Introduction
Hi, Friends, It was always my dream to make my own cool business card that attracts people and shows the credibility of my work. I came across a lot of innovative designs for business cards and for different professions. After some brainstorming and being the Crazy Engineer and a Maker, I found PCB Business Card is most suitable for me. [Continue reading till the end for the tutorial video]
I saw many people have already done this and are quite beautiful and innovative >>
http://www.instructables.com/id/USB-PCB-Business-Card/
https://hackaday.com/2015/10/01/this-pcb-business-card-is-logically-different/
Some have designed with components on the PCB like LED, MCU etc. but I wanted to keep my Business Card simple so I restricted myself to just Copper Tracks.
I already have a paper version of the Business Card and I thought it will be cool if I could make my PCB Business Card same as that. With a basic knowledge of Autodesk Eagle, I knew I could Import Bitmap Images into it and convert then into Copper Tracks. So I converted my graphics into Bitmap [ 1bit ] and made it a PCB.
Now the next challenge was to get it manufactured really cheap. After doing some research I found JLCPCB.com from Shenzhen, China is providing 2$ PCB Prototyping service for 10 Pcs PCB. I immediately generated Gerber and send it for manufacturing, which got manufactured in 2 days and delivery took 1 week due to Customs Clearance.
The PCB material used is FR4 Material 0.6mm Thickness to make it little flexible and keeping it in the 2$ budget. Next Try will be with Flexible PCB.
Specification
Layers: 2
Dimension: 50mm*90mm
PCB Qty: 10
PCB Thickness: 0.6
PCB Color: Green
Surface Finish: HASL(with lead)
Copper Weight: 1
Gold Fingers: No
Material Details: FR4-Standard Tg 140C
Gallery
-

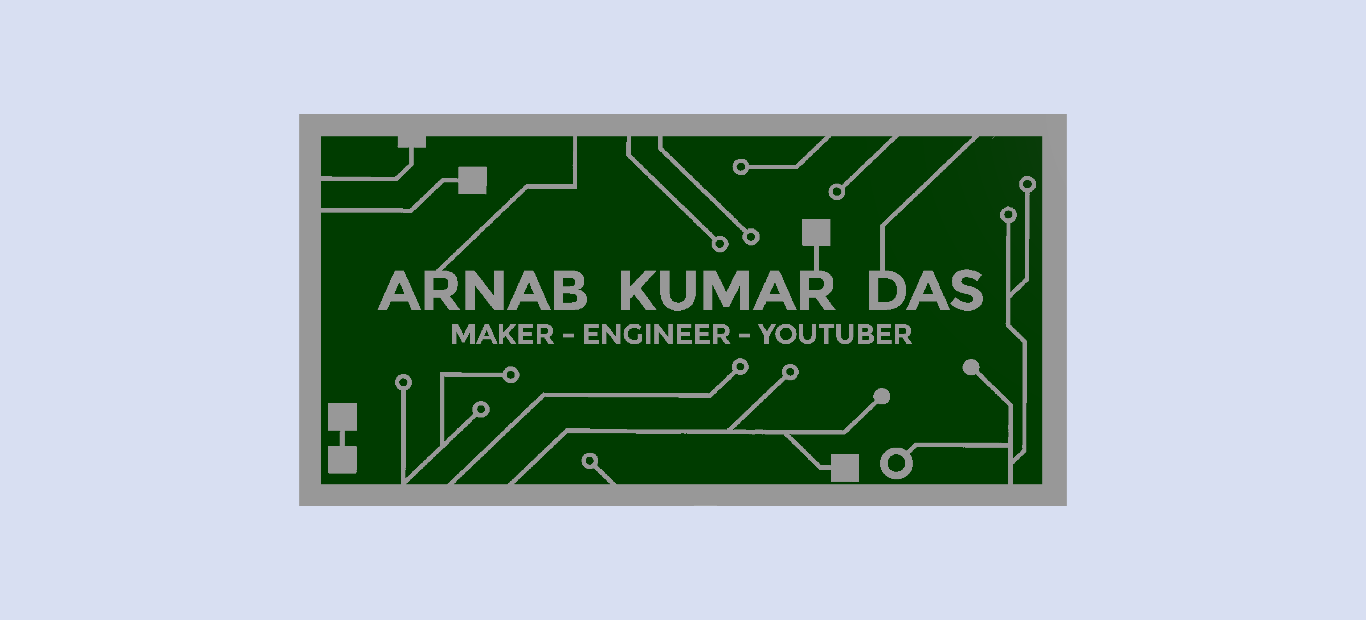
- Render of PCB Business Card Top
-

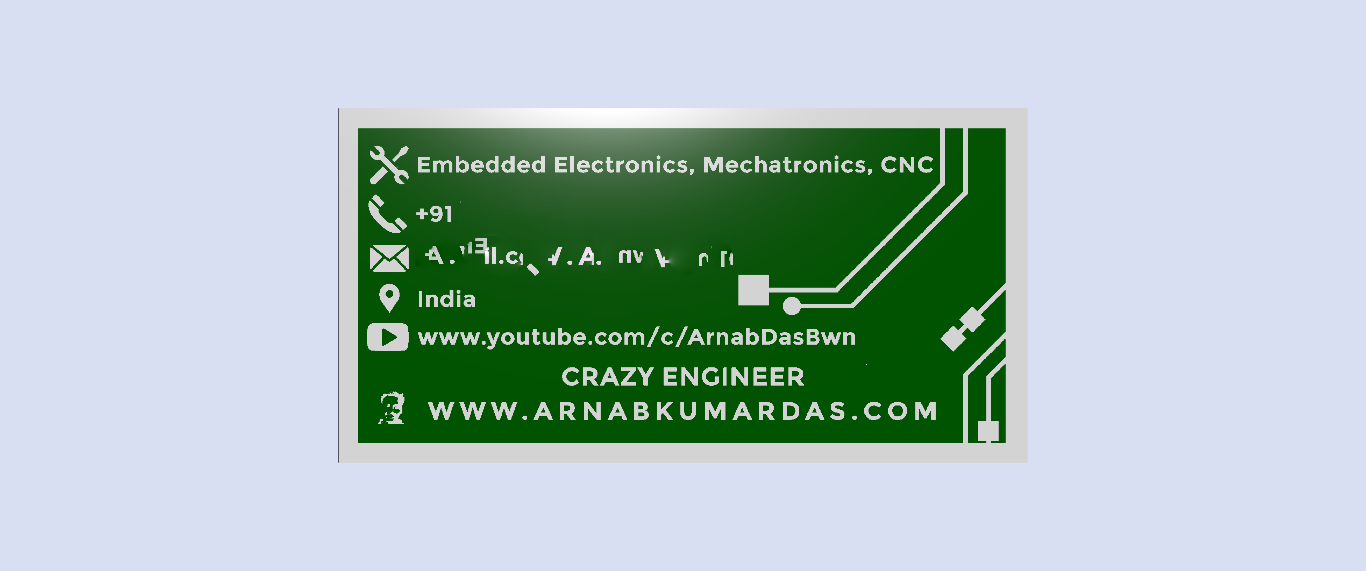
- Render of PCB Business Card Buttom
-

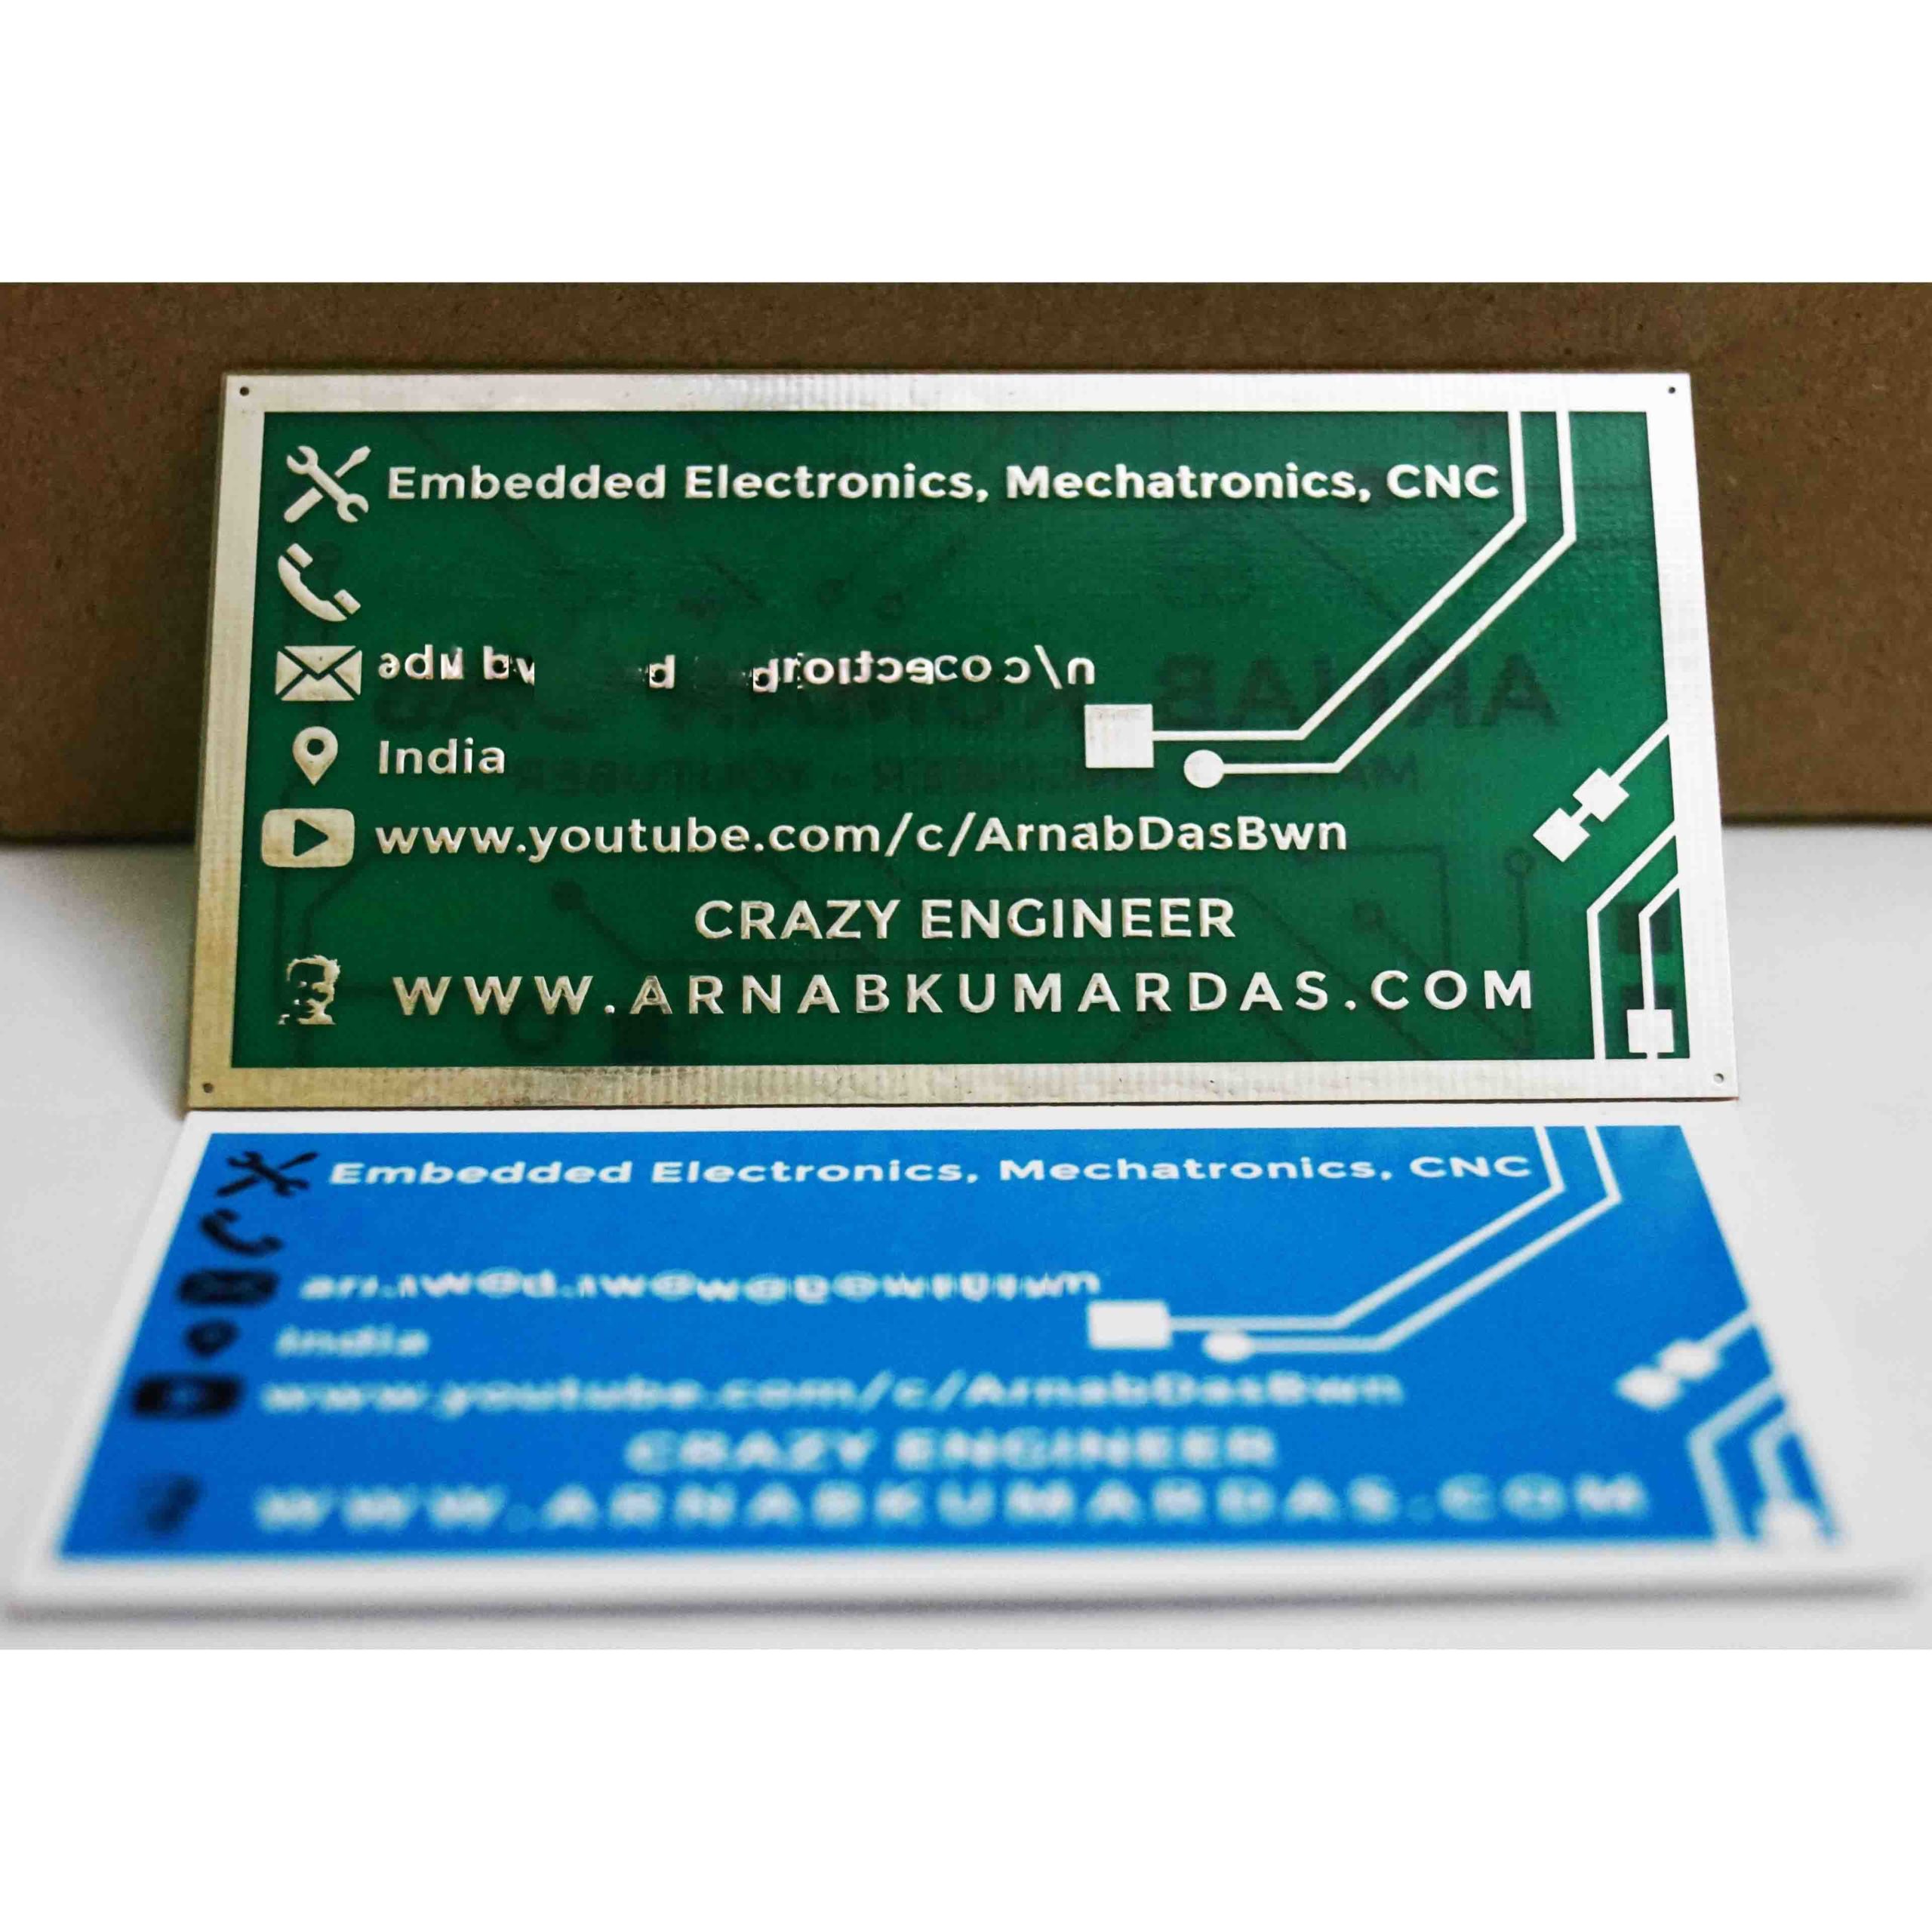
- Crazy Engineer’s PCB Business Card With the Paper Version

-

- Crazy Engineer’s PCB Business Card With the Paper Version
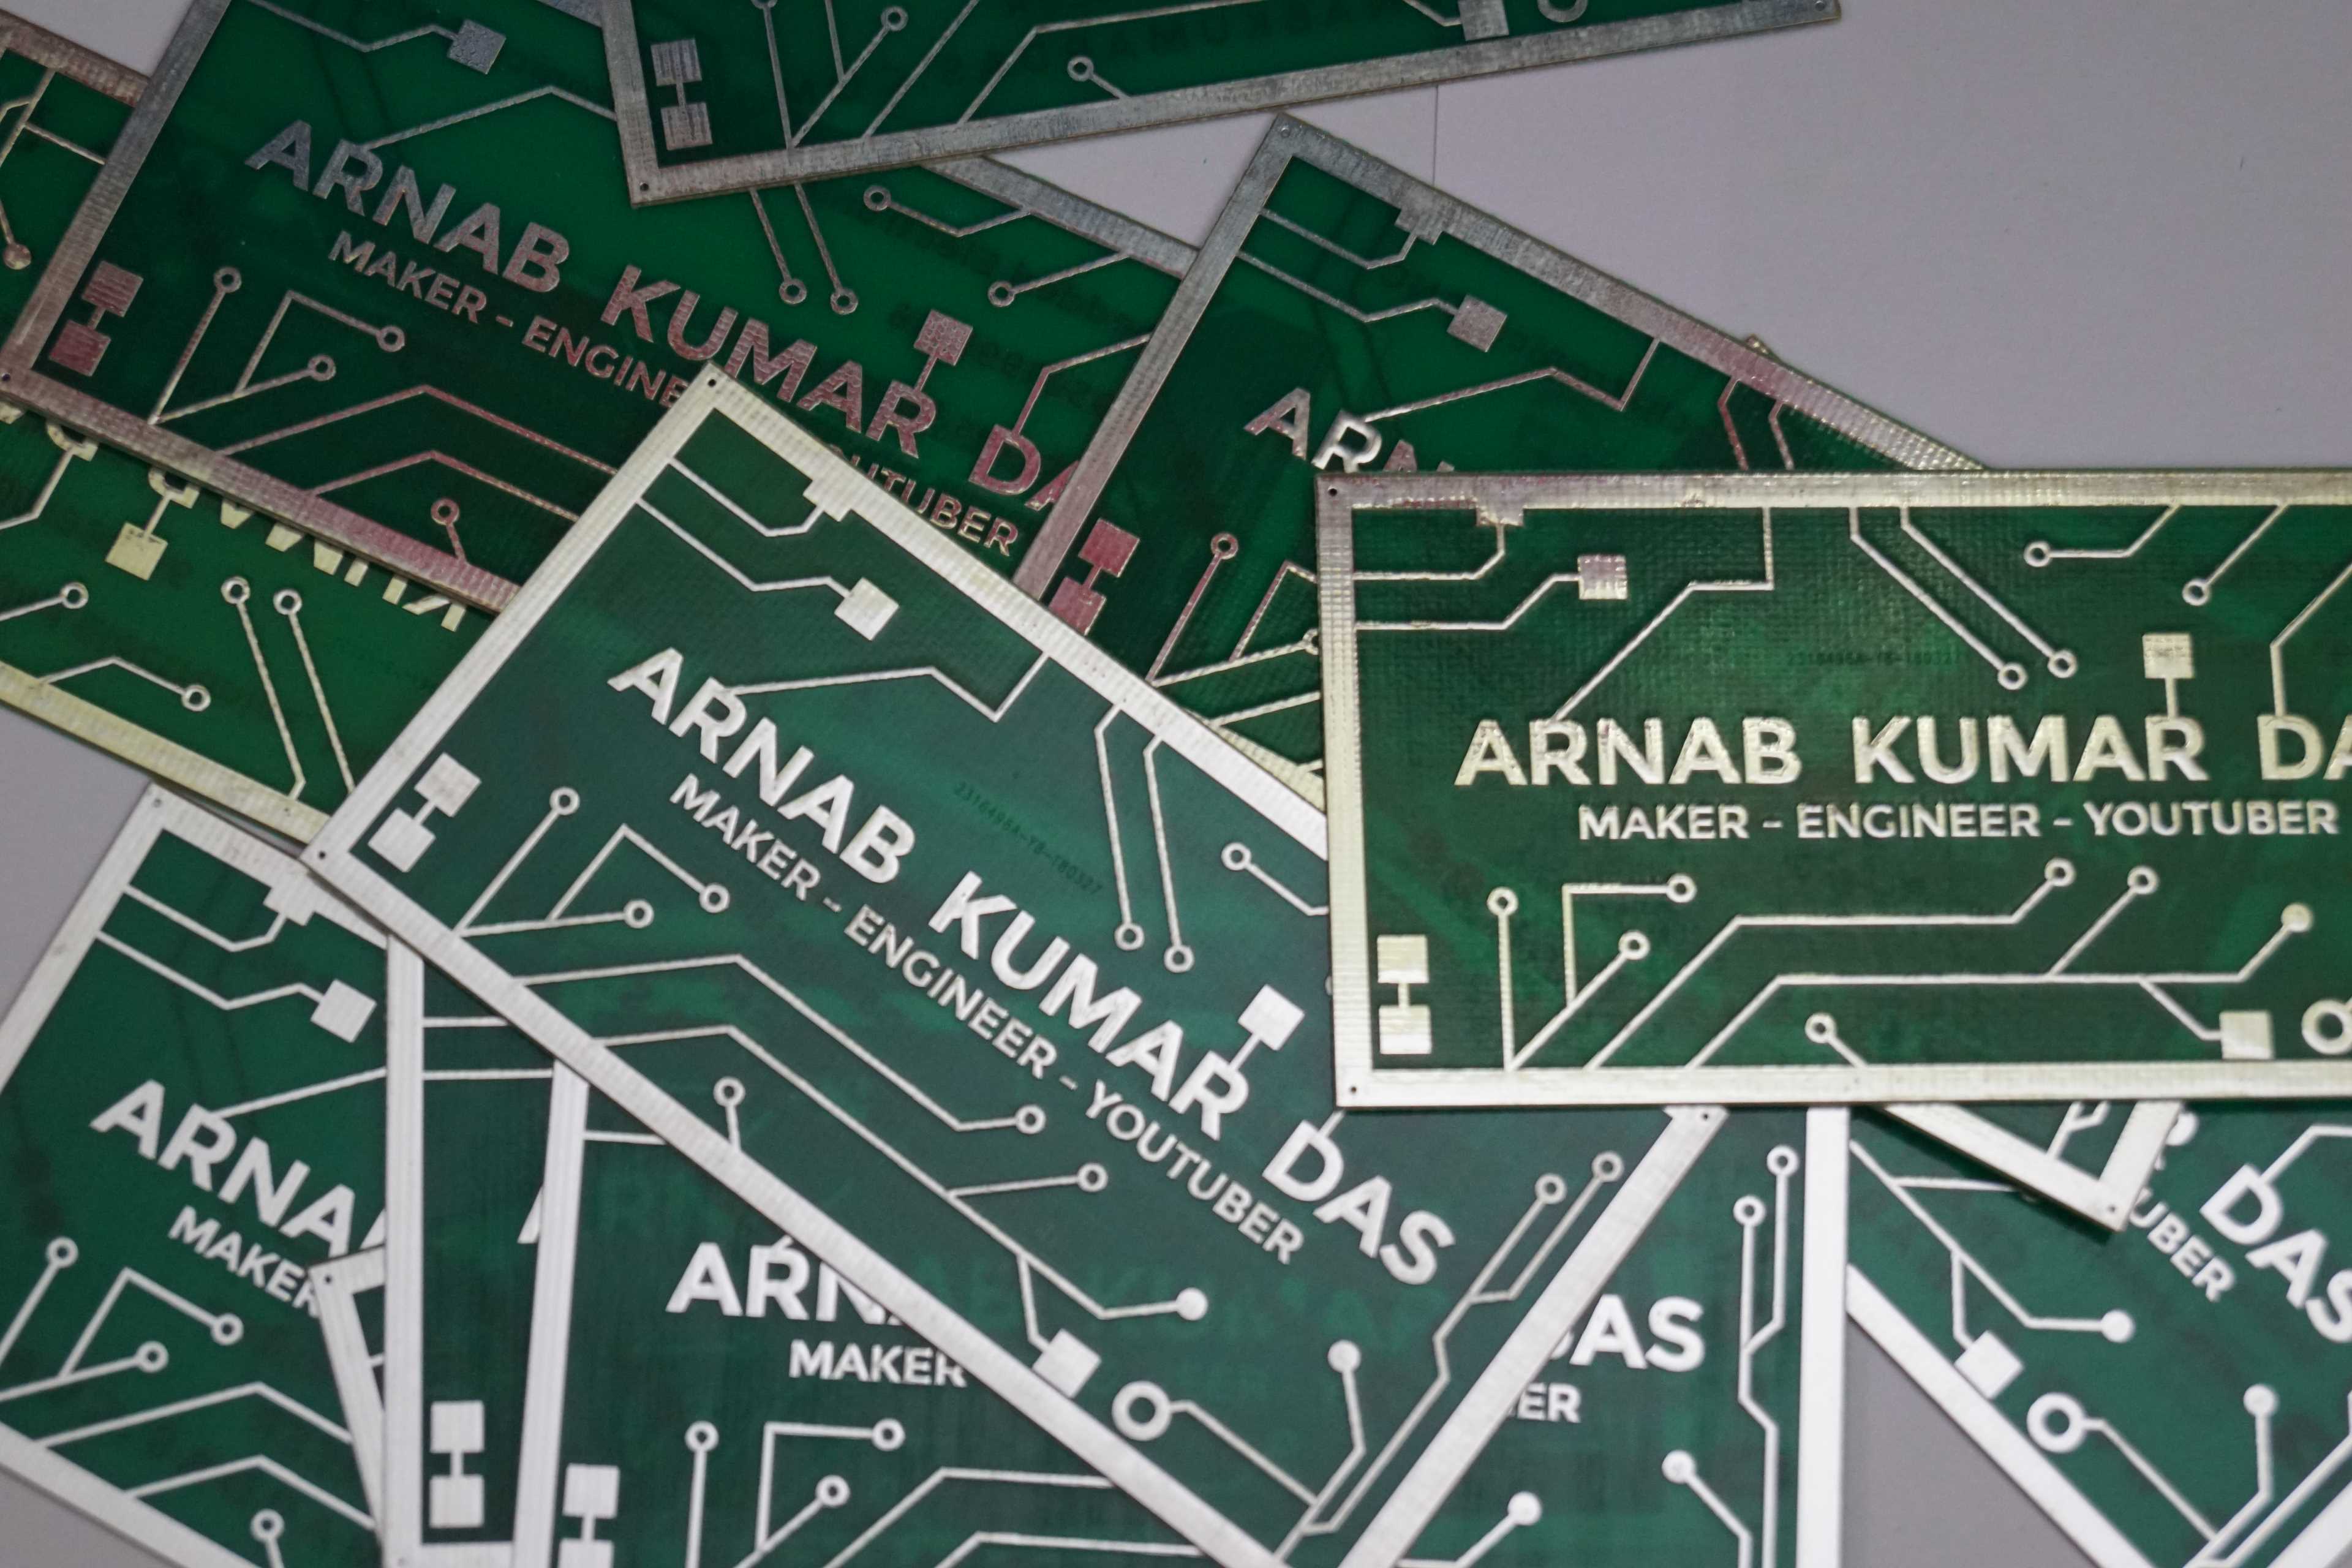
Crazy Engineer’s PCB Business Card
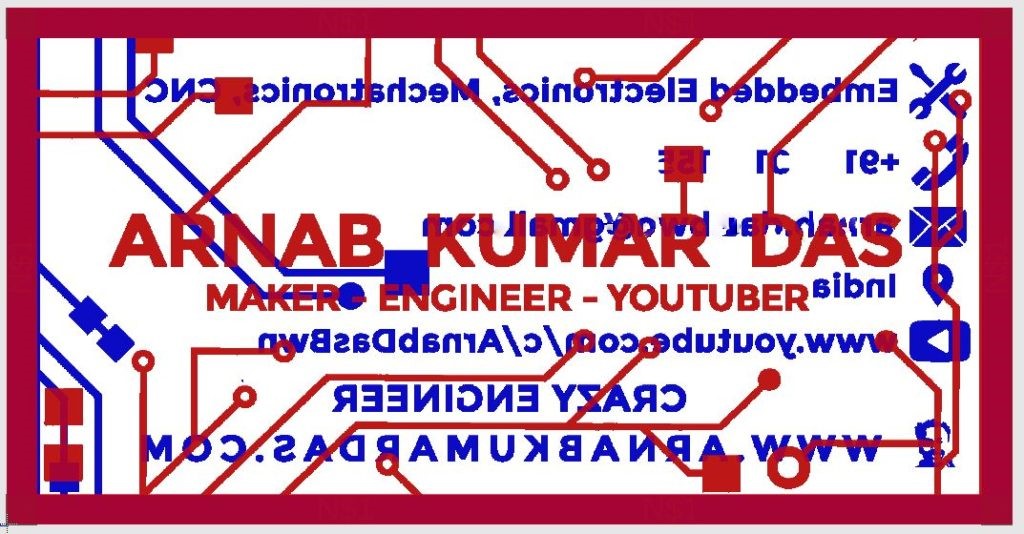
PCB Design of Crazy Engineer’s PCB Business Card
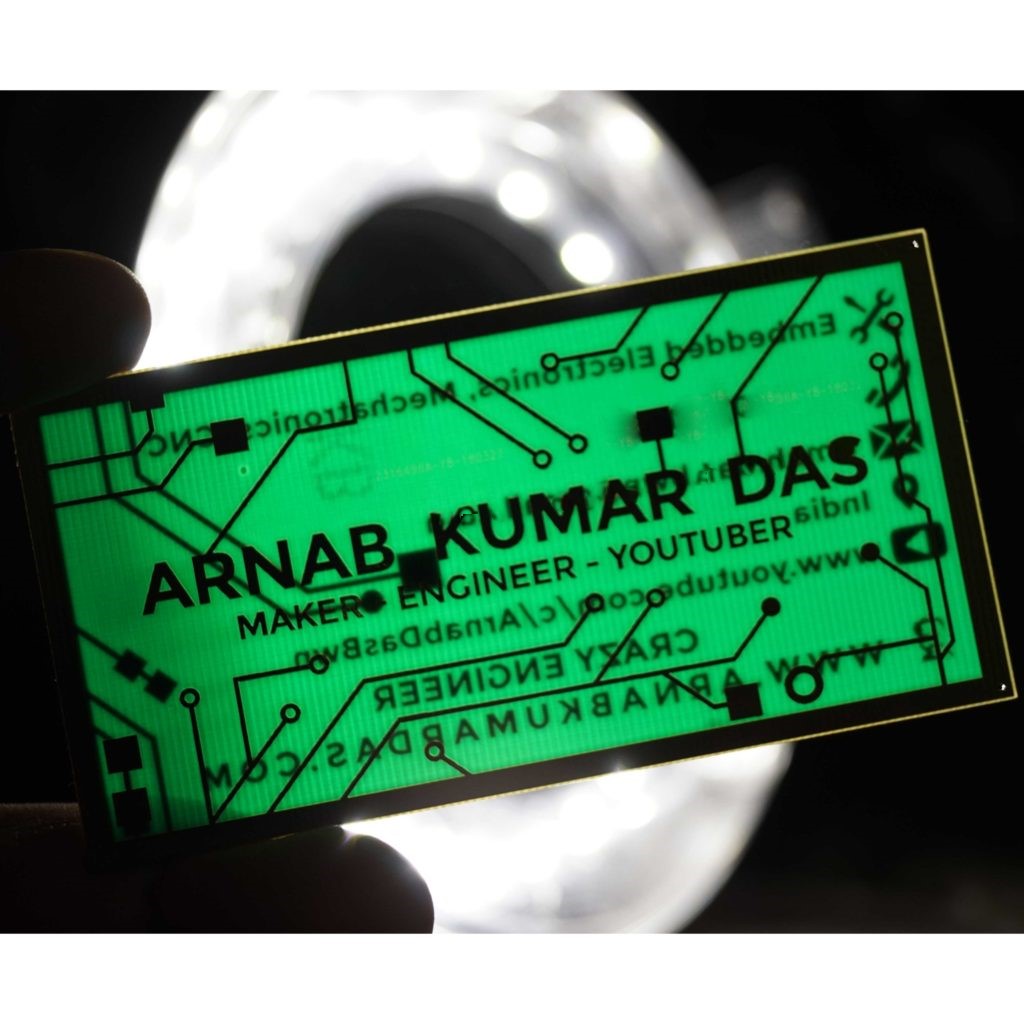
PCB Business Card Against Light
Links
Online Gerber Viewer [ To Verify your Gerber Files are Manufacturable] >> https://gerber-viewer.easyeda.com
Follow me on Instagram >> https://www.instagram.com/arnabdasbwn/
Follow me on Twitter >> https://twitter.com/ArnabDasBwn
Question / Answer
- What did you learn from making this project?
- This was the first time I was getting a PCB manufactured in a real industry and had never generated Gerber files before so it was very exciting for me to see my Gerber Files worked out.
- What challenges did you come across when building it, and how did you fix them?
- One challenge was that when I started making the projects I haven’t put any drill holes as it was not a requirement for the Business Card but because of that, the Drill file was not being generated. Without the Drill Files, the PCB was not manufacturable, so I had to put 4 Vias at the corners.
- How long did it take?
- It Took me 1 Week to Properly Design the card and place the order and another week to get the shipment.
- Is this an iteration or improvement of someone else’s project?
- I took reference from other PCB Business Cards. Most Others Used Silkscreen to write their names and information on the PCB. What is the Improvement in my case is, I have written the details using Coopper layer. It looks cool and gives an Embossed Effect.
- Would you change anything if you were to make it again?
- Next Iteration will Involve Flexible PCB so that it will be more cool to give to someone.
- What advice would you give to someone wanting to replicate it?
- Please Take Care of the bottom layer. It should be designed as a mirror image to get it correct. Otherwise, after manufacturing, you will get all text mirrored on the bottom layer and that will be very very sad.

2 Comments
Anupam Das · April 30, 2018 at 8:33 pm
Looking forward for having your cool business card?? This is the best tutorial you can have…Guys check this out….! It’s awesome! And I Liked it!
Suman Manna · May 1, 2018 at 11:18 am
This is just wow !
Inspiration from you !