Introduction
In this DIY tutorial, we will be making DIY LED Light Panel that can be used for YouTube video production also this project is best suited for people who are beginners in video production and cinematography.
Proper lighting is very important for Photography and Video. Lighting is so important that it not only defines the quality of the Video but also helps in setting a particular mood for the scene.
But it is always challenging to get an affordable Light Panel at an acceptable quality. Good LED Light Panels are expensive and can cost thousands of dollars. The cheap LED Lights lack the colour accuracy and don’t worth the hundreds of dollars price tag.
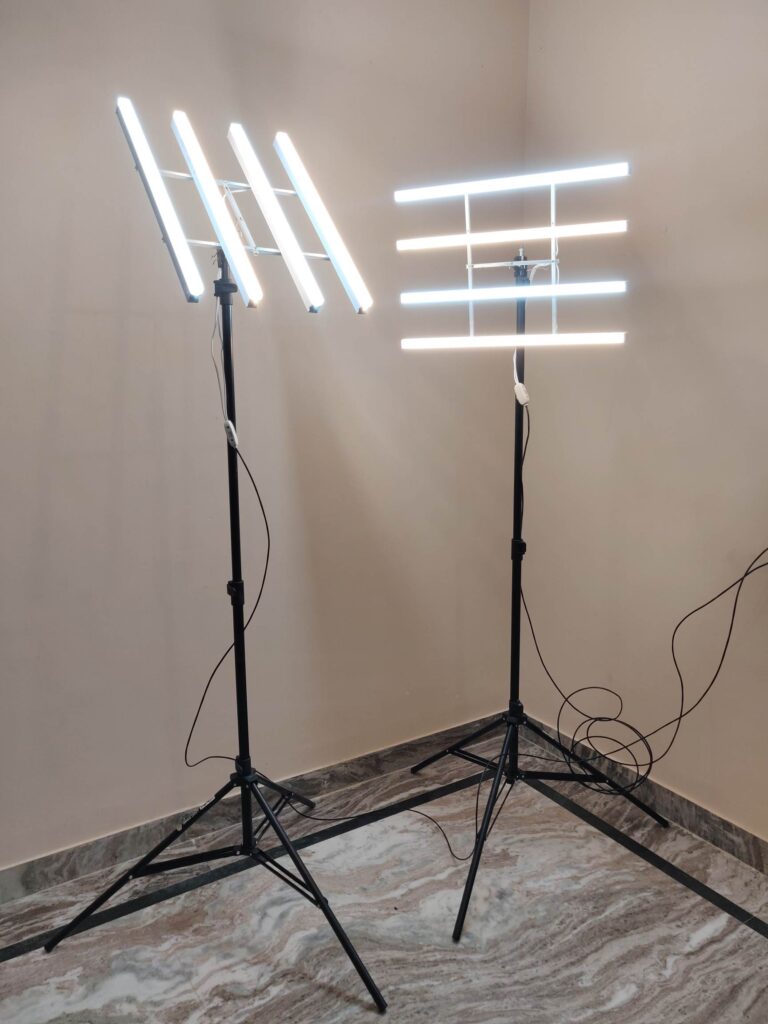
I have made two LED Light Panels using off the shelf products and the project was done under a budget of 30$. Each LED Light Panel is capable of emitting 3800 Lumens of light at 40W power.
Off the shelf, household LED Lights Products has a CRI of 80 – 95 and are available in primarily three colour temperatures Cool White(5500K – 6500K), Neutral White(4000K – 5000K), Warm White(2700 – 3000K). The idea is to use the best available off the shelf product and combine the lights from multiple sources with a slight difference in colour temperature to have an overall good light. This might not work for professional movie production but if you know the rules of mixing different colour temperature lights then you can bend the rules to have great light at a cheap cost.

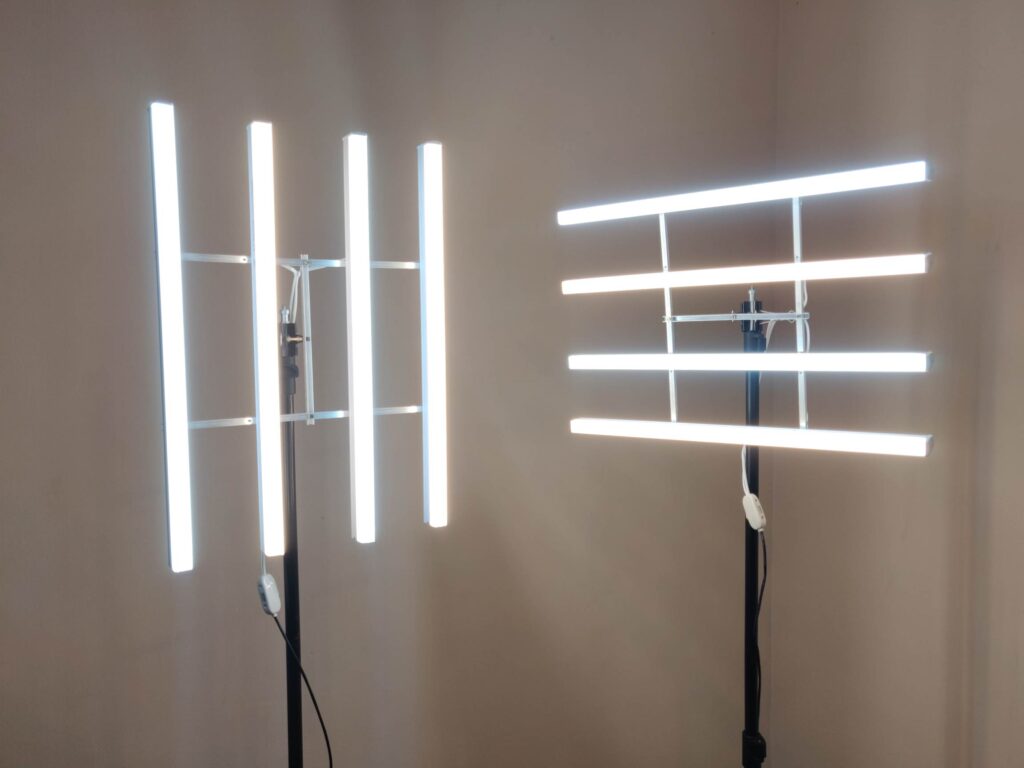
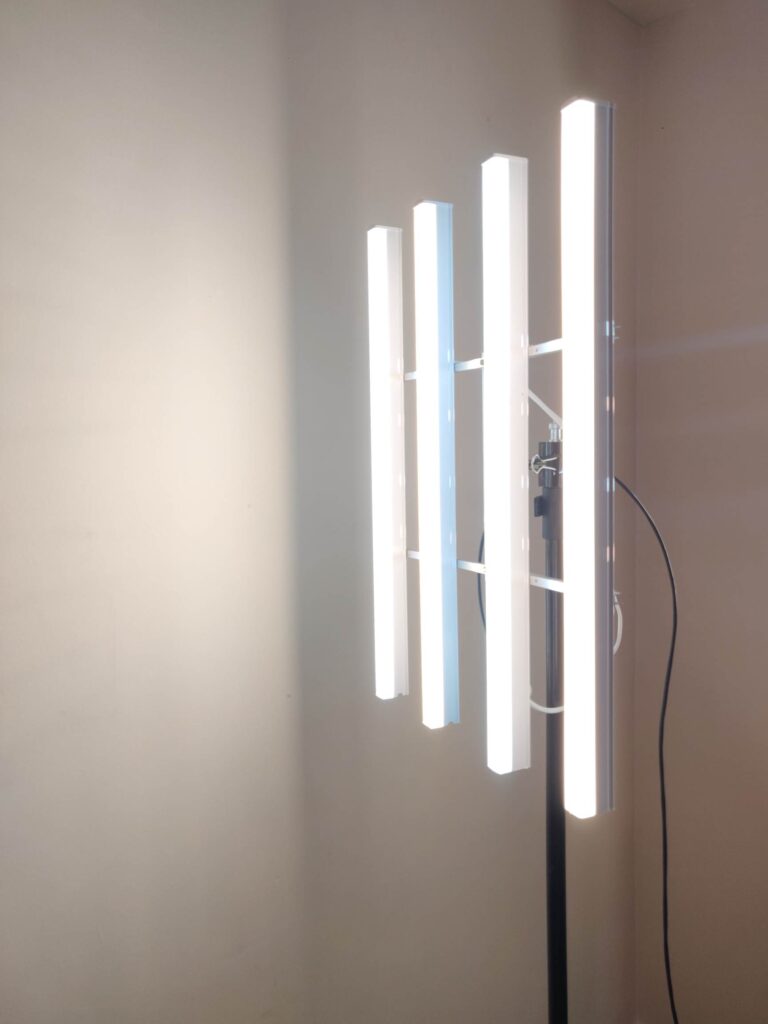
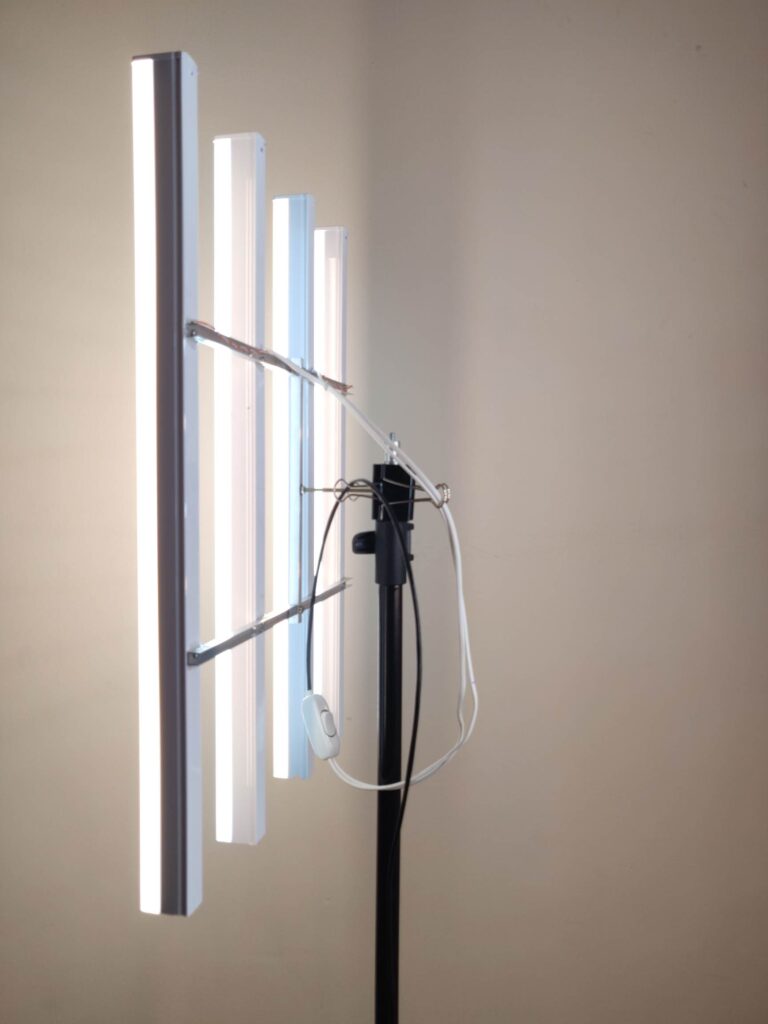
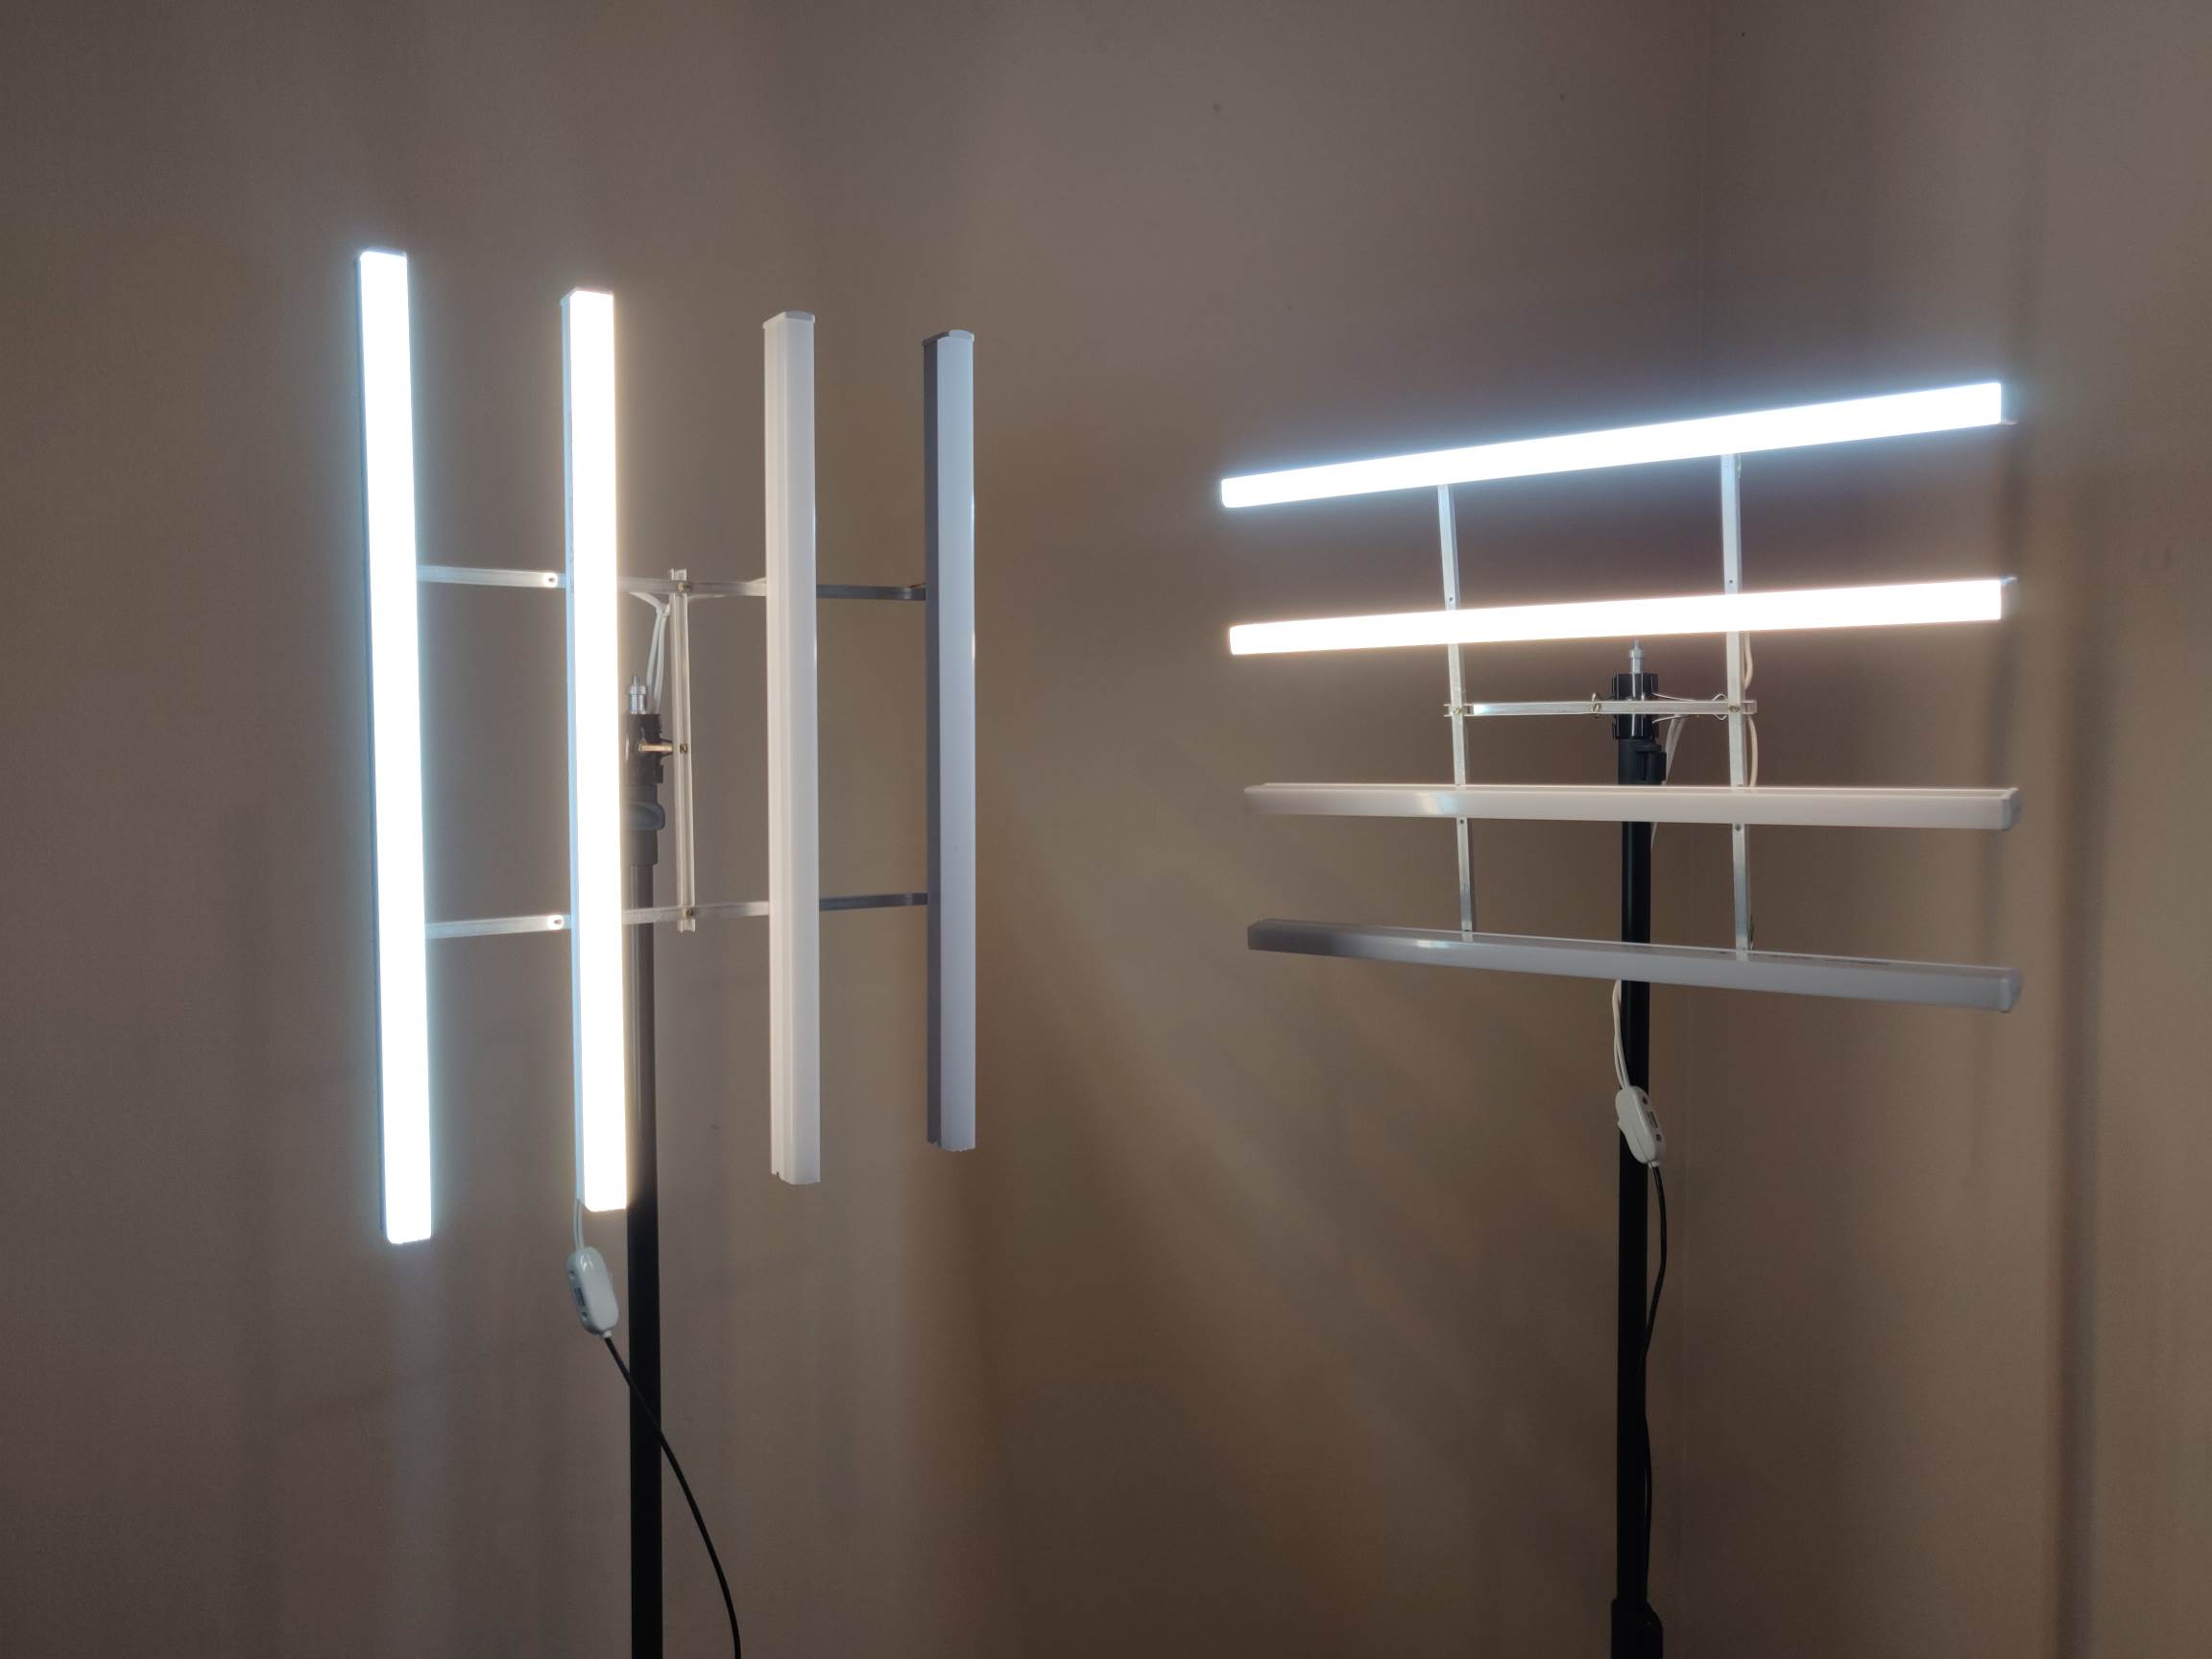
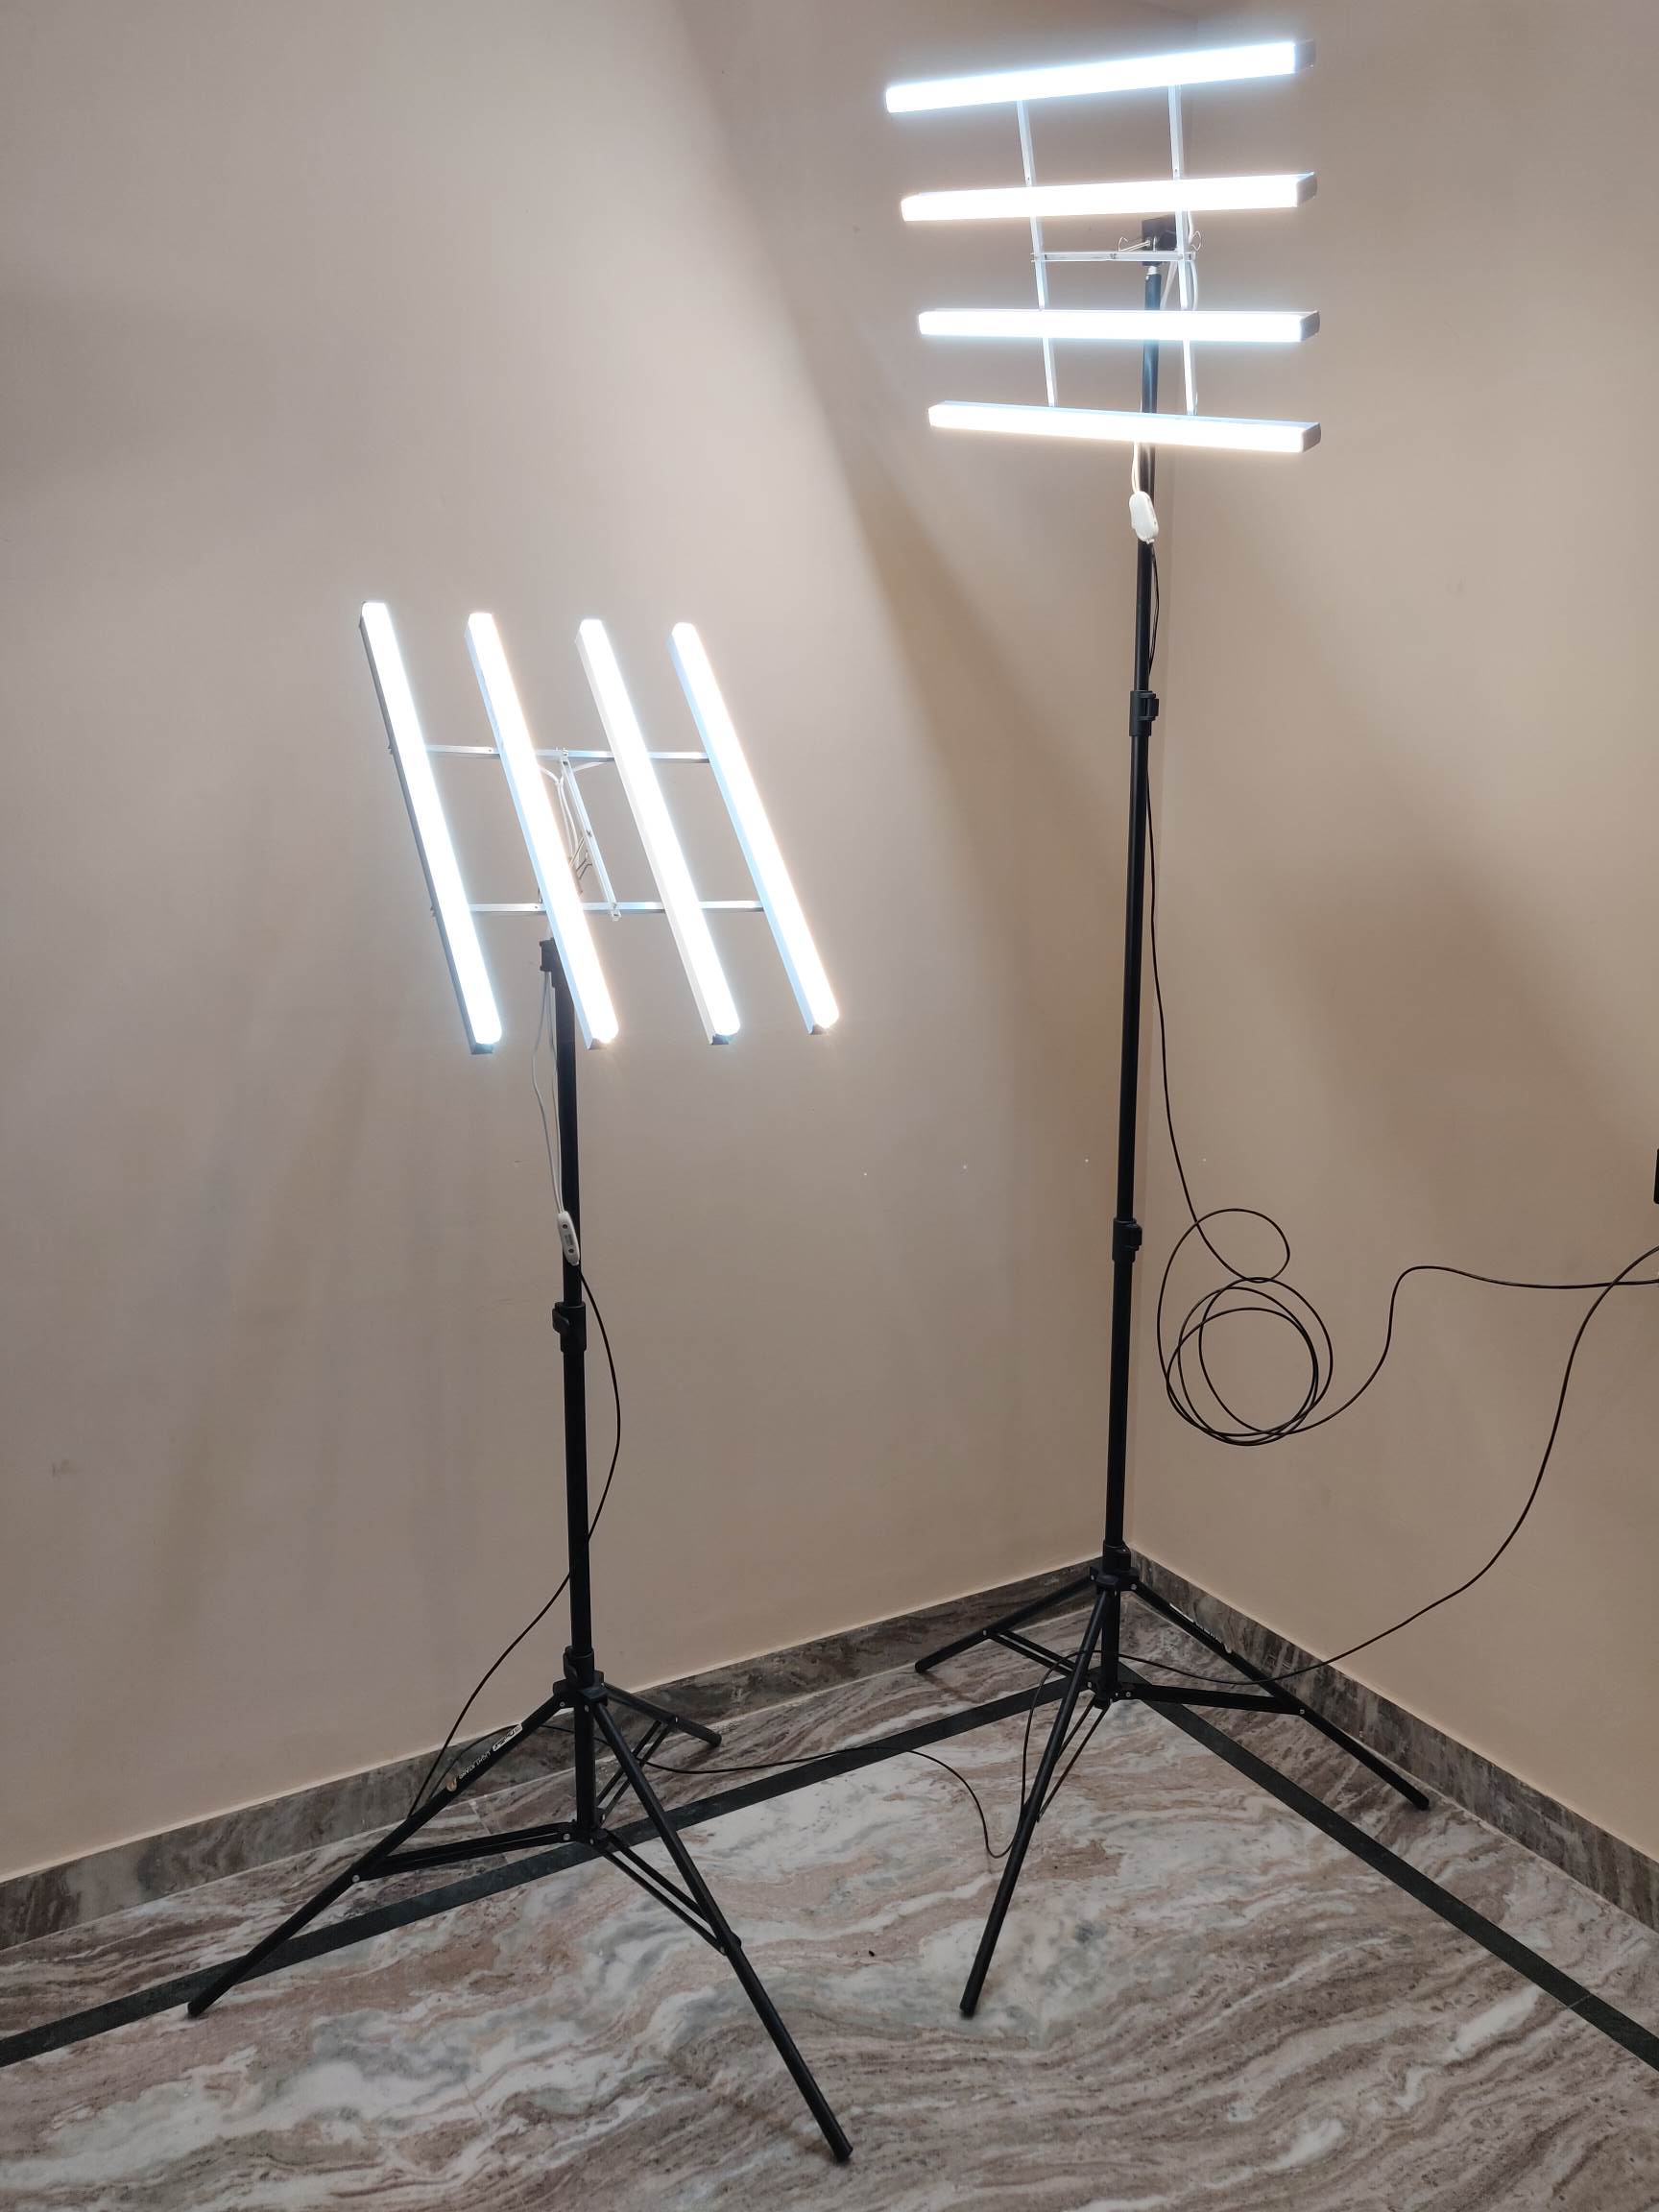
DIY LED Light Panel for Video Mounted on Light Stand / Tripod 
DIY Led Light Panel Close Up DIY LED Light Panel Back Side View DIY Light Panel on Light Stand
Hardware Bill of Materials
- LED Tubelight Batten x 2 (If 4 Feet) x 4 (If 2 Feet)
- Aluminium Strip
- 30ft Electrical Cable x 2
- Switch x 2
- Two Pin AC Plug Connector x 2
- Light Stand x 2
- Nut Bolts Screws
Idea / Design
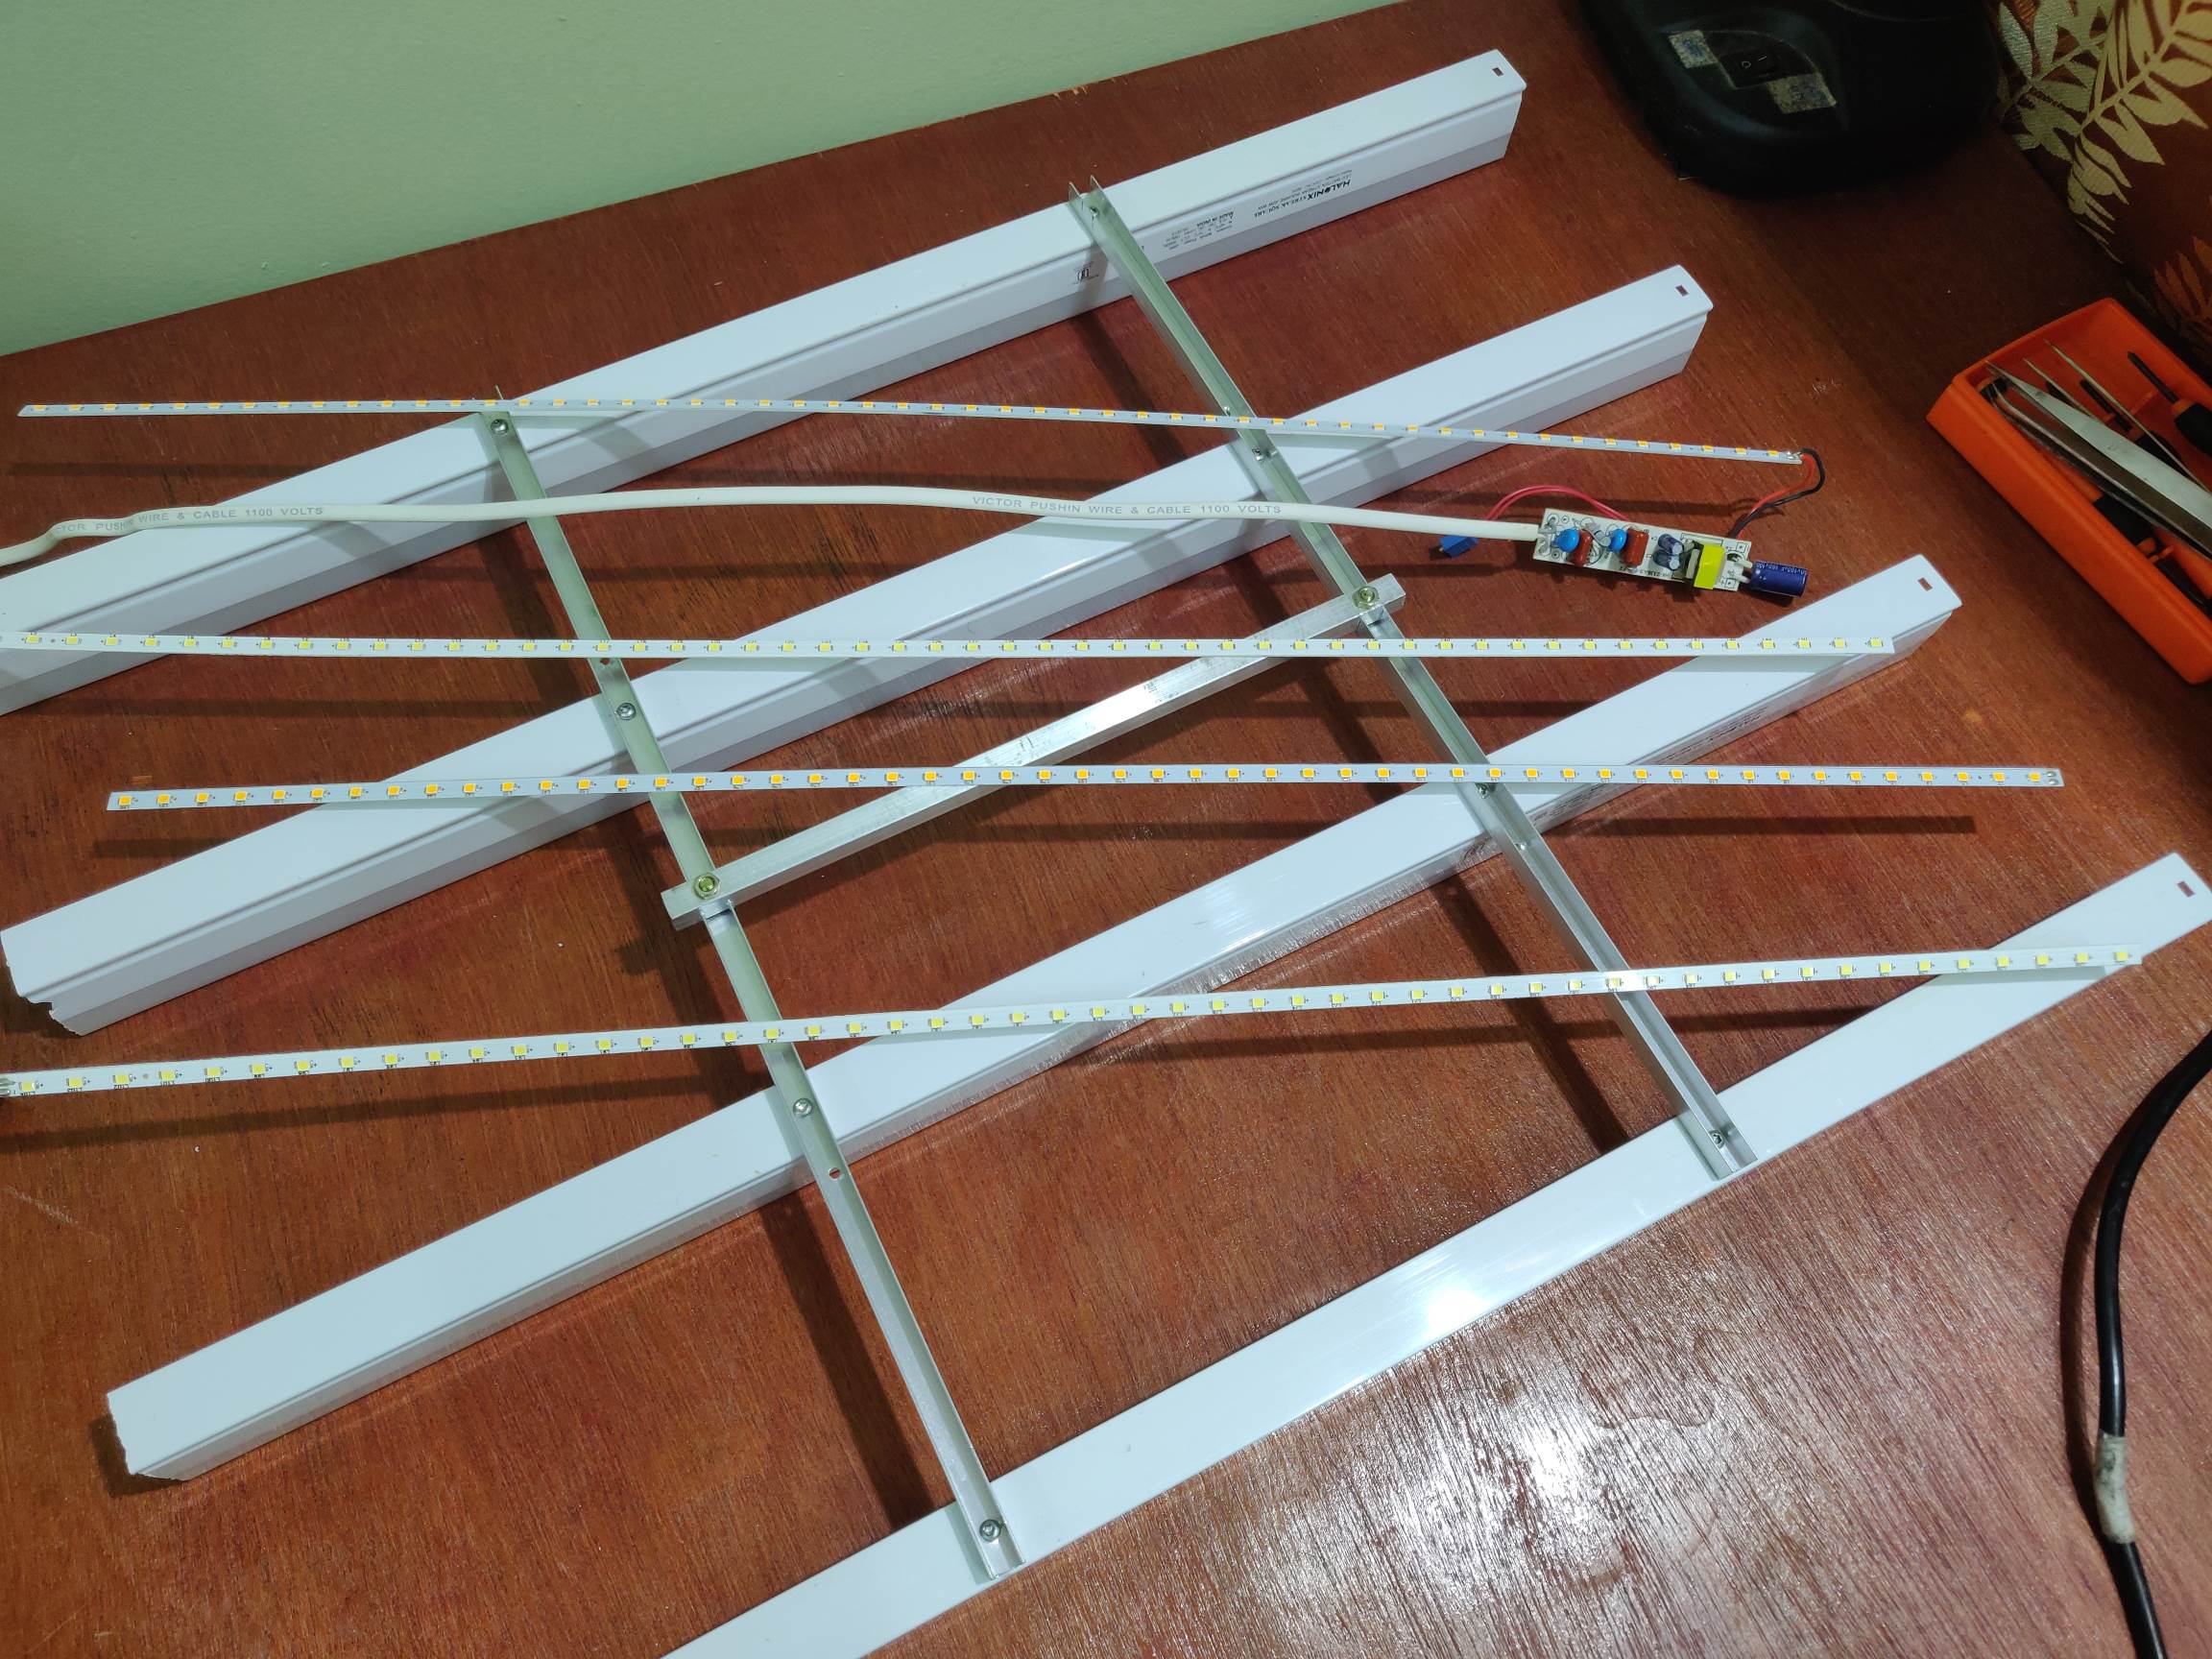
I have combined two 20W LED tube light in one panel. One of the tube light is of 20W 3000K 1800lm (4 feet) and the other one 20W 6500K 2000lm (4 feet), together they produce around 3800lm of light with a switch to cut off half of the panel to reduce the intensity to 1900lm. Both the panels are tripod or light stand mountable and work at 220V AC and can also be powered from an inverter or UPS.
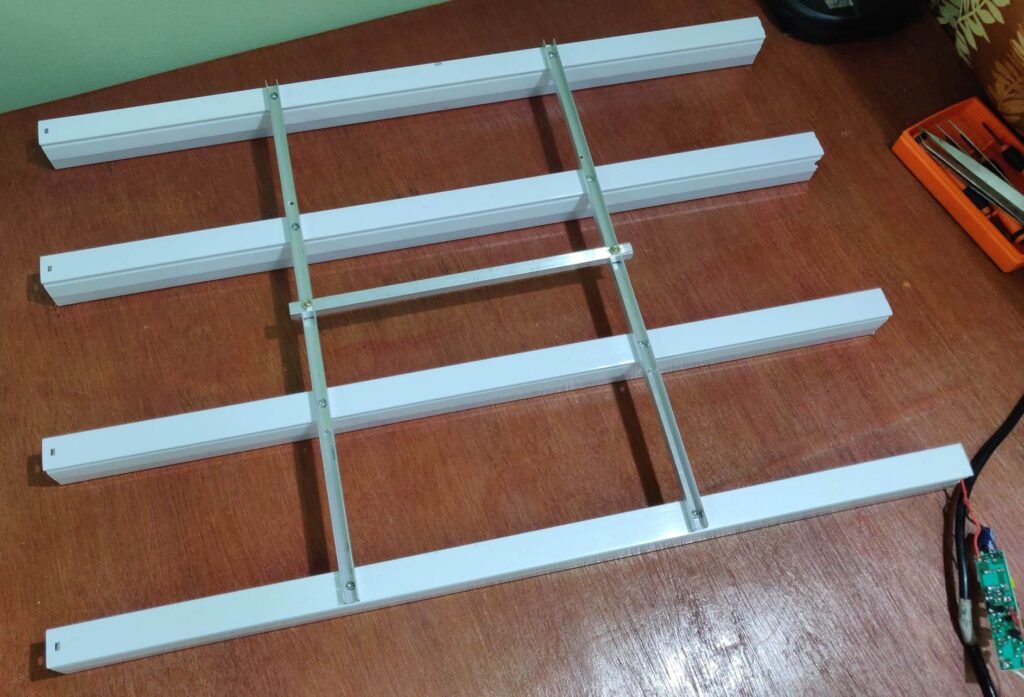
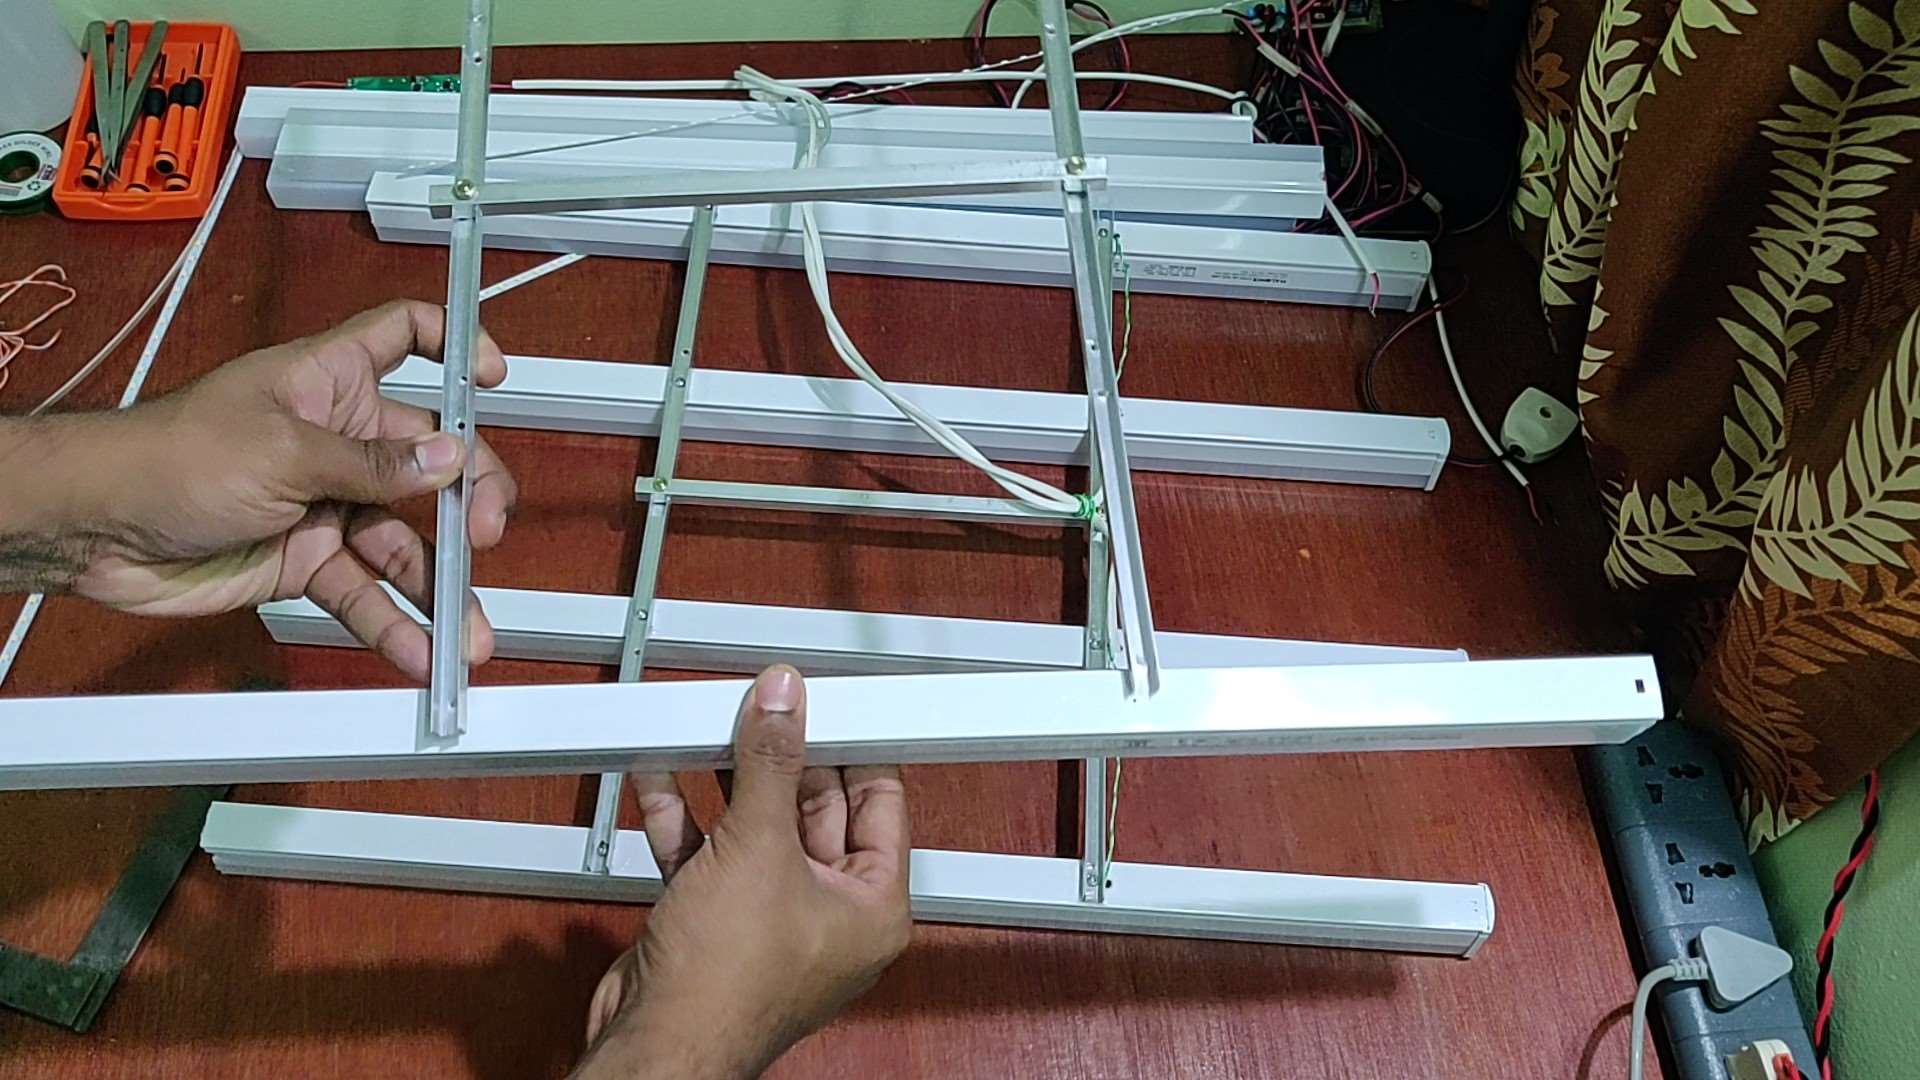
The idea is to split the 4 feet tube light into half and rearrange then in a rectangular panel. For each panel, two 4 feet tube light was split into half and are mounted on an aluminium frame. I have used tube light of two colour temperature CC + WW and I have mounted them in alternate order on to the panel. The final size of the panel is 60cm x 40cm. The aluminium frame was in H shape and is made up of 10mm aluminium U channel.
Below in the step by step guide I will show the steps I followed.
Step by Step Guide
Time needed: 5 hours
How to make a DIY LED Video Light Panel
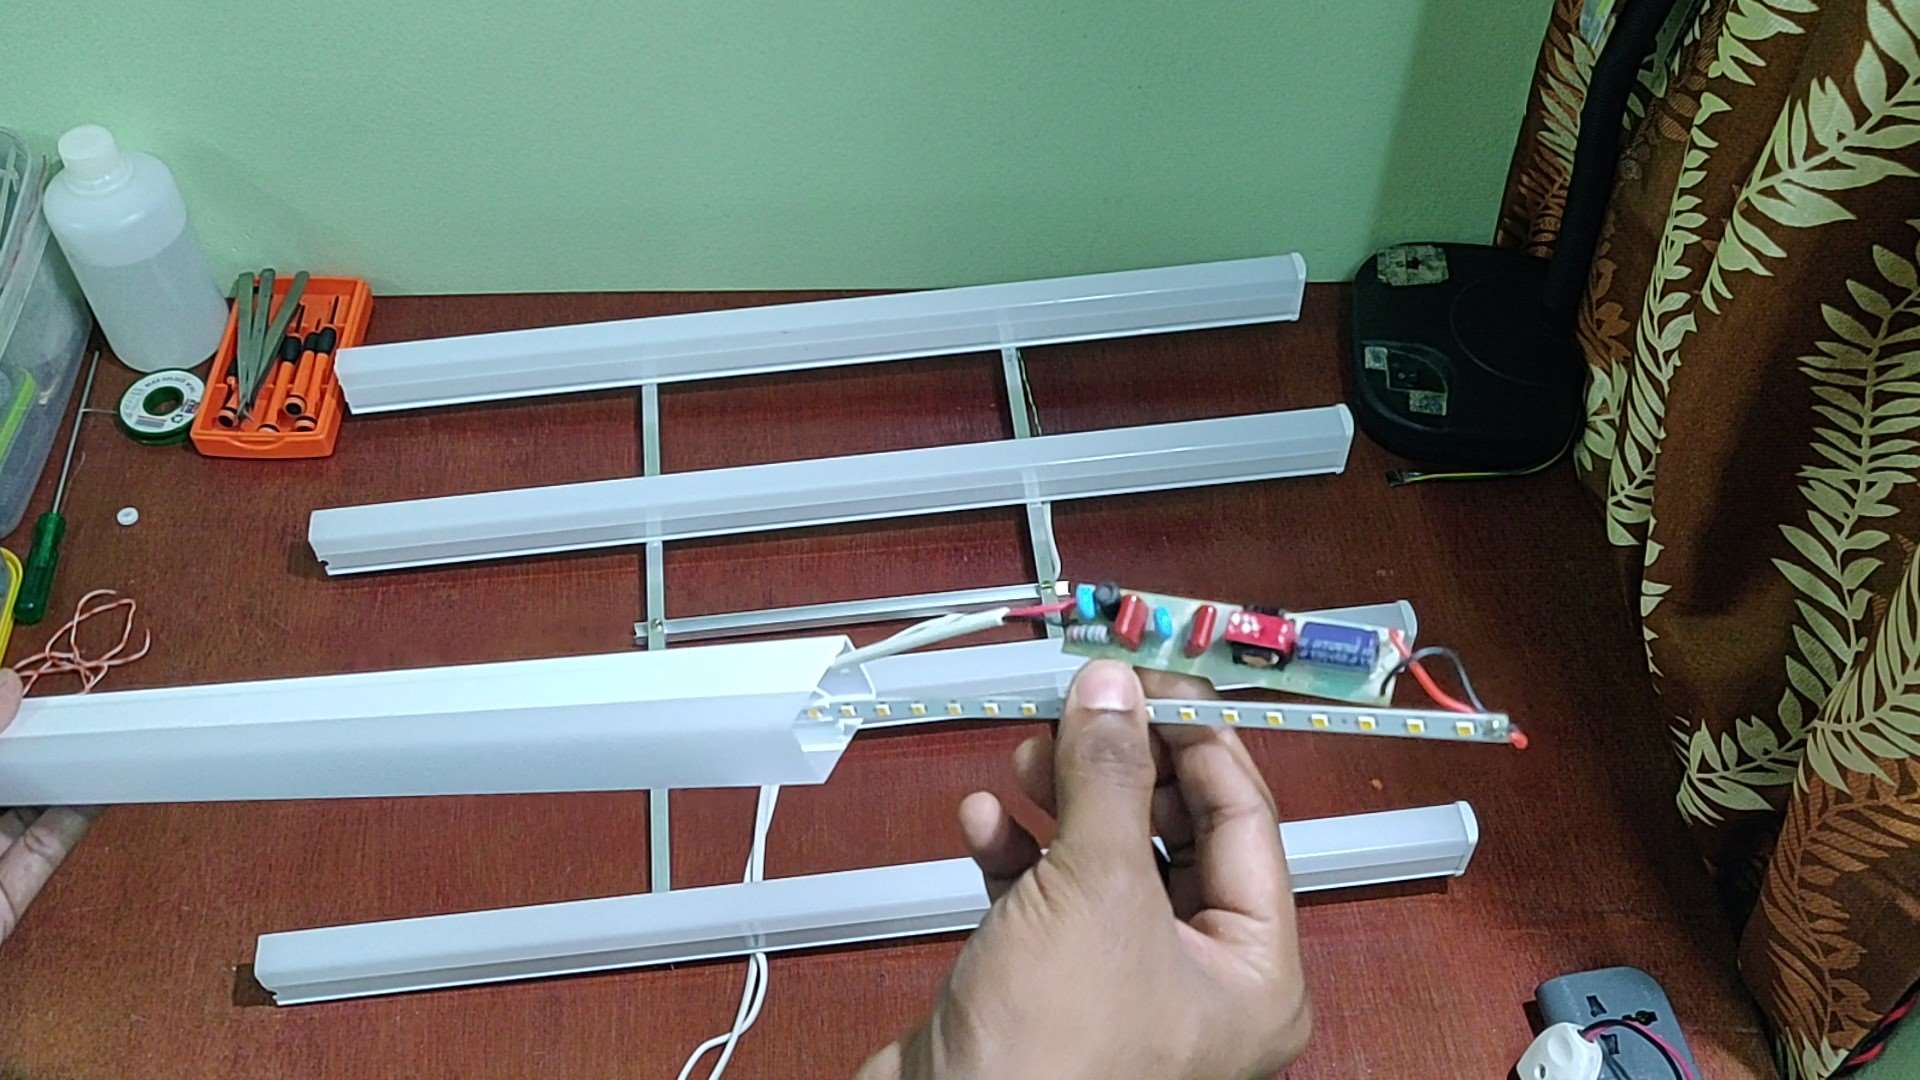
- Disassemble the LED tube light
The 4ft tube light need to be opened from both the ends and the LED strip with the driver need to be pulled out. When you buy the tube light make sure the LED light housing is openable.

- LED strip
The LED strip from the tube light might feel flexible and need to be handled with care. Depending on the manufacturer, the LED strip will be powered at a voltage of 70-100V by the driver. The LED strip will have groups of LEDs that will be connected in series and multiple such groups will be in parallel. The tube light I used had 104 total LEDs powered at 73V from a constant current driver. 26 LEDs were in a series, forming a group and 4 of these groups were present in parallel.
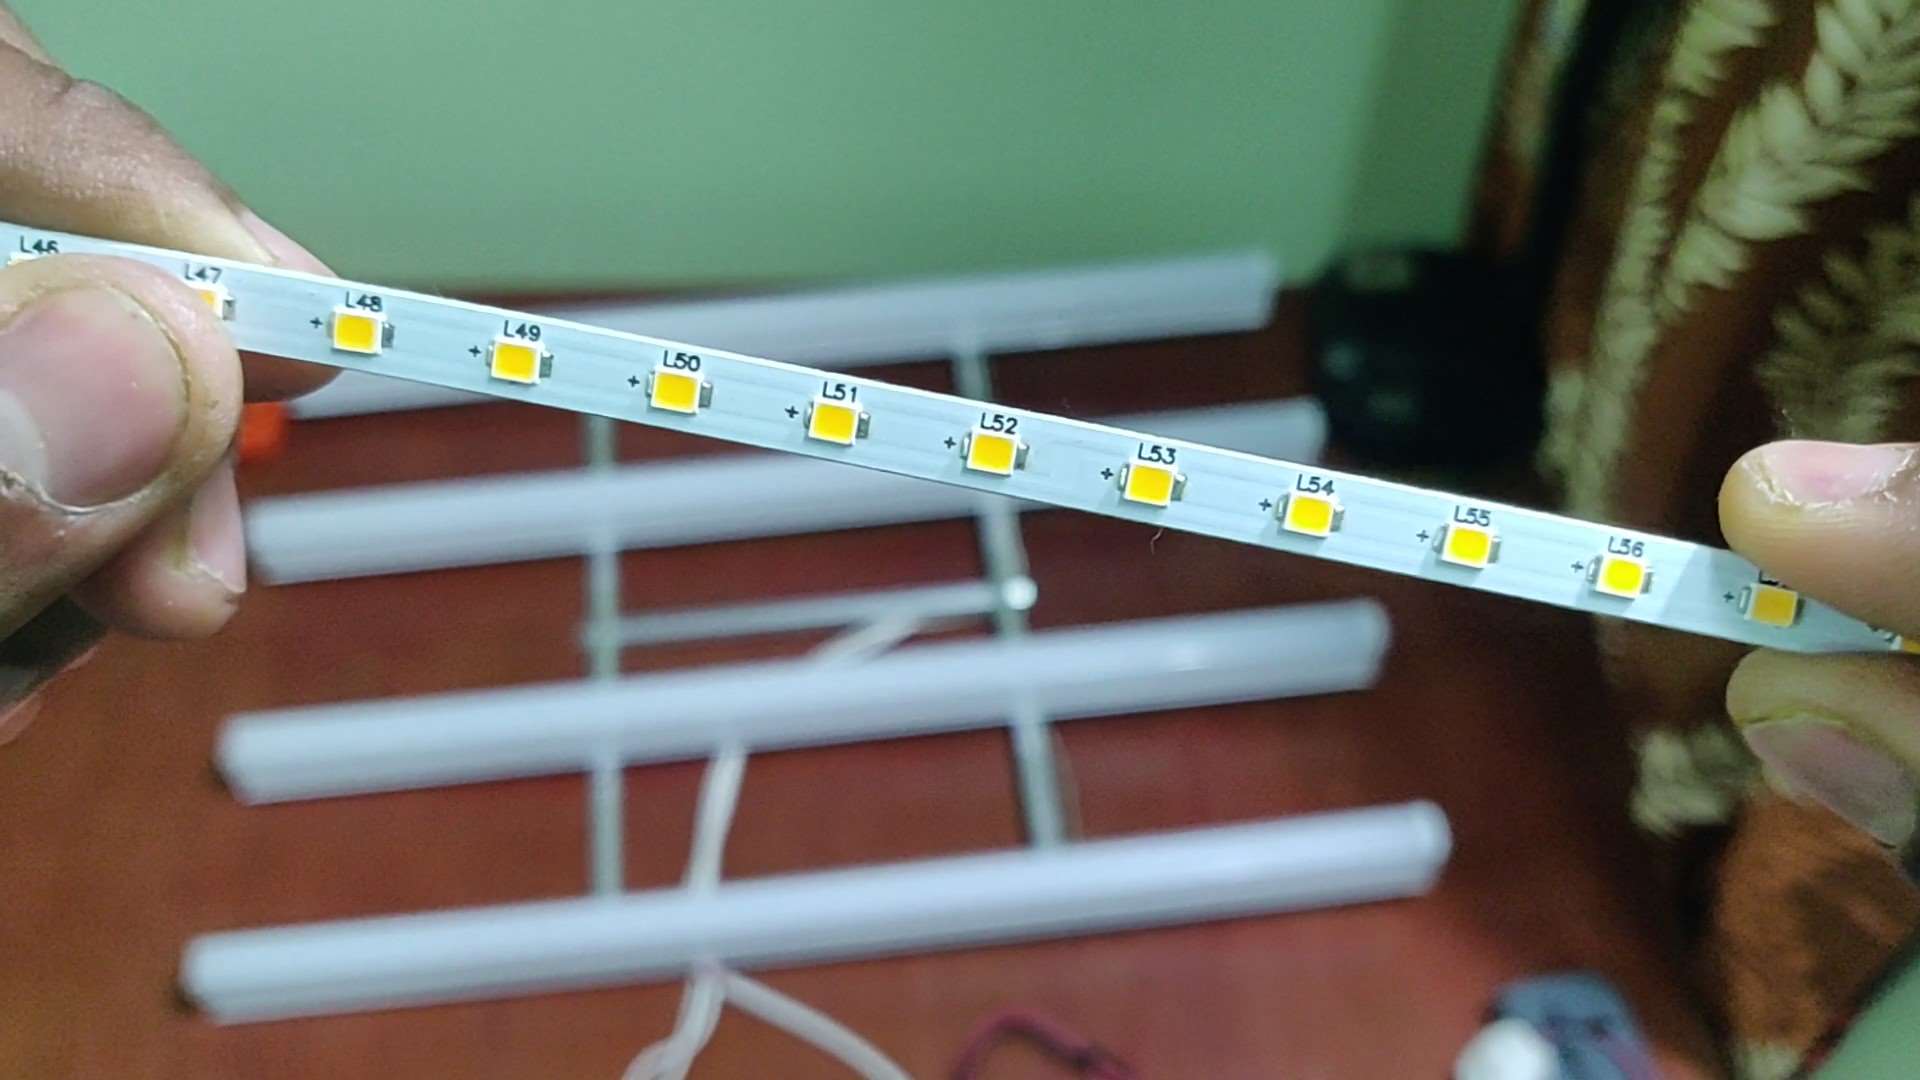
- Finding the mid point of LED strip
You need to carefully find how the individual LEDs are grouped and need to find where the groups can be split. Usually, if you look at the PCB closely you will find some demarcations. Mine was after every 26 LEDs. We need to cut the LED Strip PCB into two half after 2feet. Mine was in between 52nd and 53rd LED.
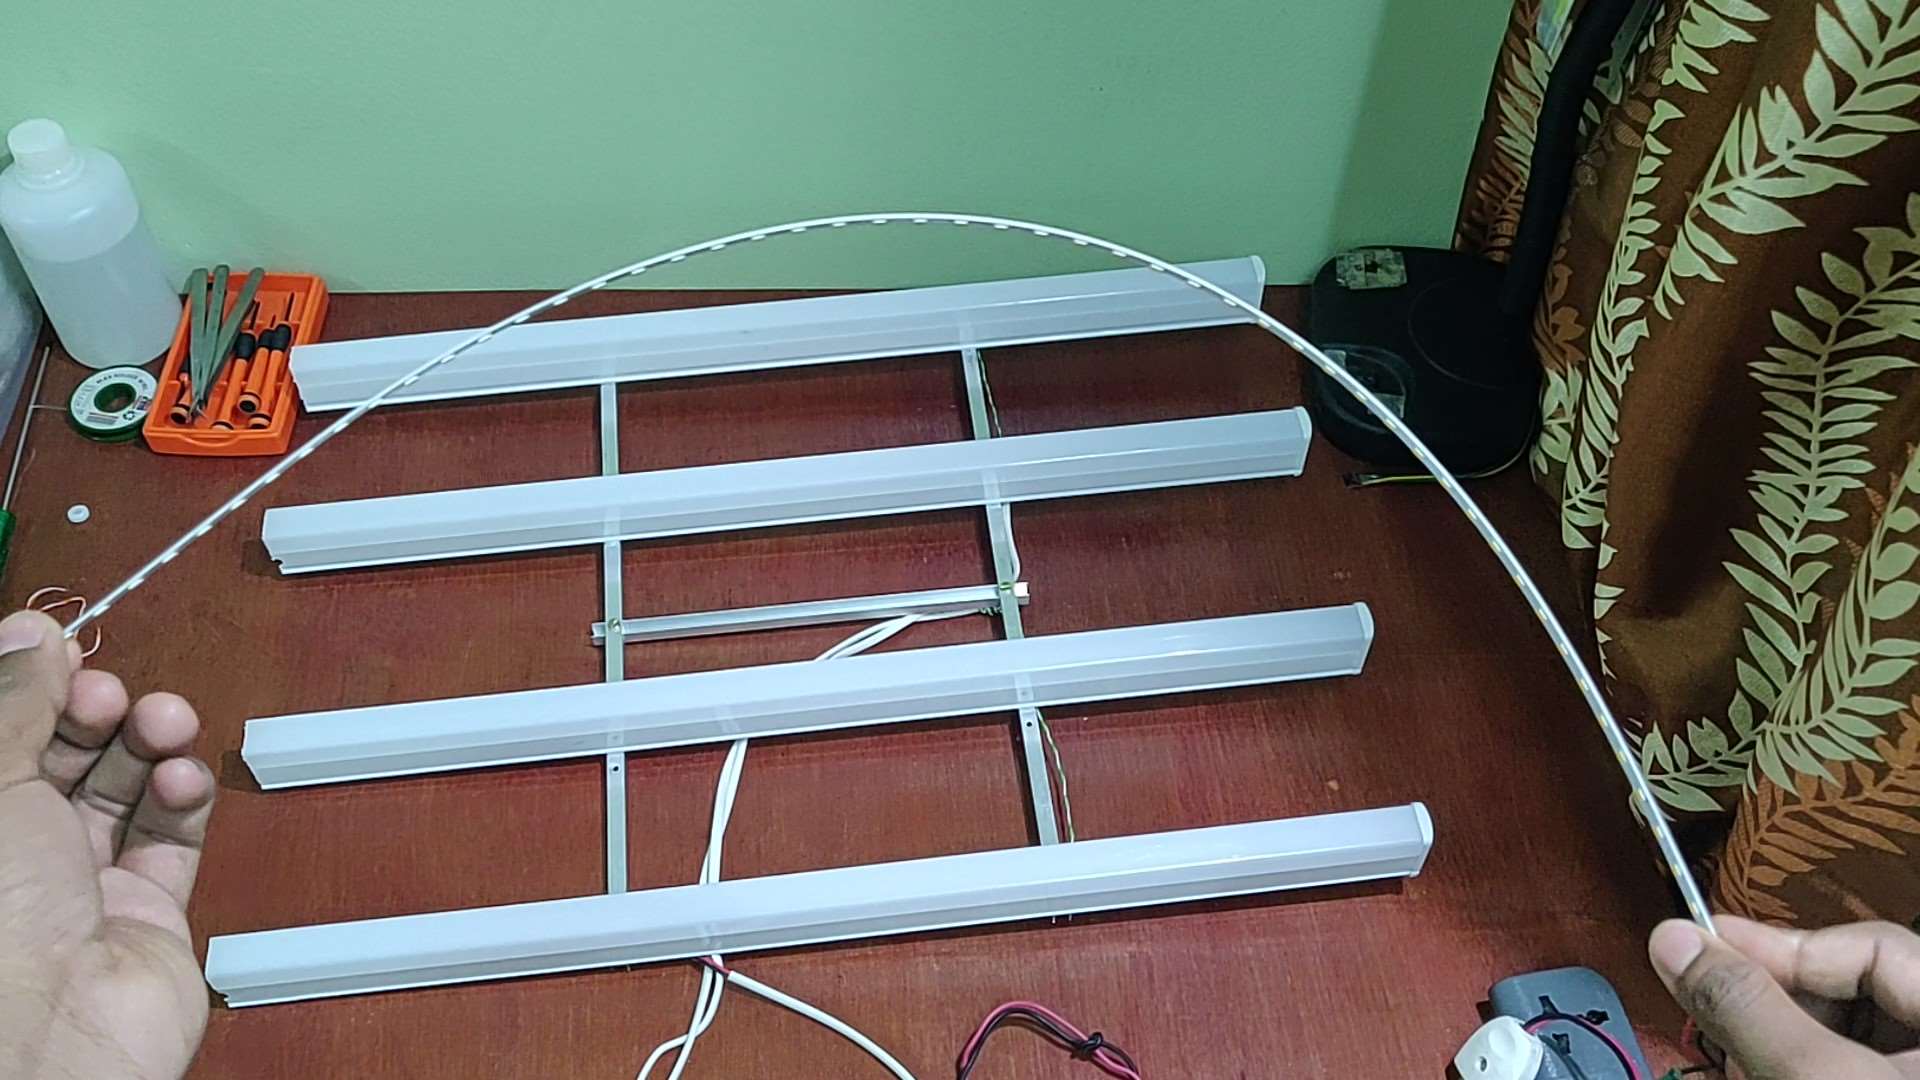
- Cut the LED strip in half
Once you have located the centre point you can cut the PCB into two parts. make sure you don’t damage any LED or PCB traces while cutting the strip.

- Cut the tube light housing in half
The tube light housing also needs to be cut in half. I used a small hacksaw to cut it in half. Make sure you cut it straight.
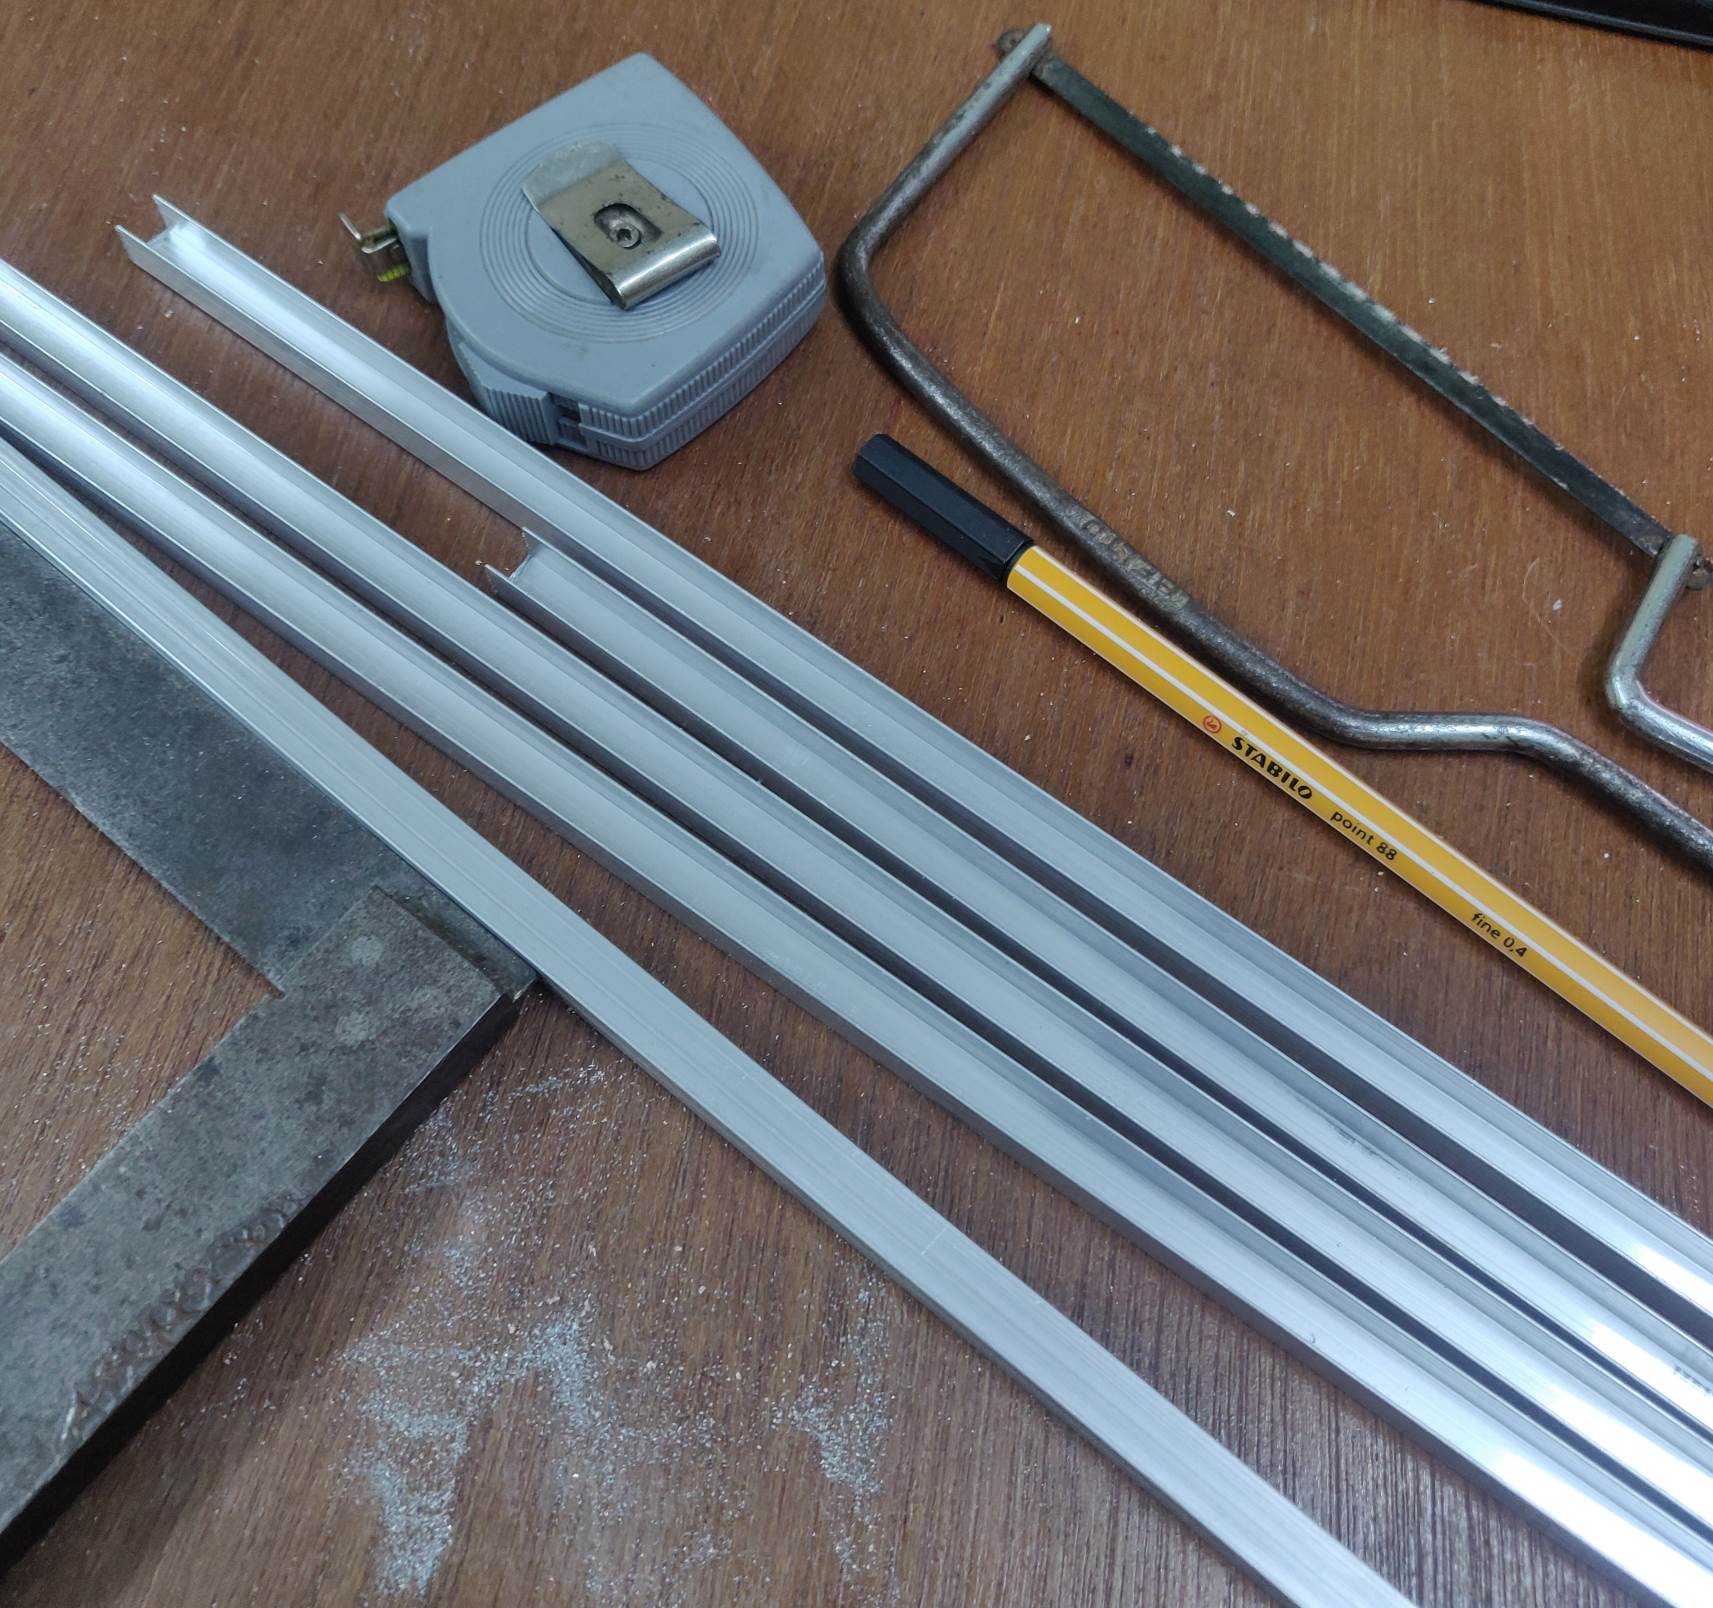
- Cut aluminium channels
I used 2 x 40cm and one 20cm aluminium U channel to form the H shaped frame to support four 2ft LED split tube lights.

- Join the aluminium channels
To join the aluminium channels to form the H shape, I have made slits on the aluminium channel and made them interlock each other. Also, I had used a nut and bolt to tighten the joint.

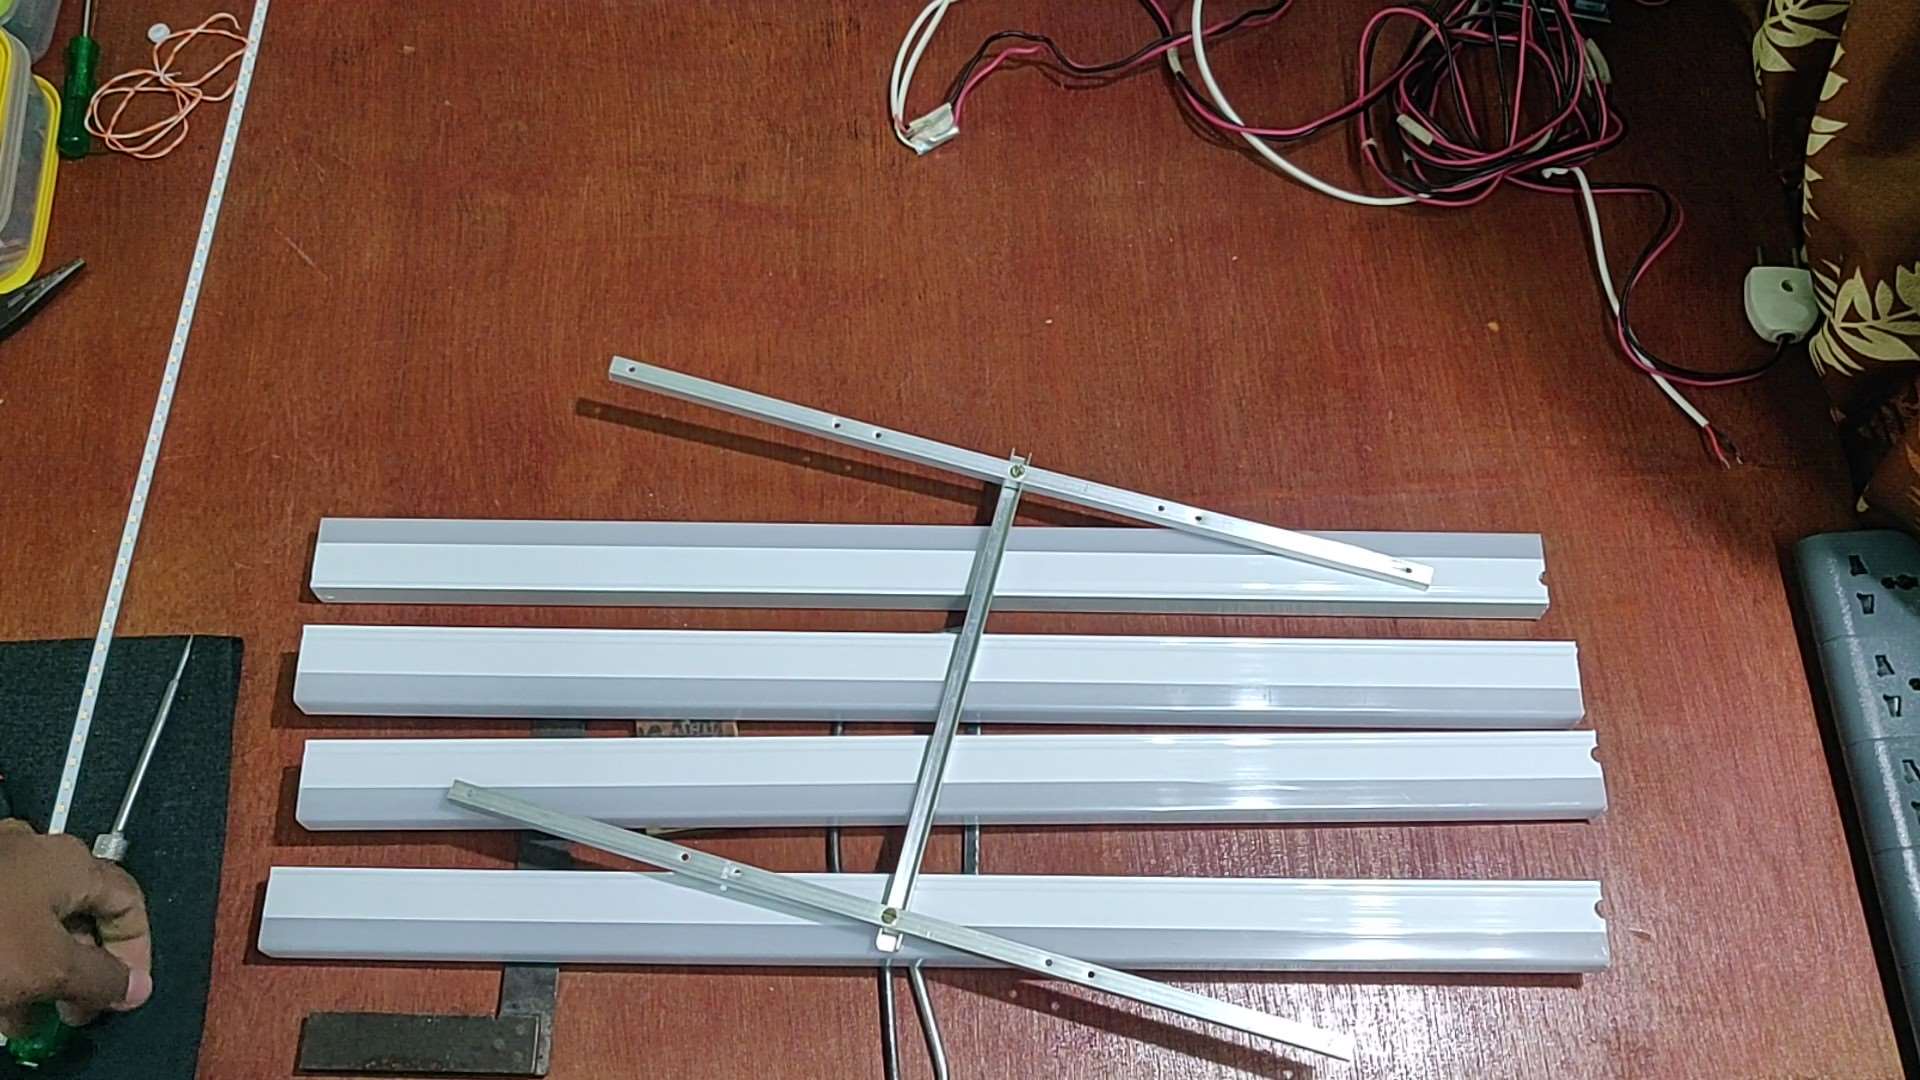
- Aluminium frame with the tube light pieces
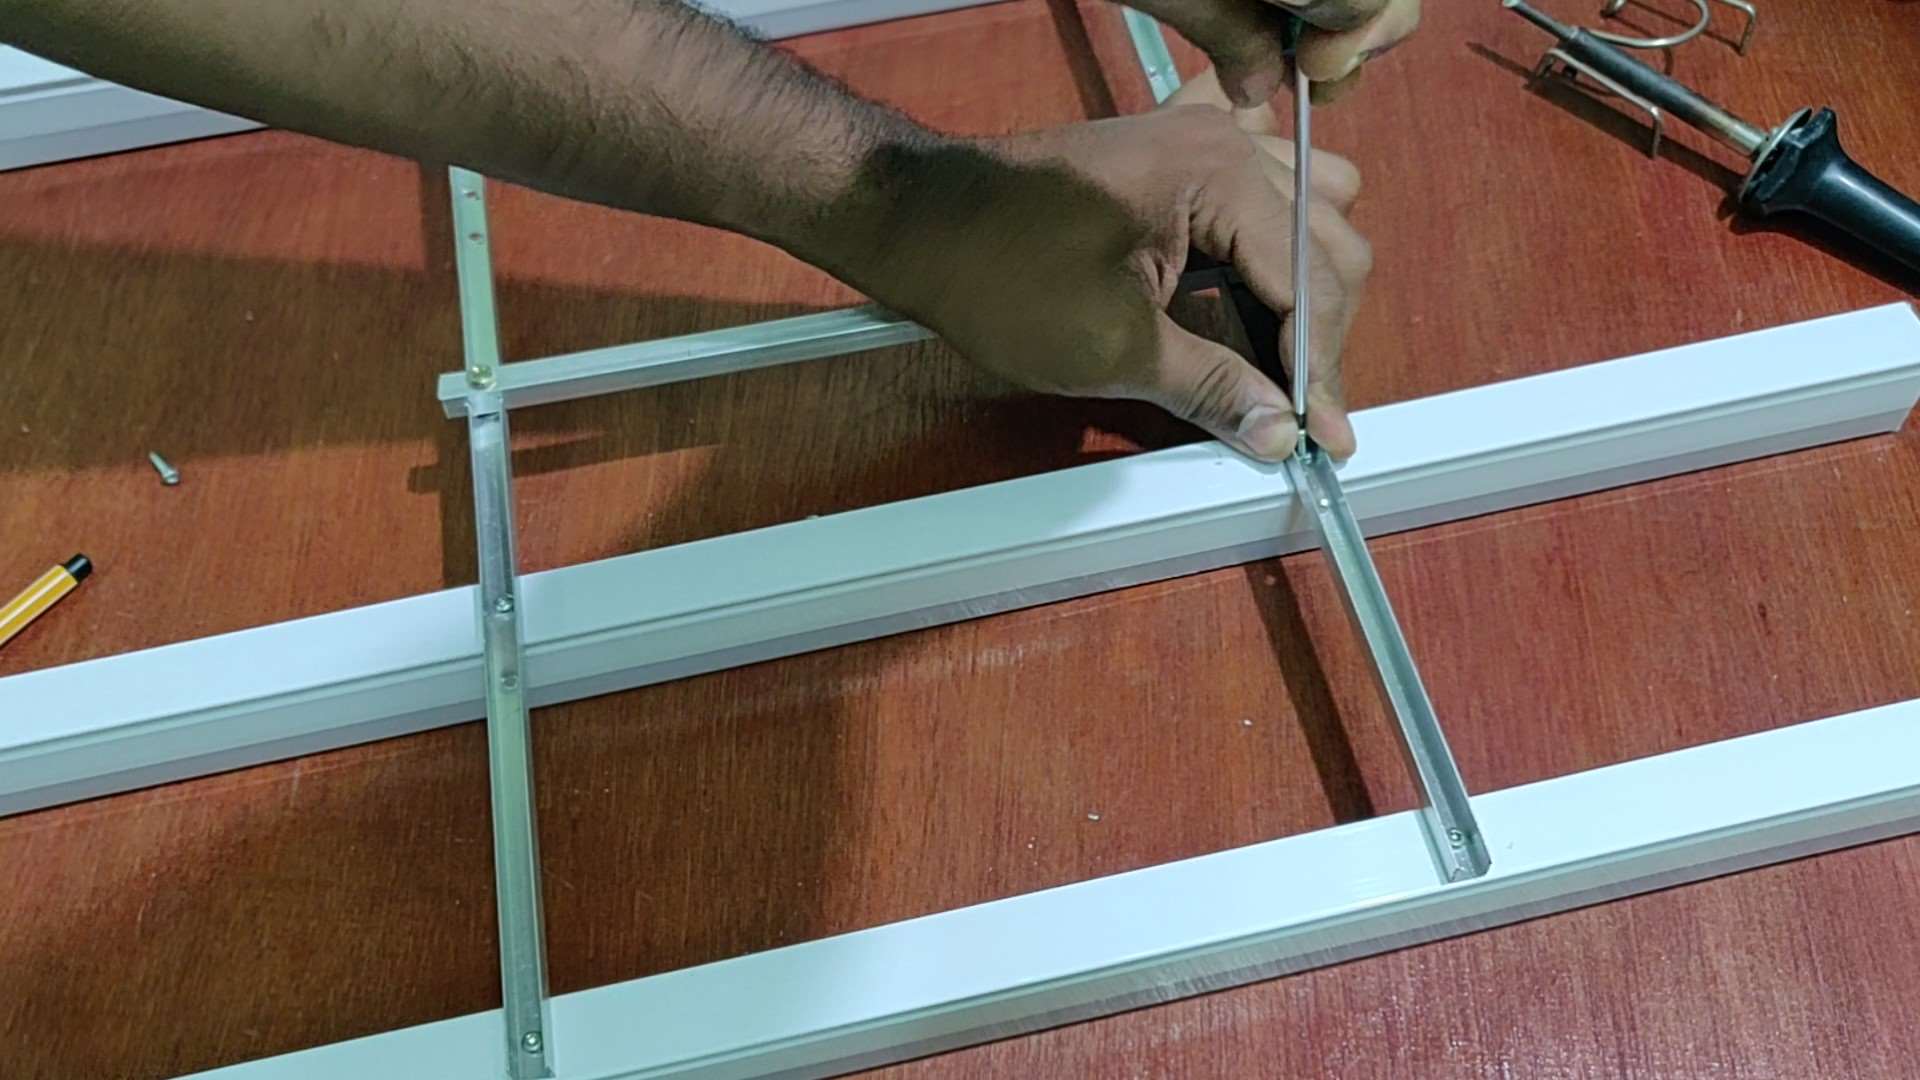
- Mark the points
Layout the tube lights pieces on the aluminium frame and mark the points where we need to screw the tube light housing with the aluminium frame. To have a uniform light distribution I have equally spaced all the tube lights.

- Drill holes on the aluminium frame
Drill holes on the aluminium frame where the tube light housing is supposed to be screwed with the H frame. I used a 3mm drill bit to make the holes. Also, it is recommended that you punch the aluminium strip before drilling to prevent the drill bit from slipping.
- Screw the tube light housing to the aluminium frame
I used 3mm screws to connect the H frame to the tube light housing. Later I also added some epoxy glue to make the joint hold better.
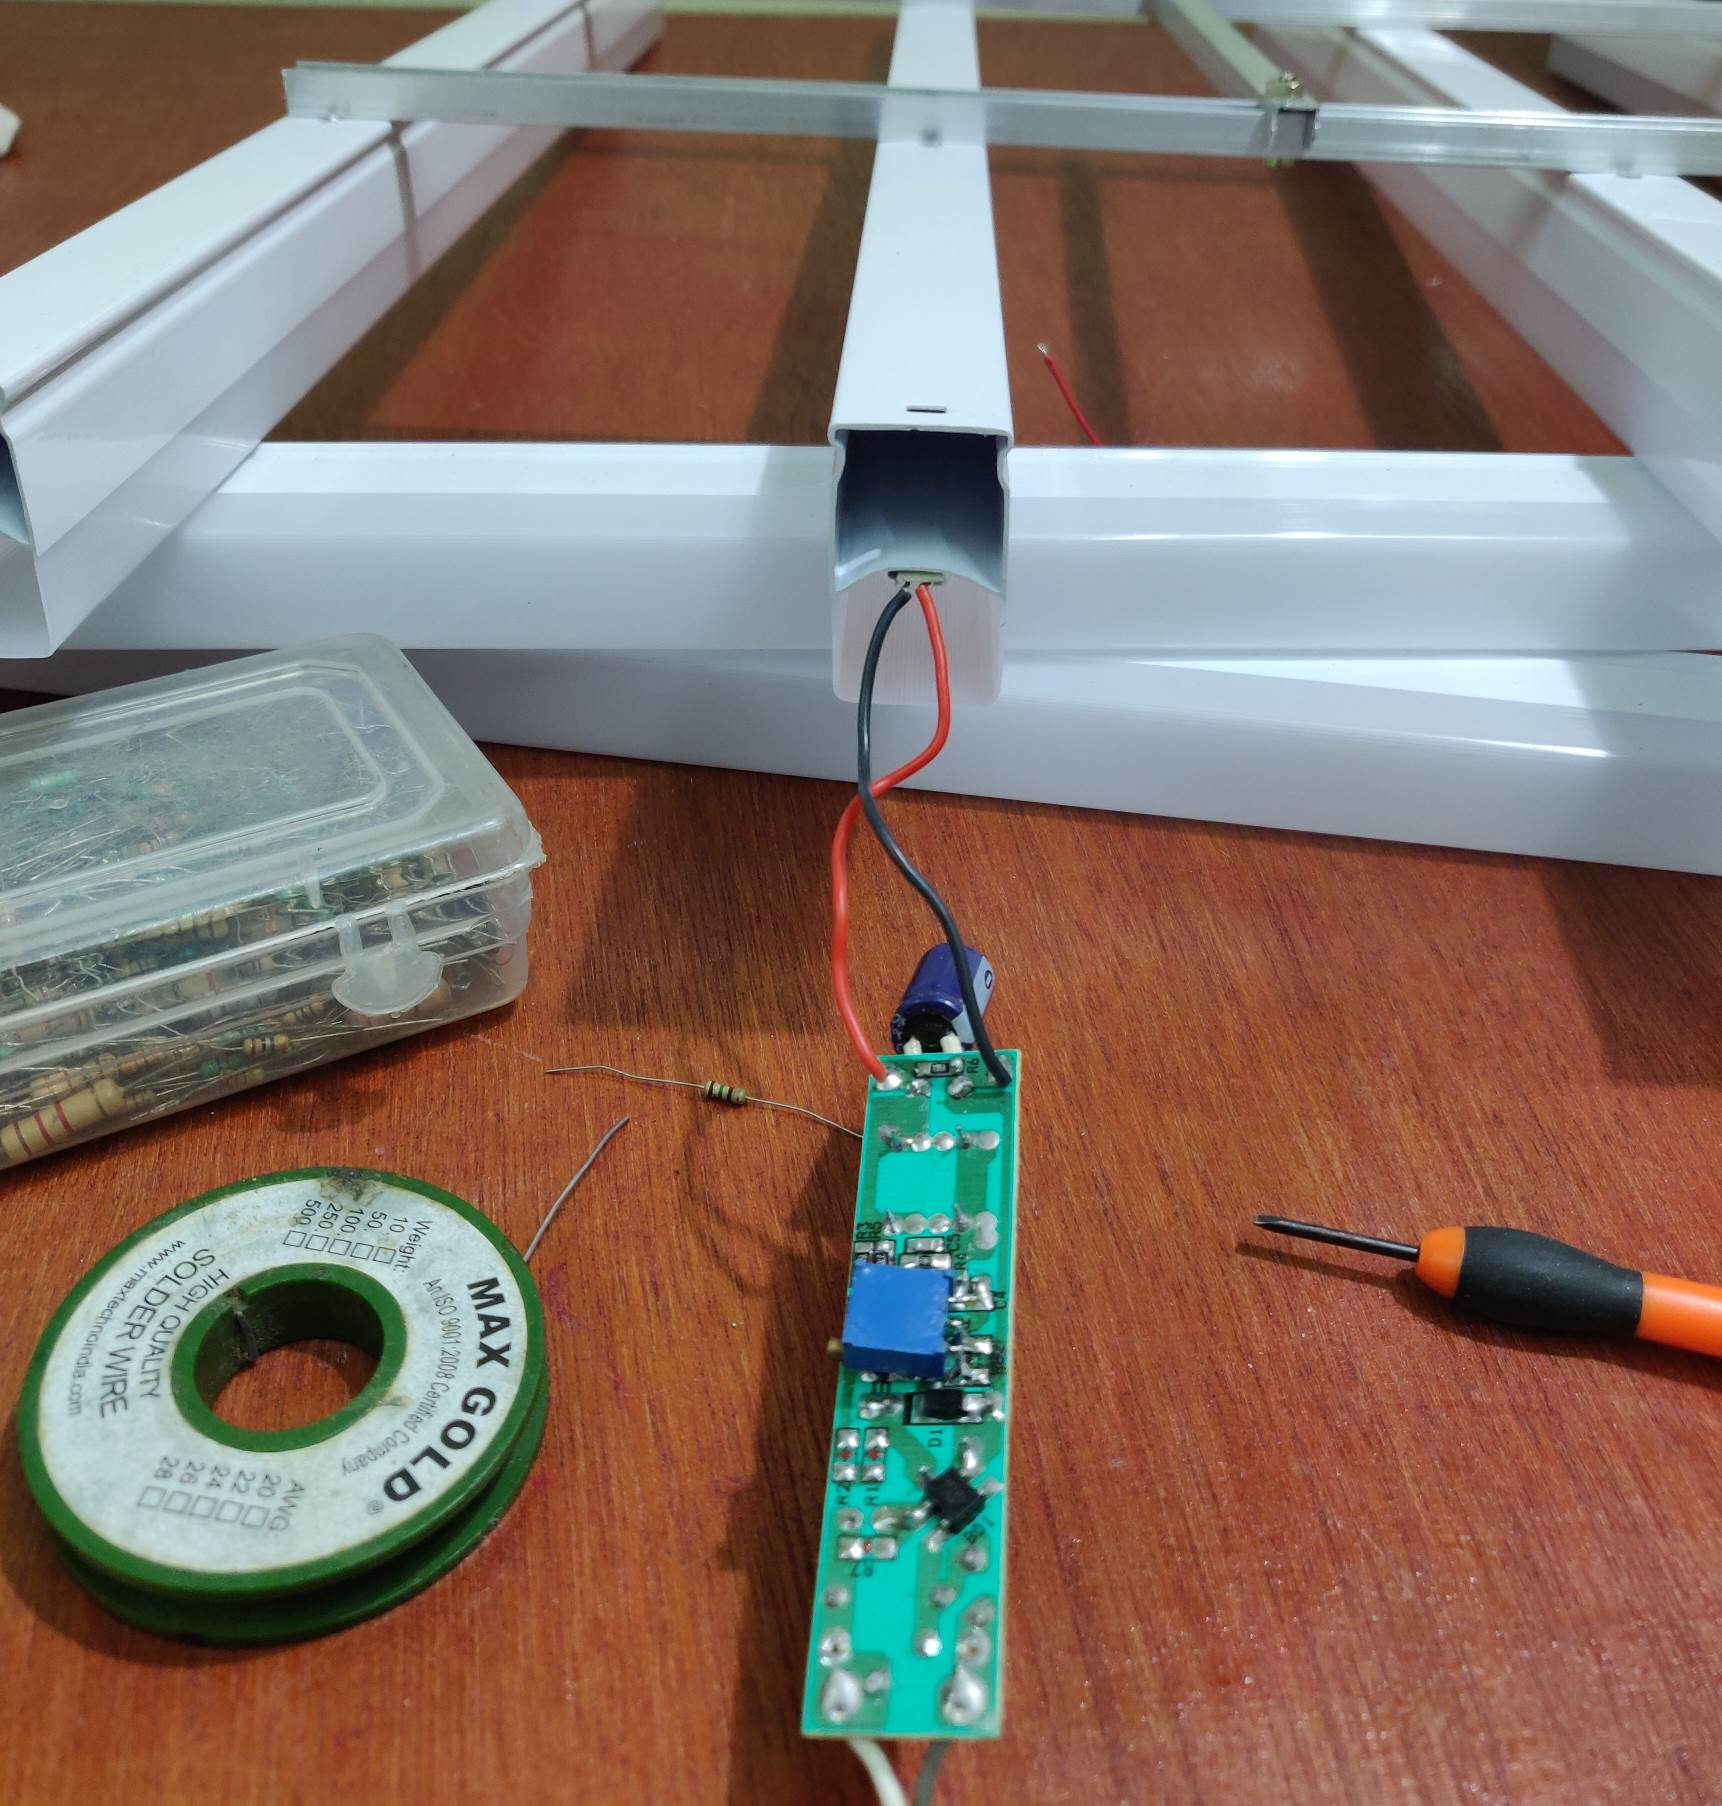
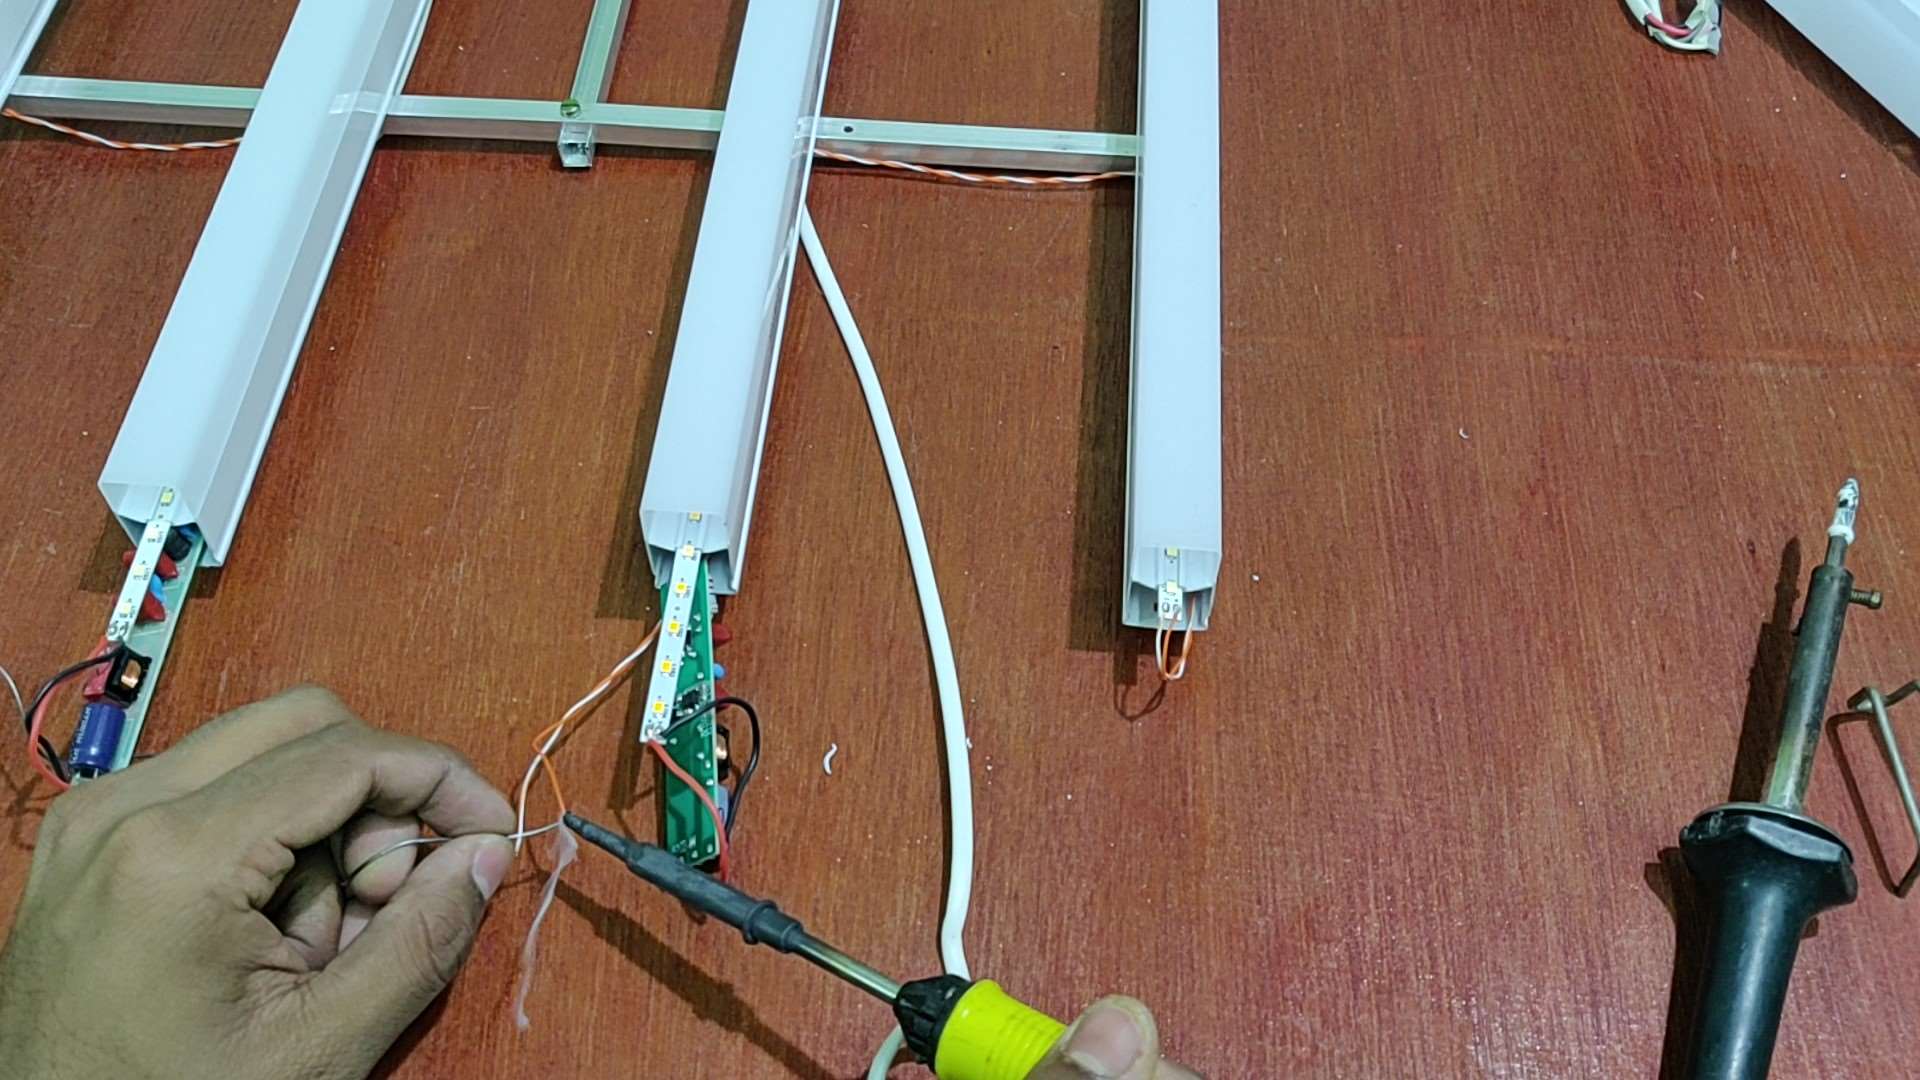
- Put the light strips back inside the tube light housing
I have used two colour temperature lights so I have put the light strips in an alternate order. I have kept the drivers inside two housing and have drilled extra holes on the backside of the housing to route wires. From the driver output, two pair of wires should be soldered and routed to two LED strips. Both the strips should be in parallel connection.
![LED Driver of a LED Tube Light]()
- Soldering the LED strips and drivers
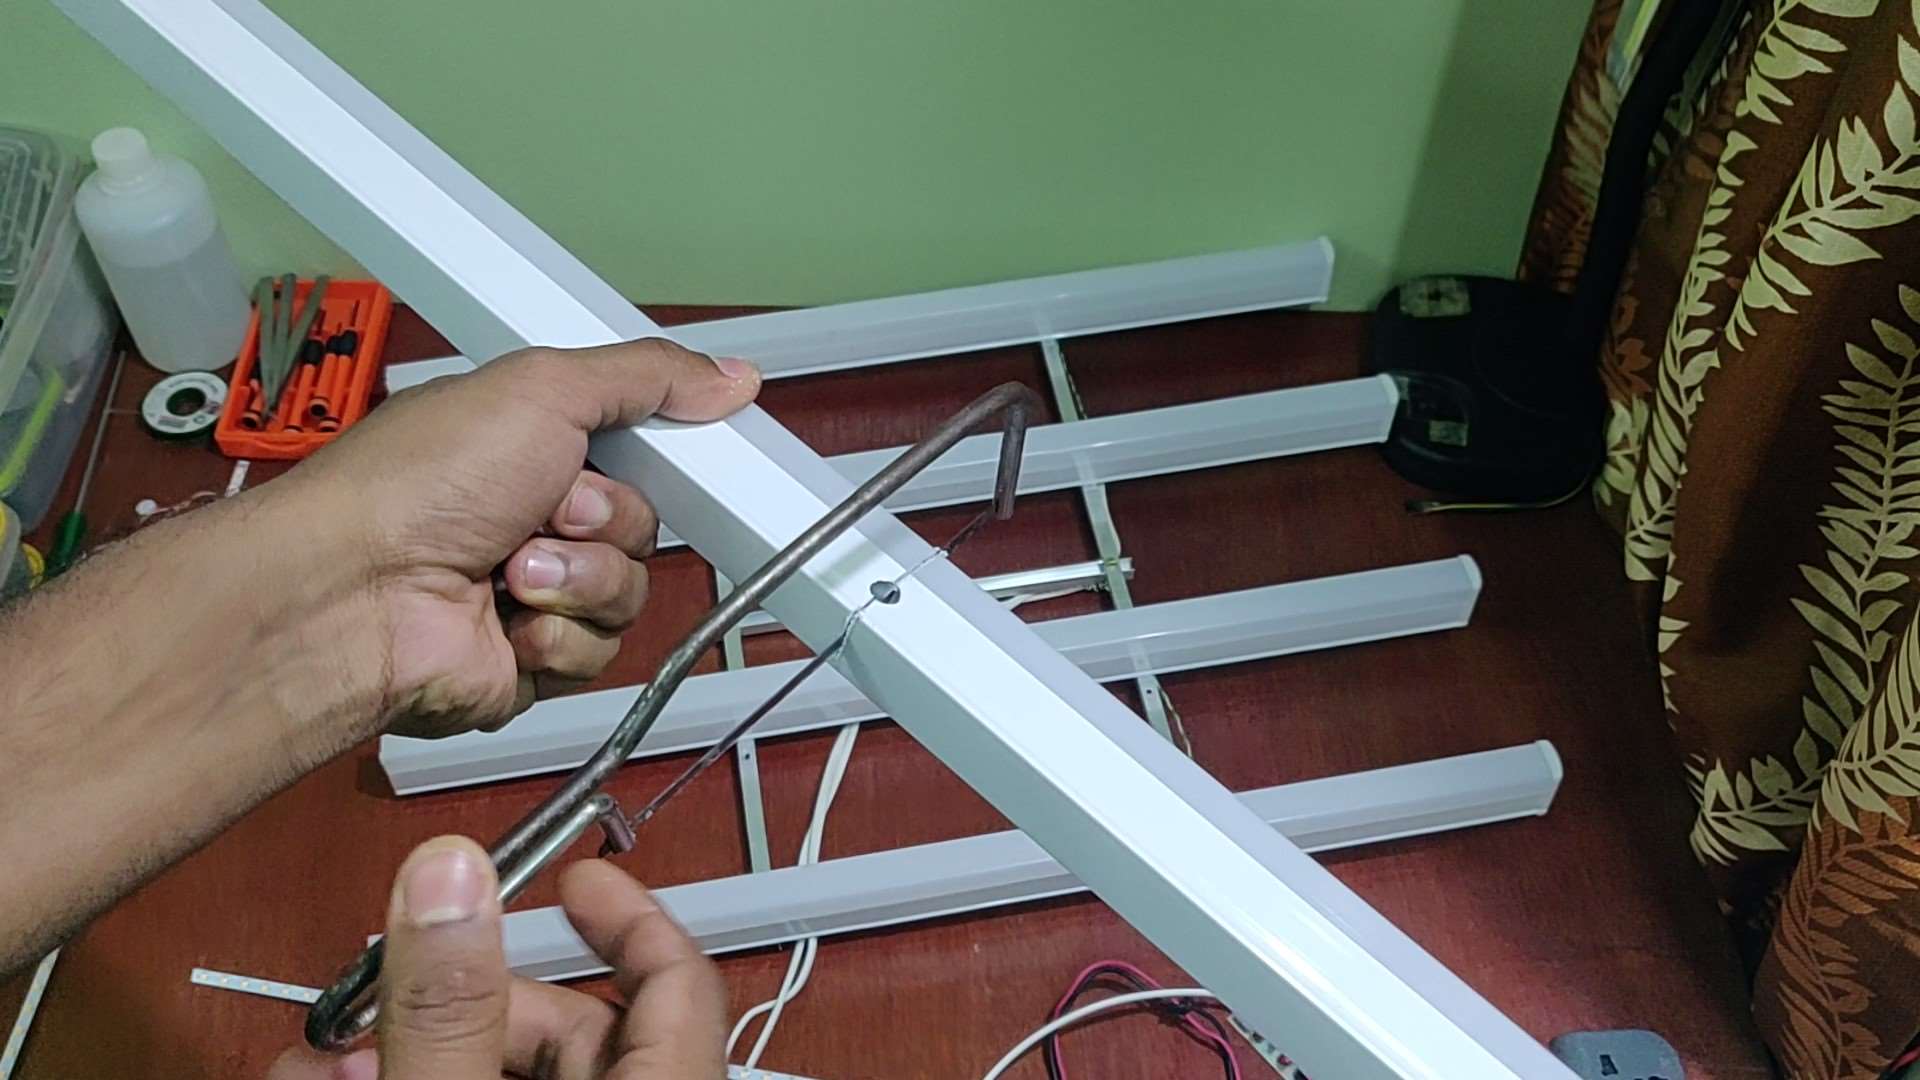
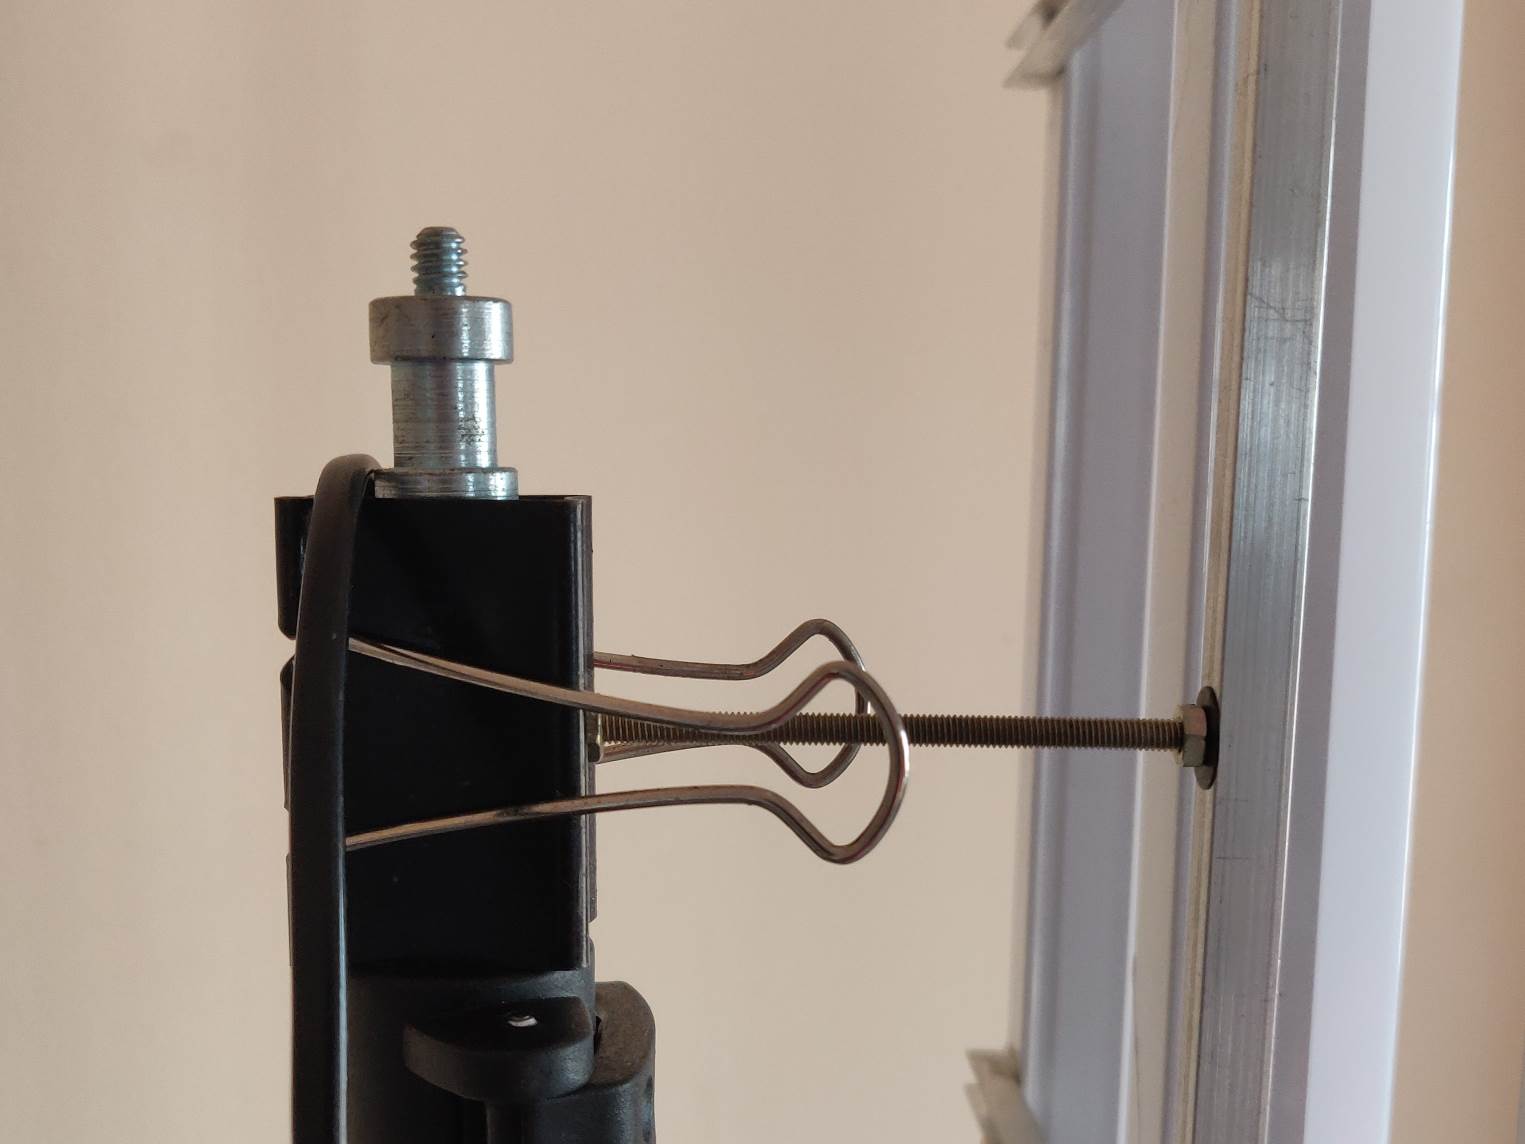
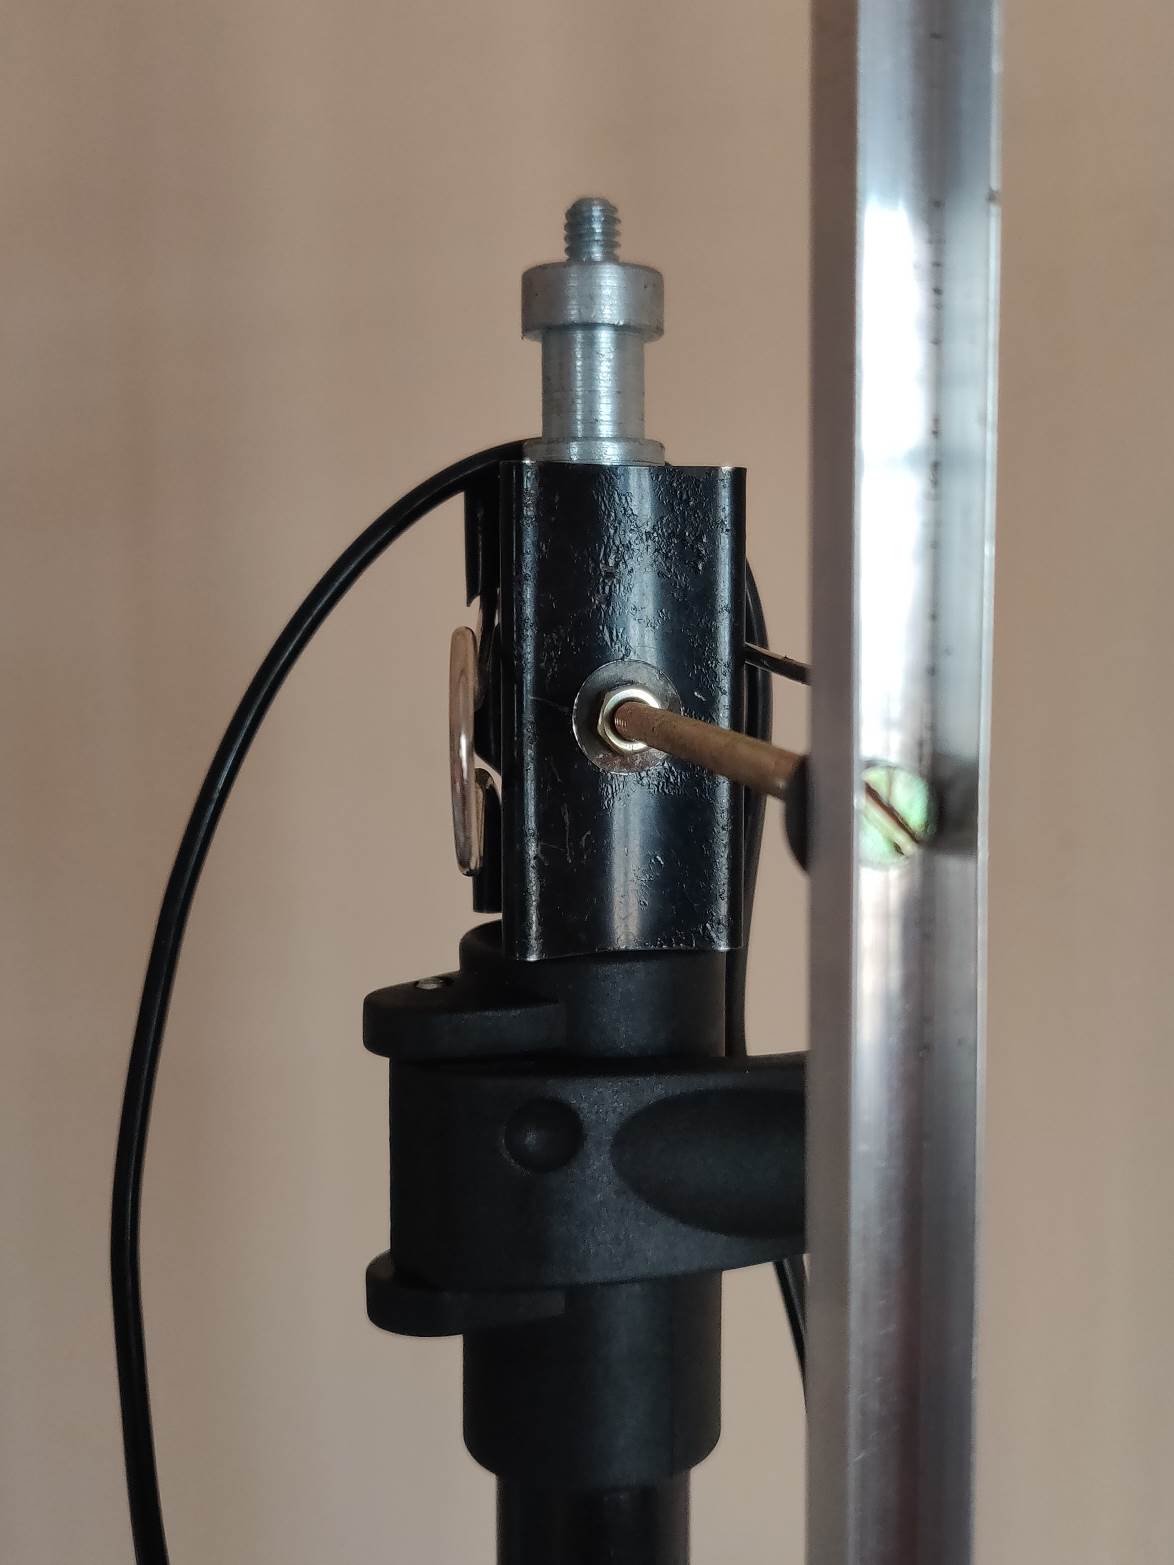
- Light stand mounting
I used a big sized paper clip as a mounting method to mount the DIY LED light panel to a light stand. I used a 4inch long bolt to connect the light panel to the paper clip.

- Light stand mounting

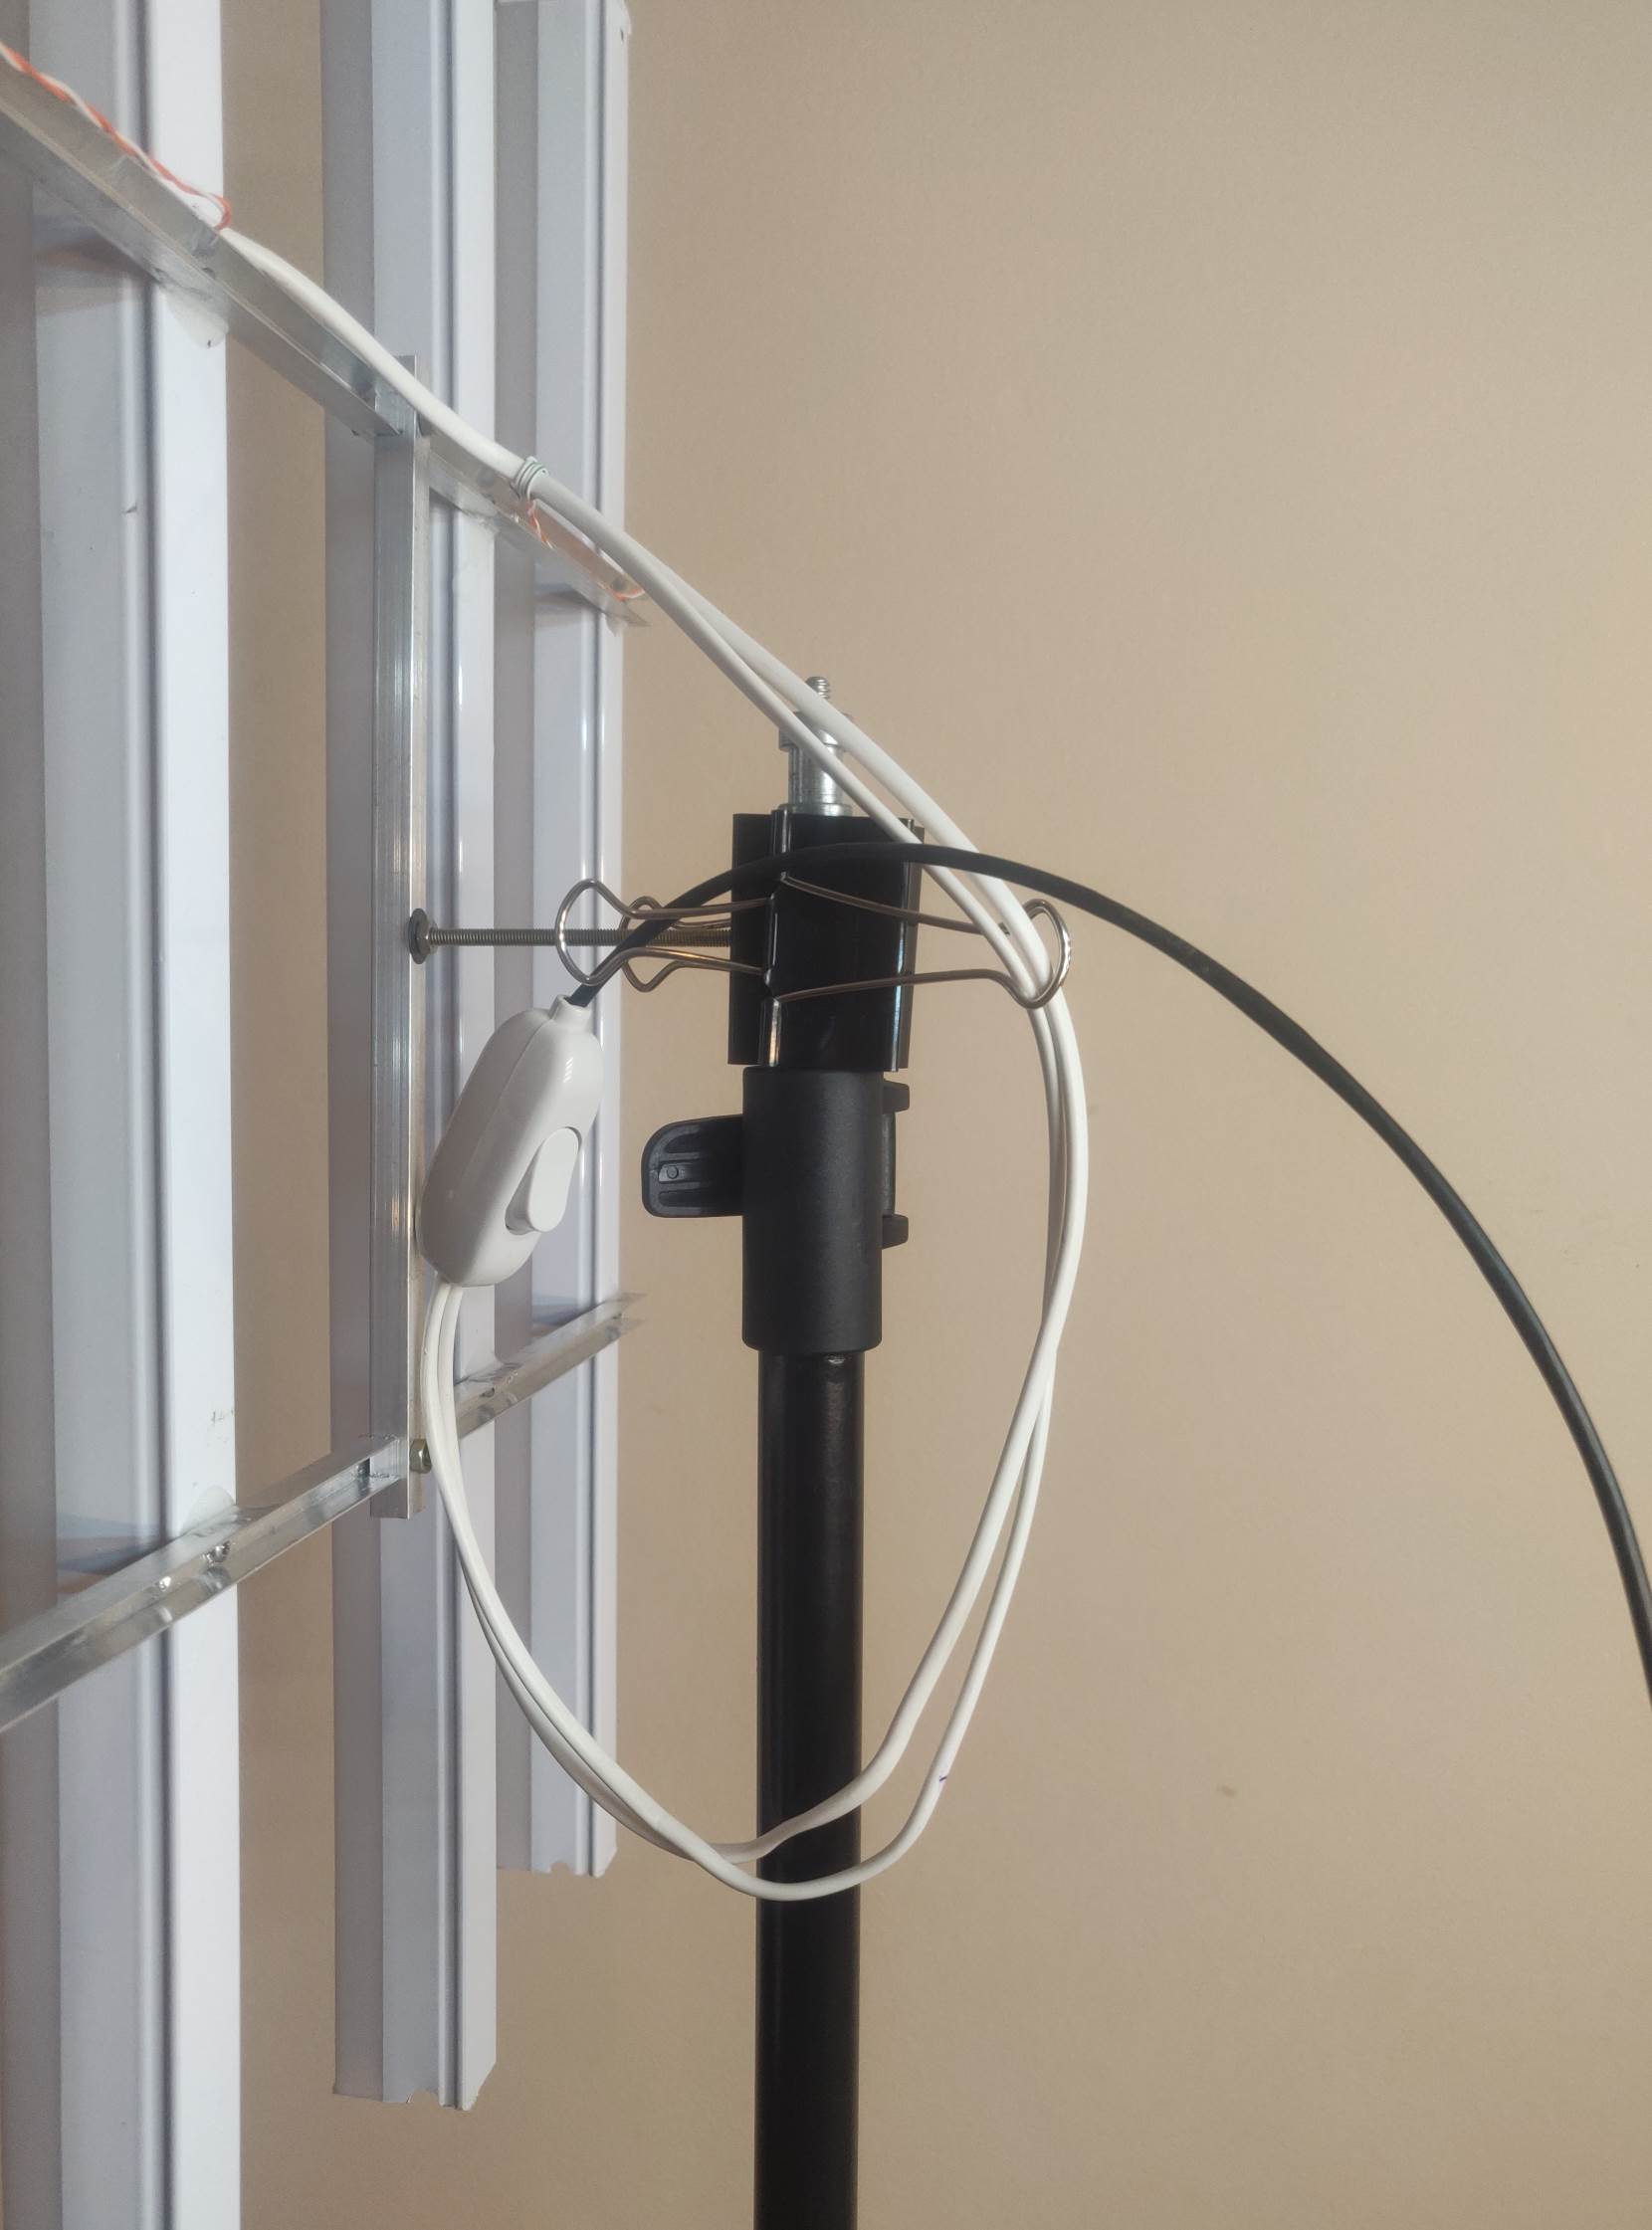
- Switch to switch on/off half of the panel
I have added a switch to control the intensity of light. It switched on/off half of the panel.
![Switch to Turn Off Half of the DIY LED Panel]()
- Half of the Panels are Switched On
- Light Panel Mounted on Light Stand
![DIY LED Light Panel Mounted on Light Stand]()


Scope of Improvement
- Variable Intensity for both the Colour Temperature
- Independent control of Colour Temperature and Intensity
- RGB Colour Panel
0 Comments