Introduction
Raspberry Pi Pico is a tiny, fast, and versatile board built using RP2040, a brand new microcontroller chip designed by Raspberry Pi. RP2040 features a dual-core Arm Cortex-M0+ processor with 264KB internal RAM and support for up to 16MB of off-chip Flash. A wide range of flexible I/O options includes I2C, SPI, and uniquely Programmable I/O (PIO).
In this article, we will connect a Raspberry Pi Pico to a computer and learn how to build the SDK and flash an example program in it using C/C++. We will also see how to write the code in Visual Studio Code IDE.
What You Will Learn
- How to load the C/C++ firmware onto a Raspberry Pi Pico?
- How to program a Raspberry Pi Pico using C/C++?
- How to compile and build C/C++ SDK for Raspberry Pi Pico?
- How to compile and build C/C++ programs for Raspberry Pi Pico in Windows PC?
Prerequisite Hardware
- Raspberry Pi Pico
- Micro USB Cable
- Windows 10 Computer
Software Downloads
Download the Windows Executable Installer for each of the mentioned software in the list. The attached links will take you to the respective download pages.
- ARM GCC Compiler
Download the Windows 32-bit Installer (Signed for Windows 10 and later) - CMake
Download the Windows x64 Installer - Build Tools for Visual Studio 2019
Download the Online Installer - Python 3.9
Download Windows installer (64-bit) Stable Version - Git
Download 64-bit Git for Windows Setup - Visual Studio Code
Download Windows Installer (64-bit) - Doxygen (Optional)
Download the binary distribution for Windows
Software Installation
Follow the detailed installation guide in the following sequence and make sure not to miss any steps, especially match the checkboxes as shown in the below screenshots.
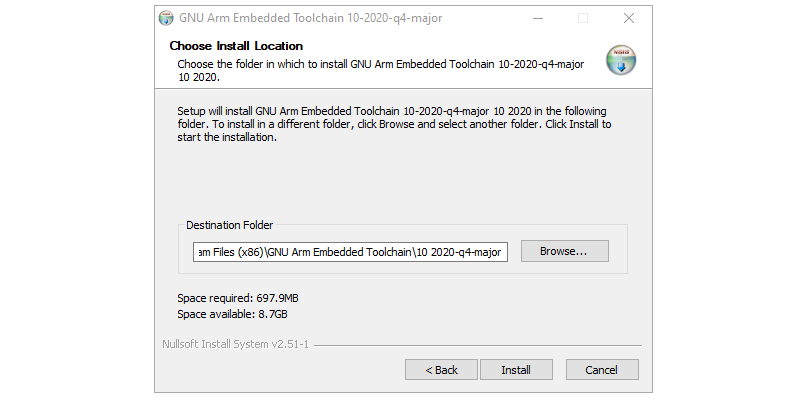
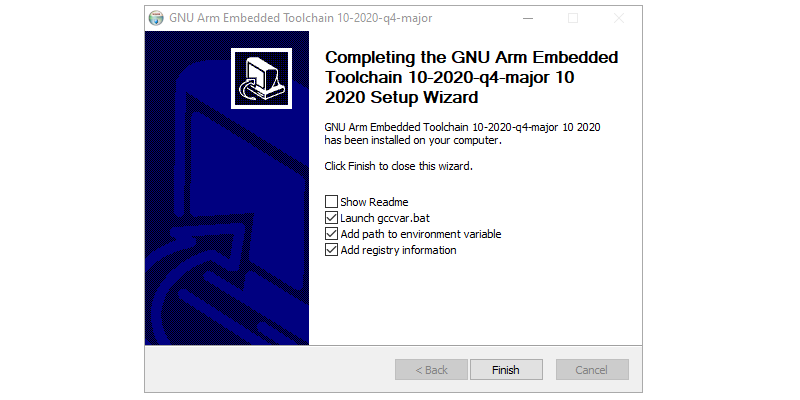
Installing ARM GCC Compiler
- Open the installer
- Use the default installation folder
- Add path to environment variable and add registry information

Step 1 : Installing ARM GCC Compiler Step 2 : Installing ARM GCC Compiler Step 3 : Installing ARM GCC Compiler Step 4 : Installing ARM GCC Compiler

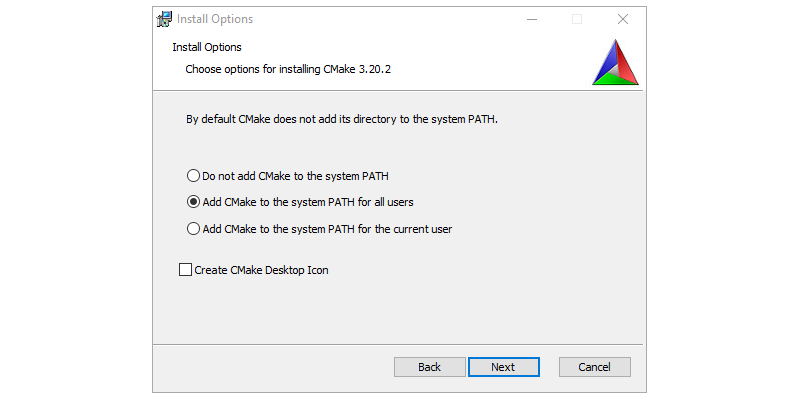
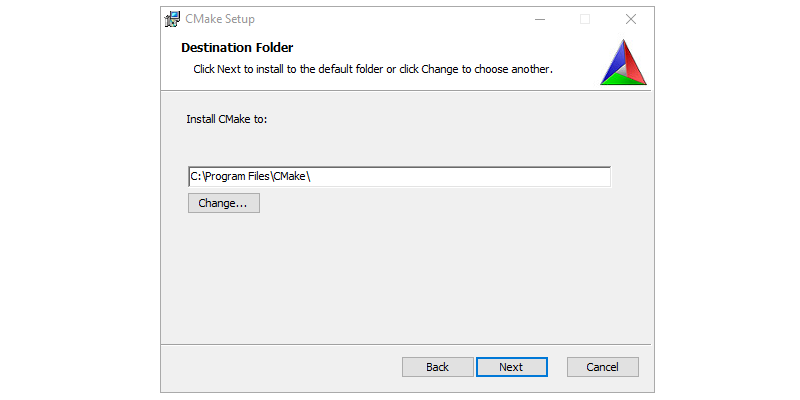
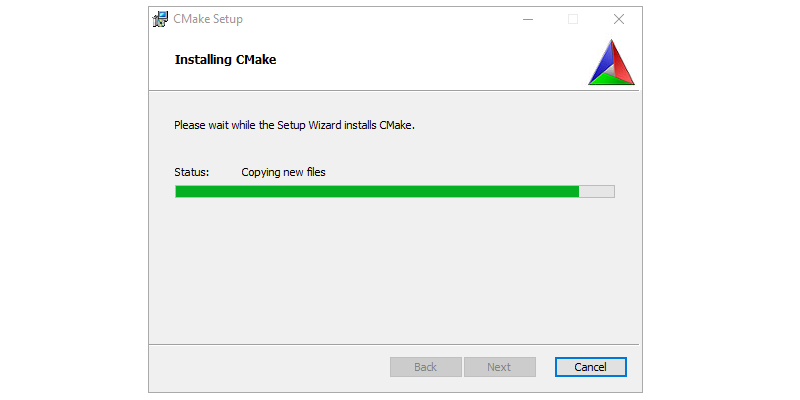
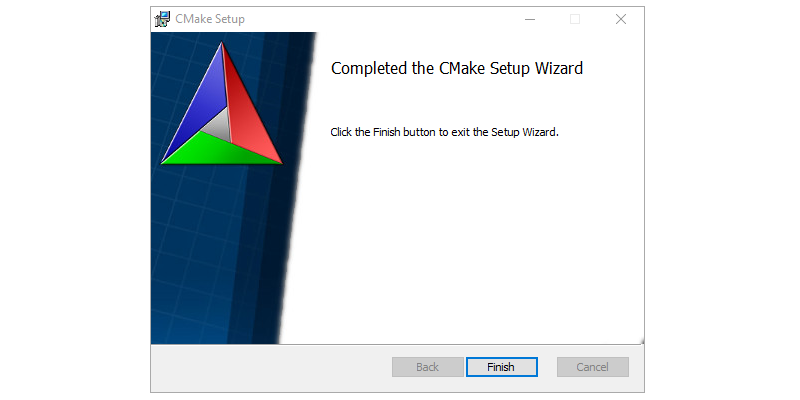
Installing CMAKE
- Open the installer
- Use the default installation folder
- Add CMake to the system PATH for all the users
Step 1 : Installing CMAKE Step 2 : Installing CMAKE Step 3 : Installing CMAKE Step 4 : Installing CMAKE Step 5 : Installing CMAKE
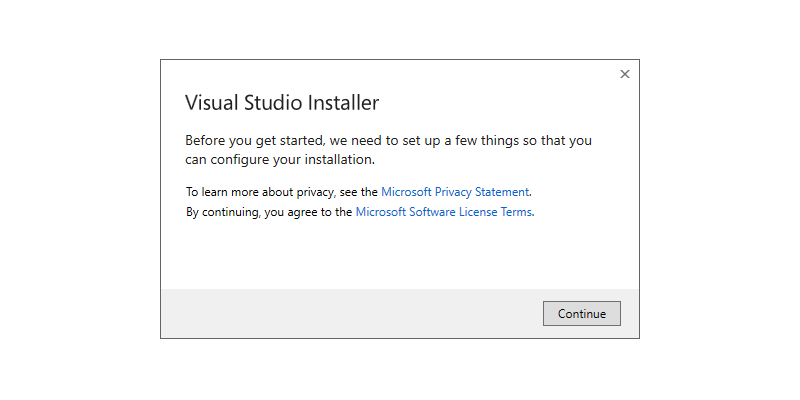
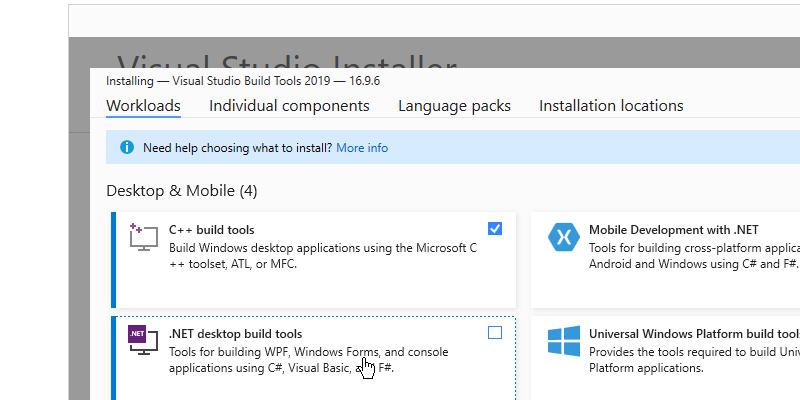
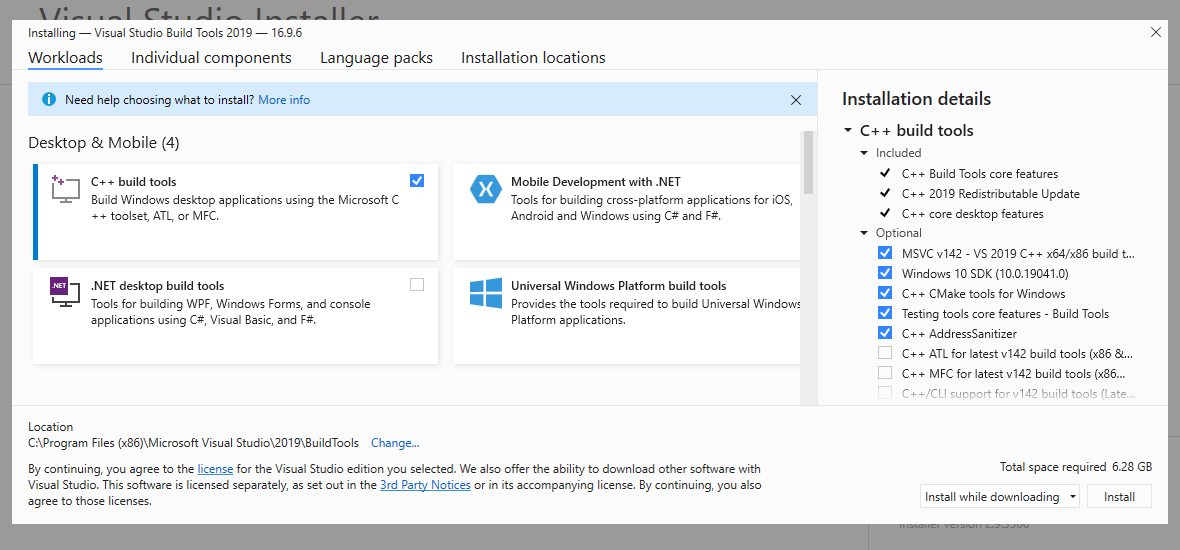
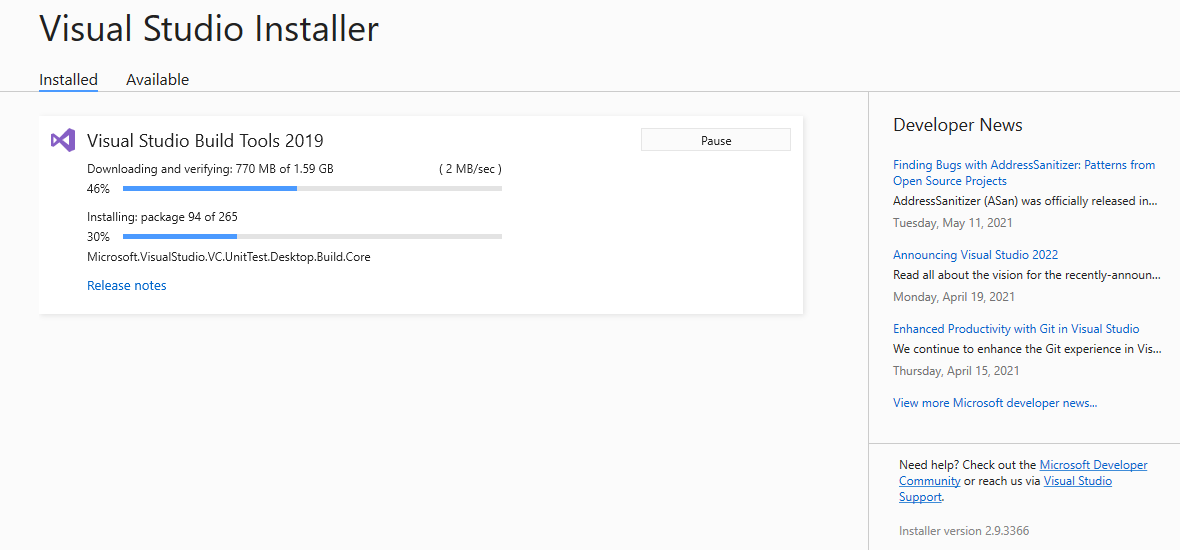
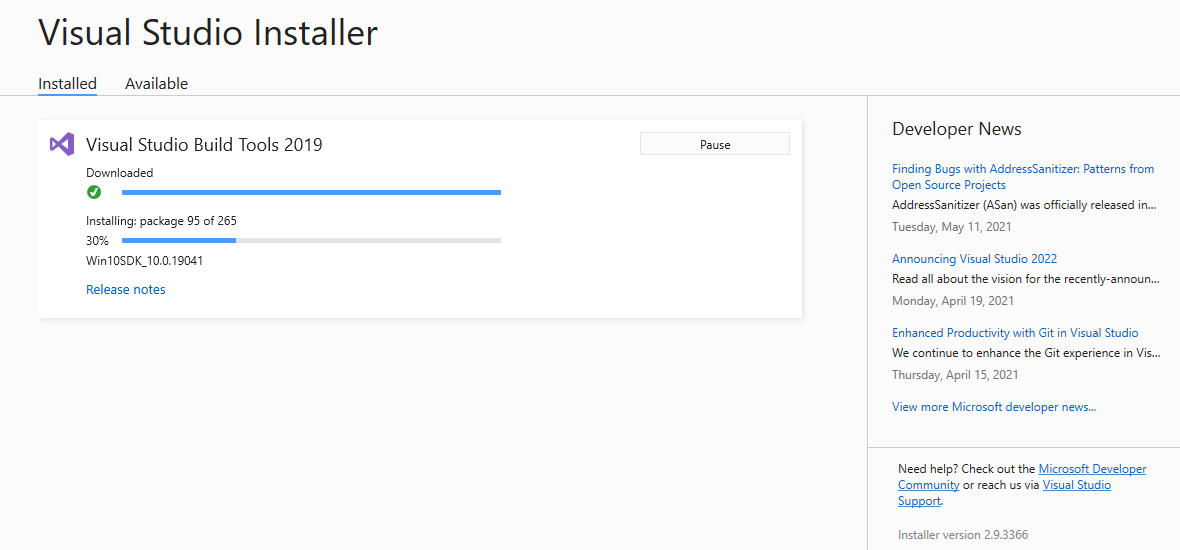
Installing Build Tools for Visual Studio 2019
- Open the installer
- Use the default installation folder
- Select the C++ Build Tools only
- Don’t change any other selection
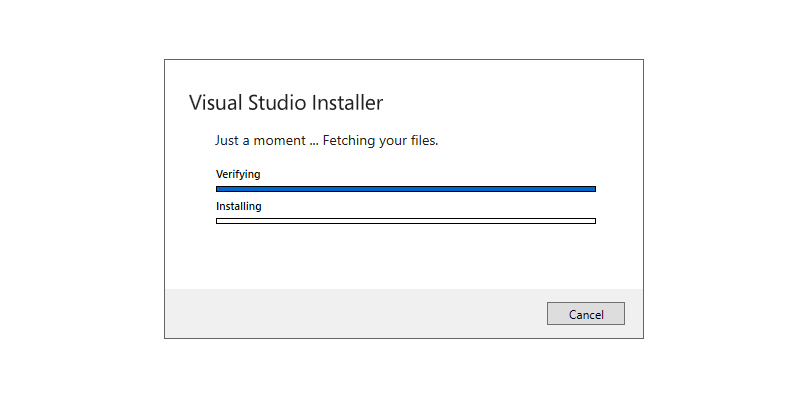
Step 1 : Installing Build Tools for Visual Studio 2019 Step 2 : Installing Build Tools for Visual Studio 2019 Step 3 : Installing Build Tools for Visual Studio 2019 
Step 4 : Installing Build Tools for Visual Studio 2019 Step 5 : Installing Build Tools for Visual Studio 2019 Step 6 : Installing Build Tools for Visual Studio 2019
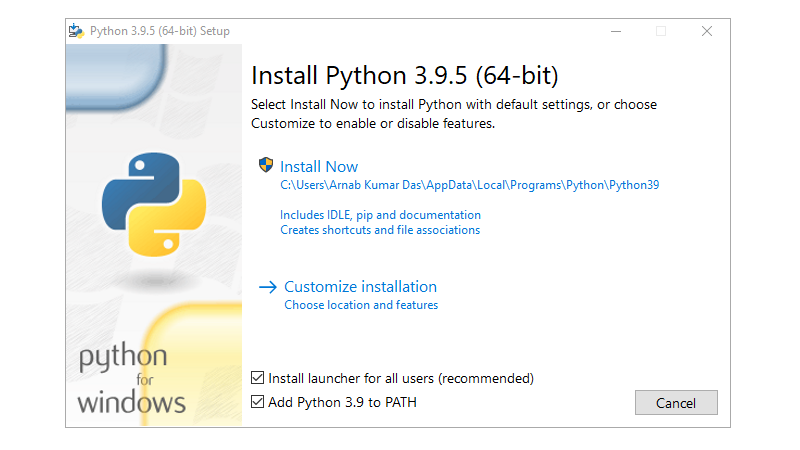
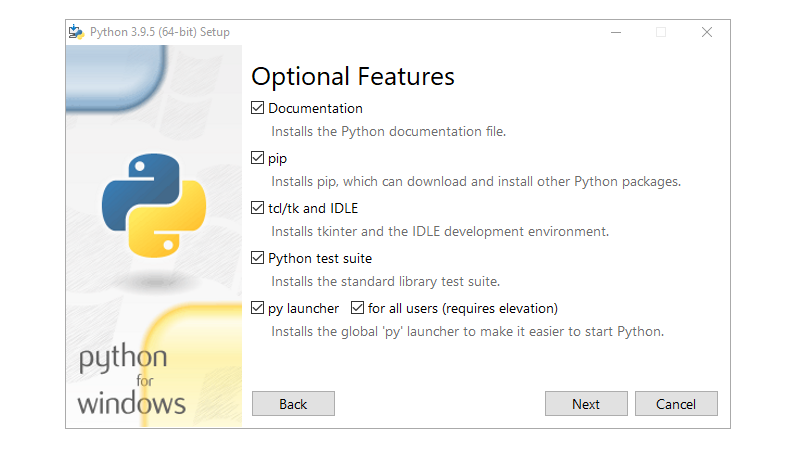
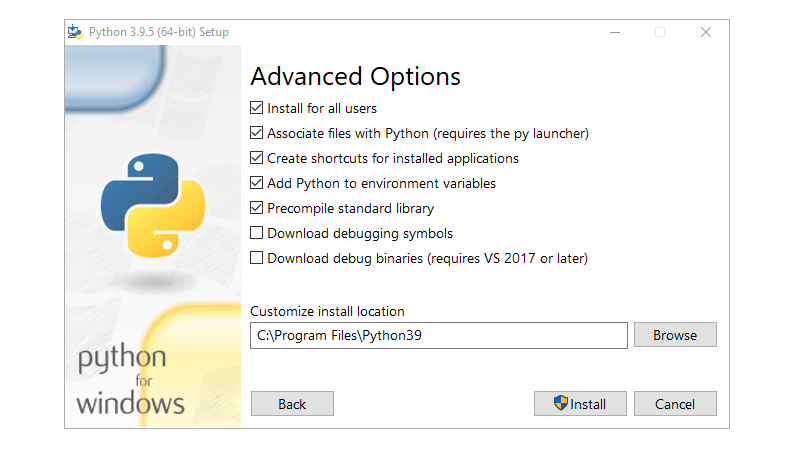
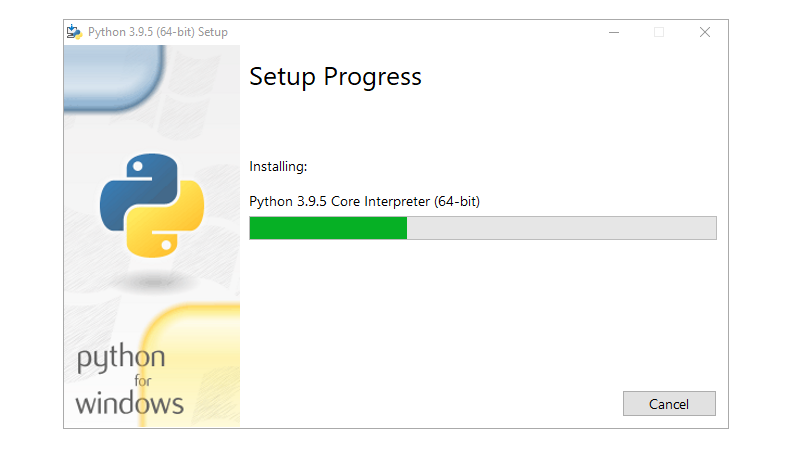
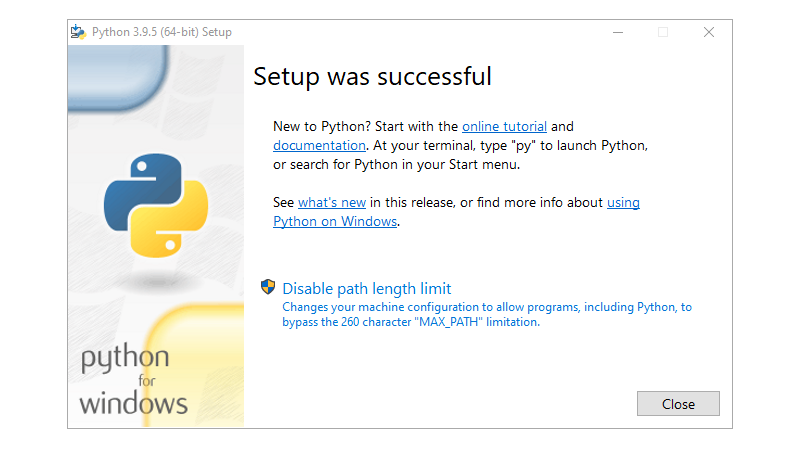
Installing Python
- Open the installer
- Use the default installation folder
- Use Customize installation option
- Add Python 3.9 to PATH/environment variable
- Install launcher for all users
- Precompile standard library
- Disable path length limit

Step 1 : Installing Python Step 2 : Installing Python Step 3 : Installing Python Step 4 : Installing Python Step 5 : Installing Python Step 6 : Installing Python
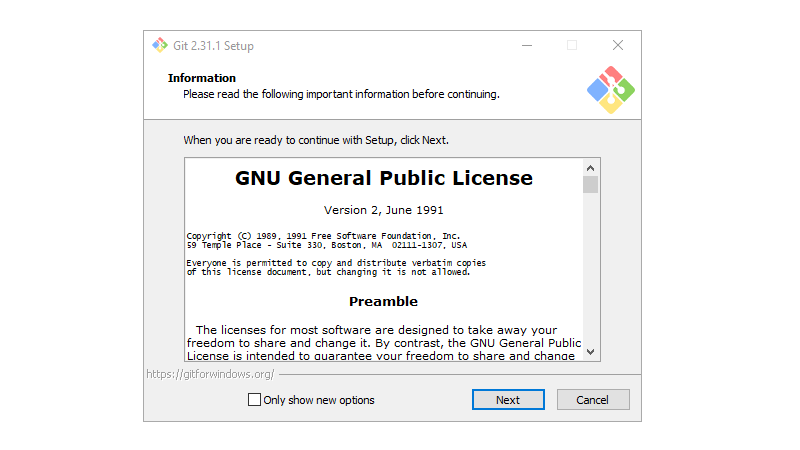
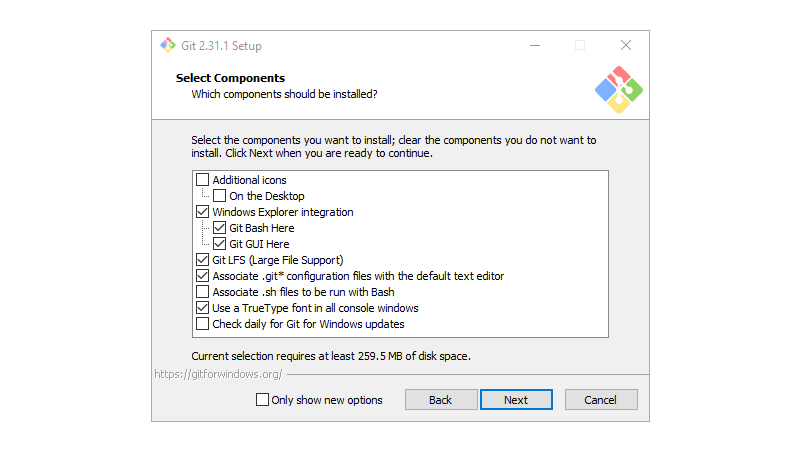
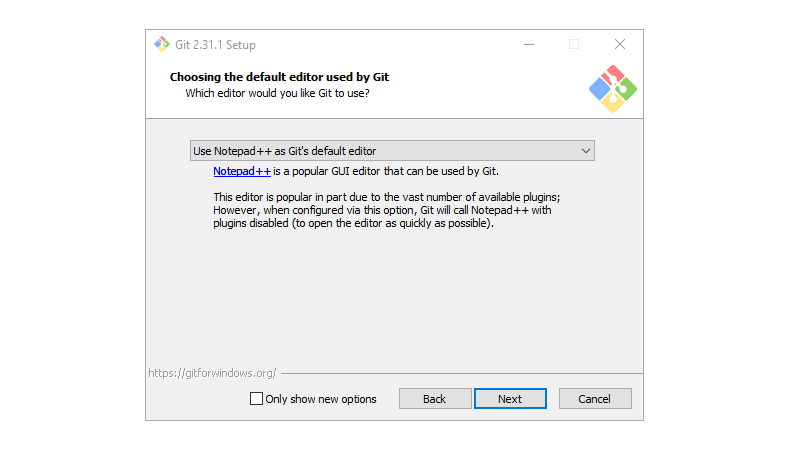
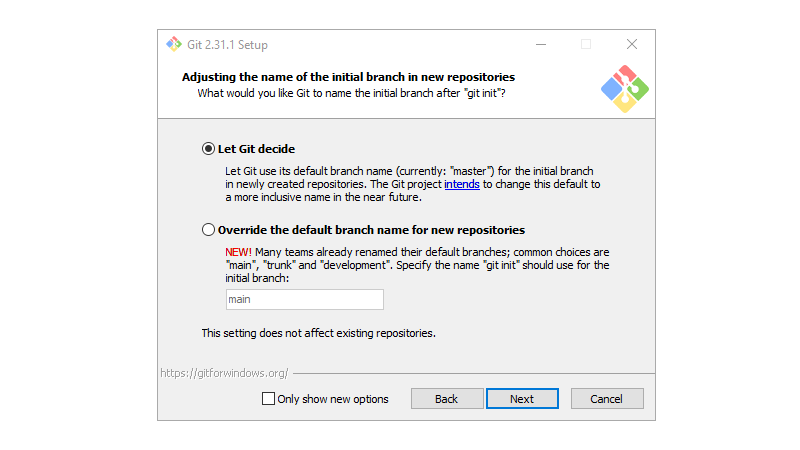
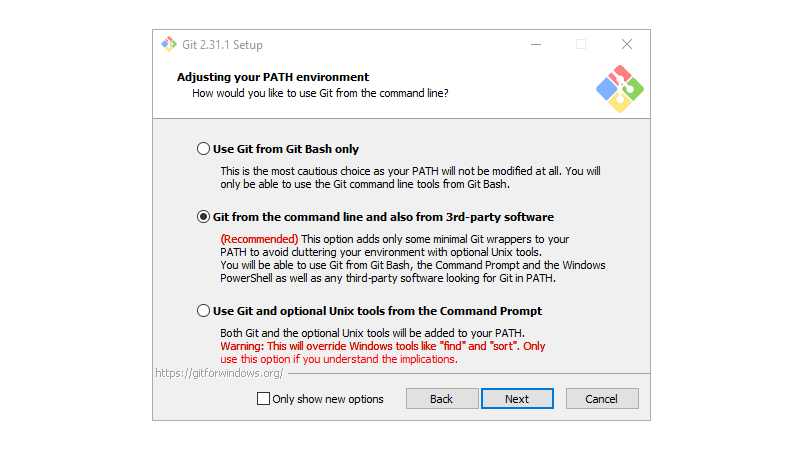
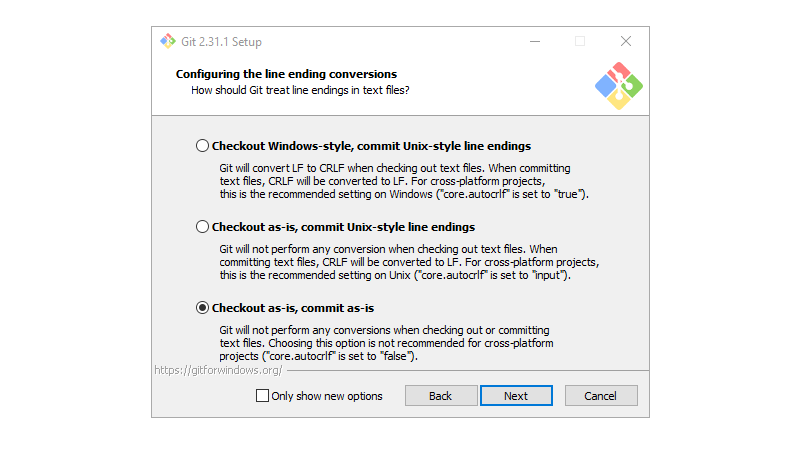
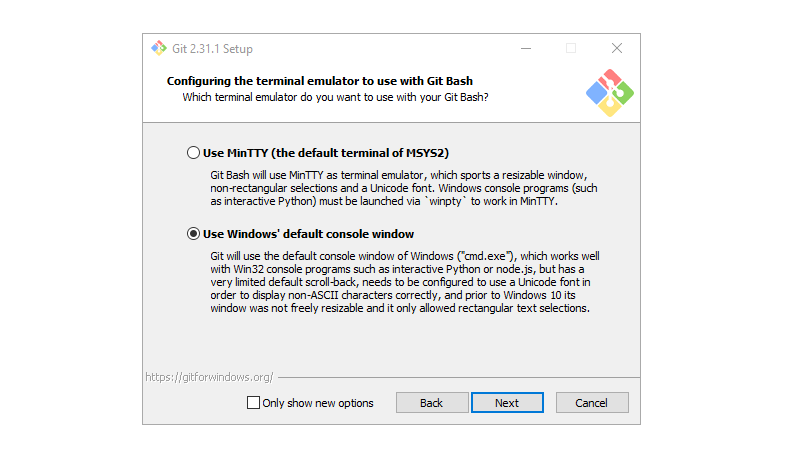
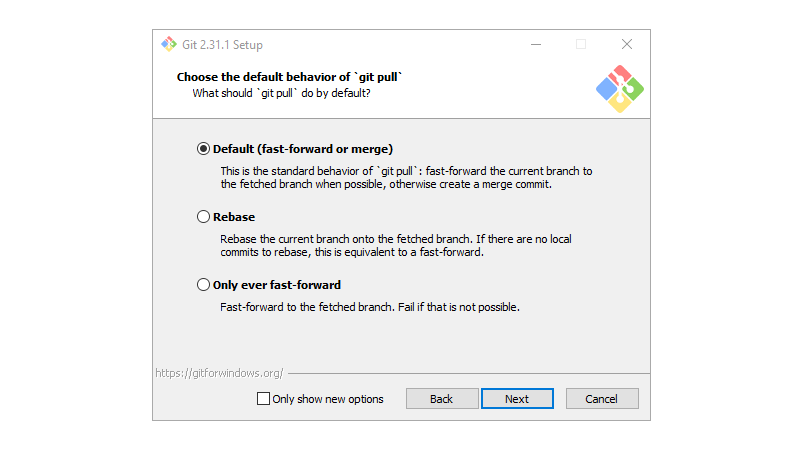
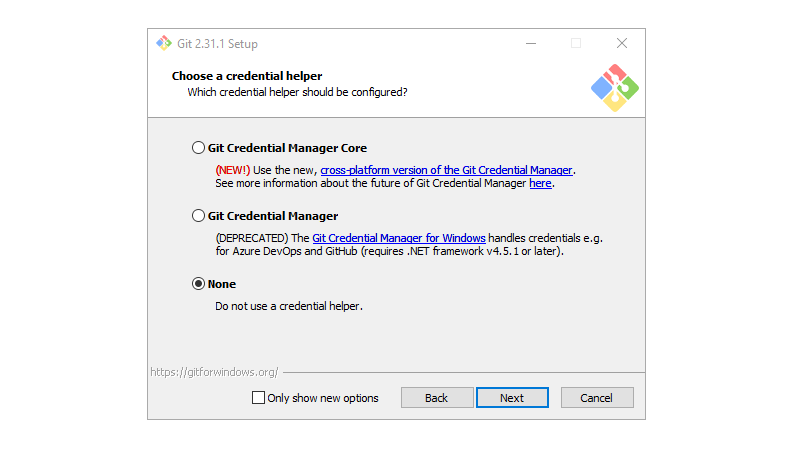
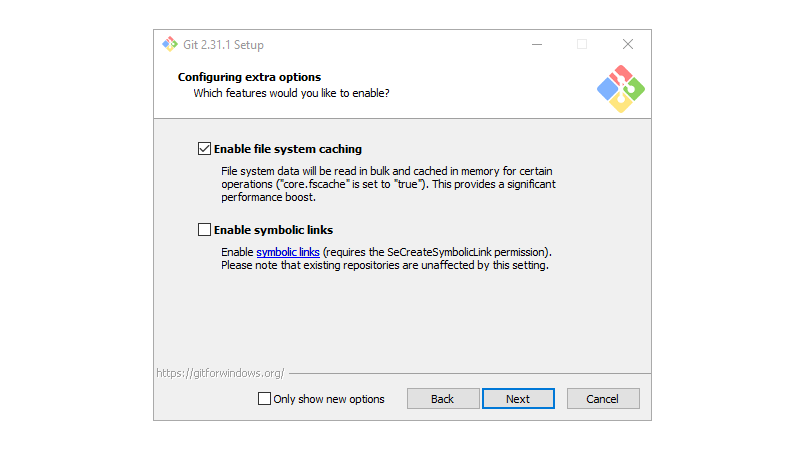
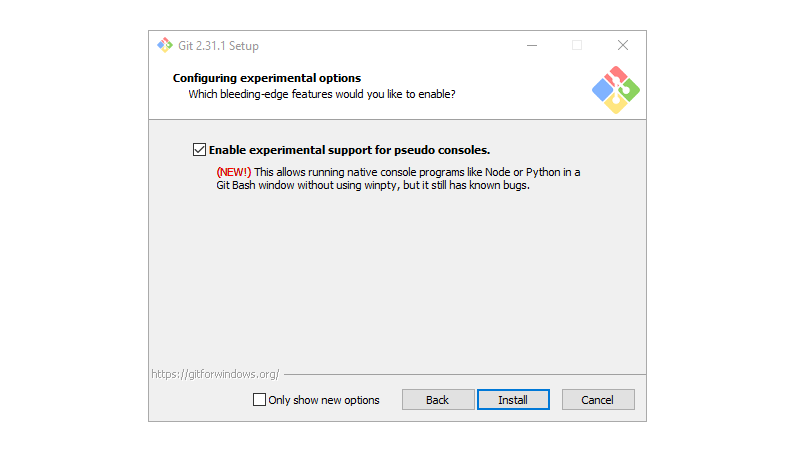
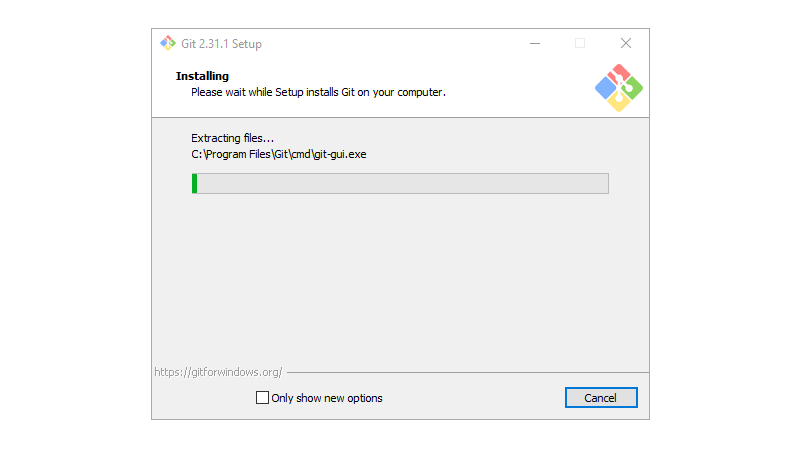
Installing Git
- Open the installer
- Use the default installation folder
- Select allow Git to be used from third-party tools
- Select checkout as-is, commit as-is
- Select use Windows’ default console window
- Select Enable experimental support for pseudo consoles

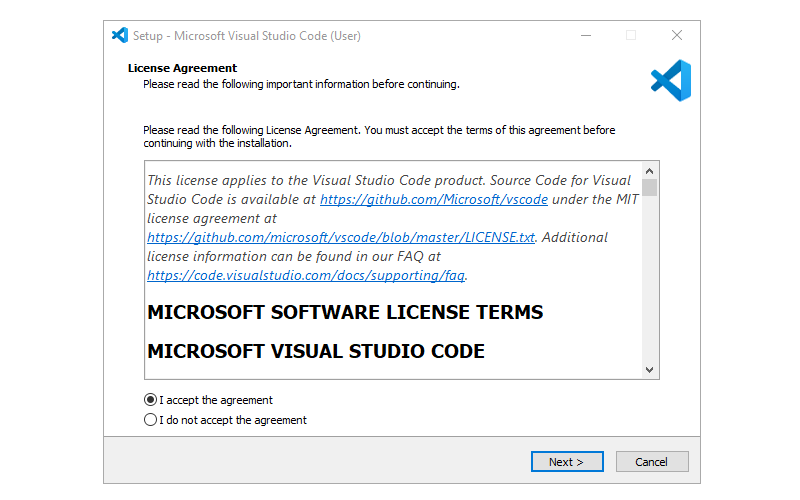
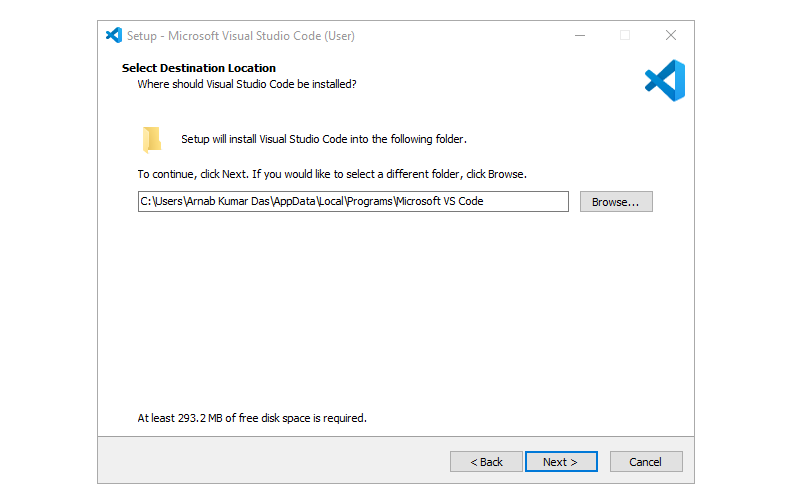
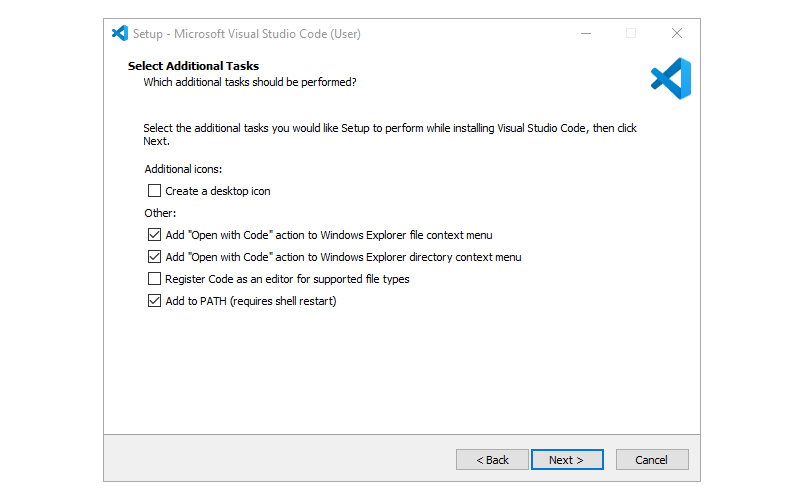
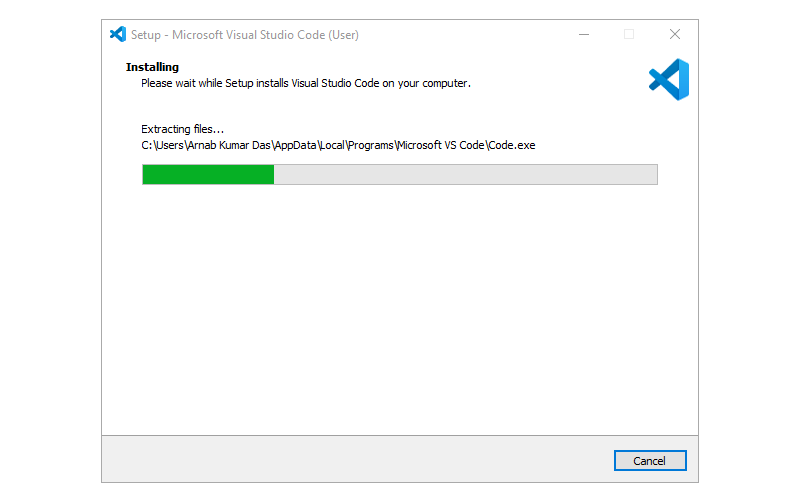
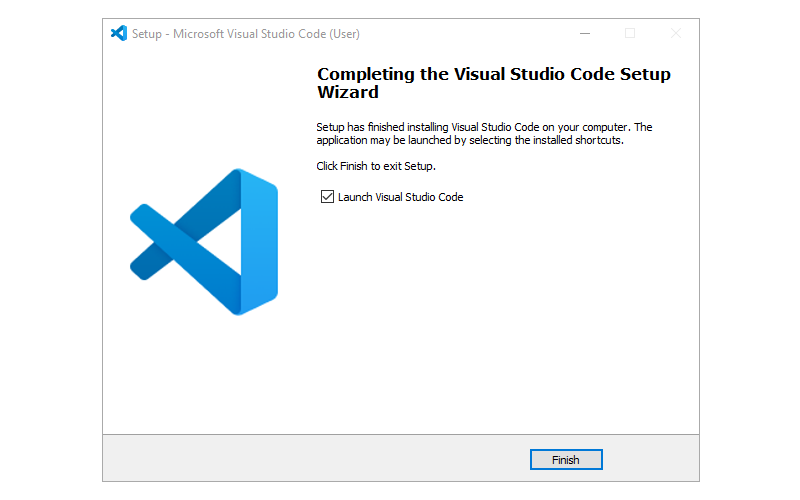
Installing Visual Studio Code
- Open the installer
- Use the default installation folder
- Add to
PATH

Step 1 : Installing Visual Studio Code Step 2 : Installing Visual Studio Code Step 3 : Installing Visual Studio Code Step 4 : Installing Visual Studio Code Step 5 : Installing Visual Studio Code
Raspberry Pi Pico SDK
The Raspberry Pi Pico SDK (Software Development Kit), provides the headers, libraries, and build system necessary to write programs for the RP2040 based devices such as the Raspberry Pi Pico in C, C++, or assembly language.
The SDK provides higher-level libraries for dealing with timers, USB, synchronization, and multi-core programming, along with additional high-level functionality built using PIO. The SDK also has examples to help get started with basic functionality and hardware interfacing.
The Build System
The Raspberry Pi Pico SDK uses CMake to manage the build. CMake is widely supported by IDEs (Integrated Development Environments) and allows a simple specification of the build (via CMakeLists.txt files), from which CMake can generate a build system ( make ) customized for the platform. CMakeList files used in Raspberry Pi Pico SDK and projects define how applications are configured and built.
The SDK builds an executable that is bare metal and runs independently on RP2040.
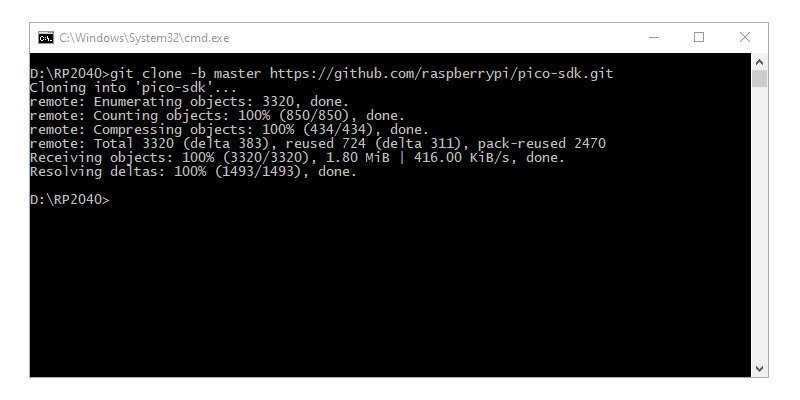
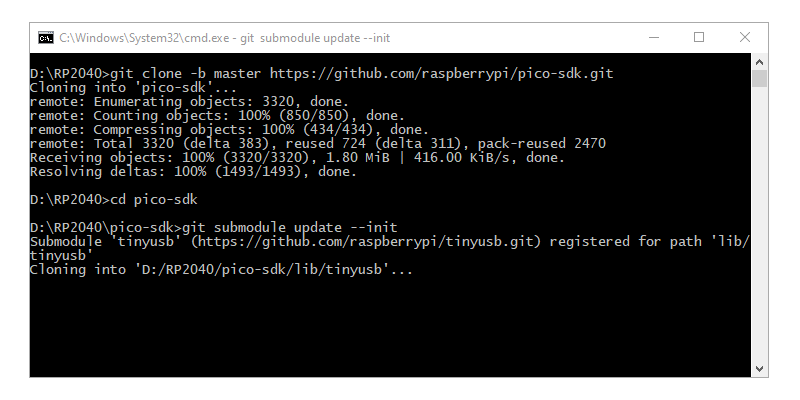
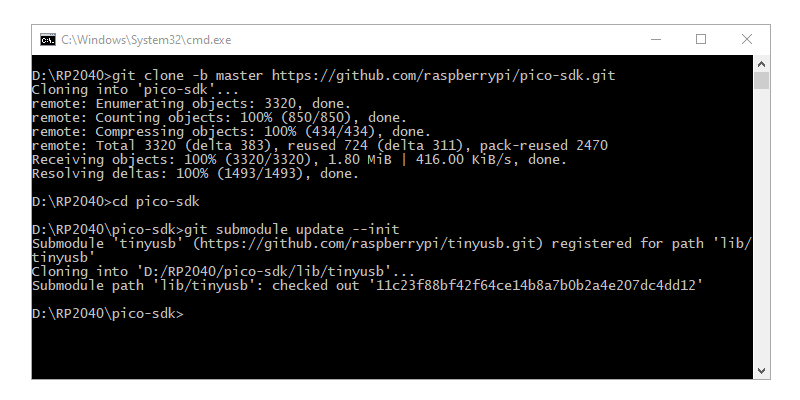
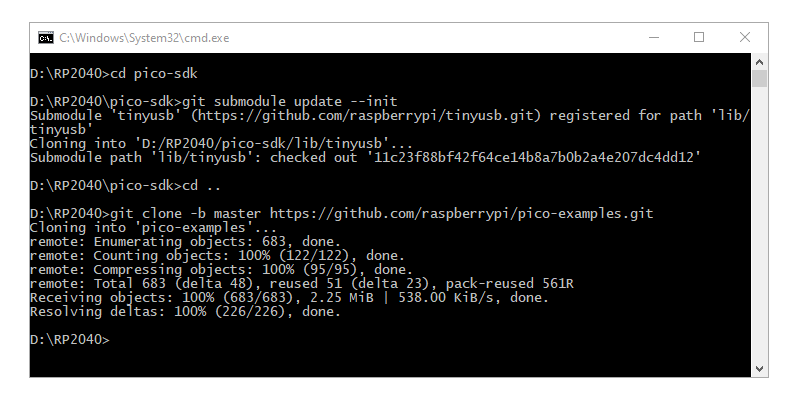
Download the Raspberry Pi Pico SDK and Examples
Create a new folder and open Command Prompt (cmd.exe) at that location. Run the below commands in a sequence.
D:\RP2040> git clone -b master https://github.com/raspberrypi/pico-sdk.git
D:\RP2040> cd pico-sdk
D:\RP2040\pico-sdk> git submodule update --init
D:\RP2040\pico-sdk> cd ..
D:\RP2040> git clone -b master https://github.com/raspberrypi/pico-examples.git
Step 1 : Download the Raspberry Pi Pico SDK and Examples Step 2 : Download the Raspberry Pi Pico SDK and Examples Step 3 : Download the Raspberry Pi Pico SDK and Examples Step 4 : Download the Raspberry Pi Pico SDK and Examples
Building the Raspberry Pi Pico SDK and Examples
- Open the Visual Studio 2019 Developer Command Prompt
- Navigate to the SDK download location
- Add the environment variable with the path of the
pico-sdk - Close the Command Prompt
 ** Visual Studio 2019 Developer Command Prompt v16.9.6
 ** Copyright (c) 2021 Microsoft Corporation

 C:\Program Files (x86)\Microsoft Visual Studio\2019\BuildTools>cd /D D:RP2040
 D:\RP2040>setx PICO_SDK_PATH "D:\RP2040\pico-sdk"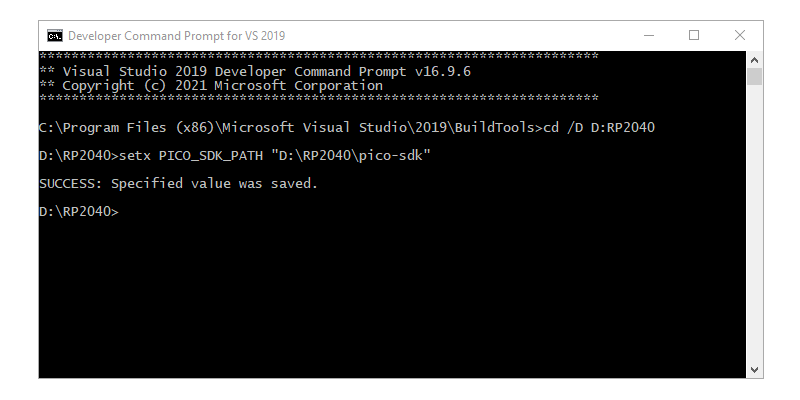
- Open a new Visual Studio 2019 Developer Command Prompt
- Navigate to the SDK download location
- Navigate to
pico-examples - Create a
buildfolder - Navigate to
build
 ** Visual Studio 2019 Developer Command Prompt v16.9.6
 ** Copyright (c) 2021 Microsoft Corporation

 C:\Program Files (x86)\Microsoft Visual Studio\2019\BuildTools>cd /D D:RP2040
 D:\RP2040>cd pico-examples
 D:\RP2040\pico-examples>mkdir build
 D:\RP2040\pico-examples>cd build
 D:\RP2040\pico-examples\build>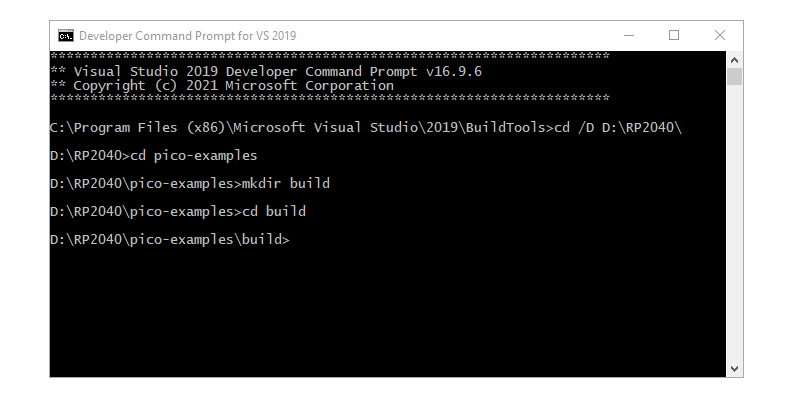
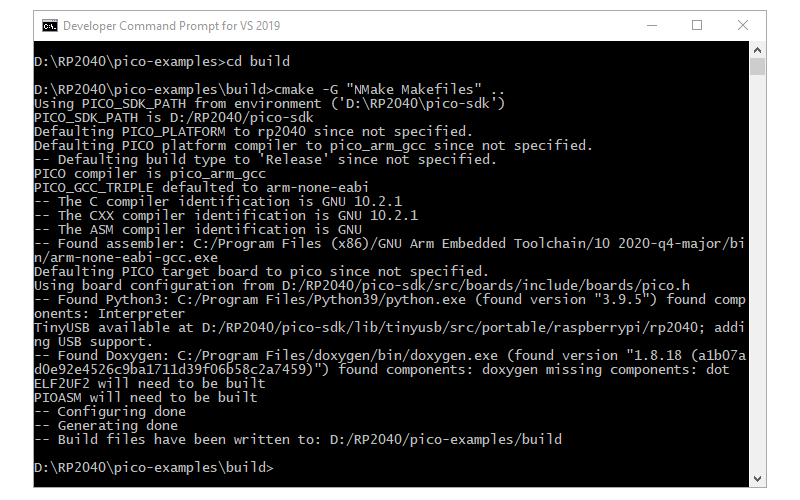
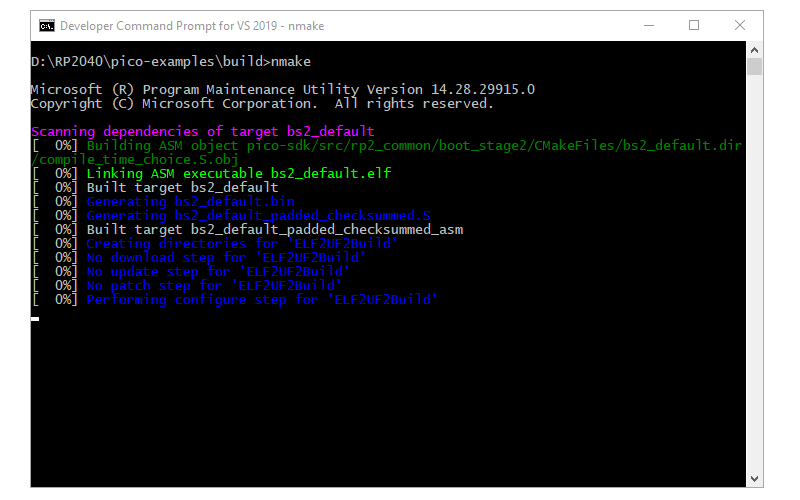
- Run
cmake -G "NMake Makefiles" .. - Run
nmake - This will produce ELF, bin, and uf2 file for each example project
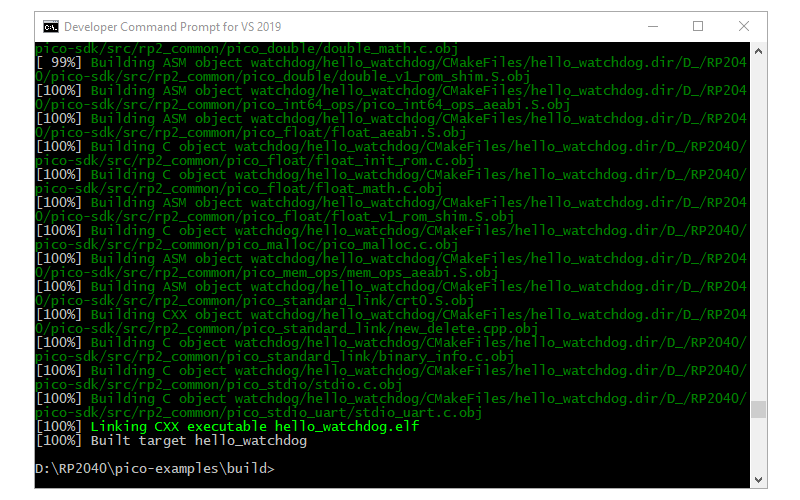
D:\RP2040\pico-examples\build>cmake -G "NMake Makefiles" ..
D:\RP2040\pico-examples\build>nmake
Running cmake for Raspberry Pi Pico SDK and Examples Running nmake for Raspberry Pi Pico SDK and Examples Successful Build Raspberry Pi Pico SDK and Examples
Setting Up Visual Studio Code IDE
- Open a new Visual Studio 2019 Developer Command Prompt
- Run the below command to open Visual Studio Code
D:\RP2040\pico-examples\build>code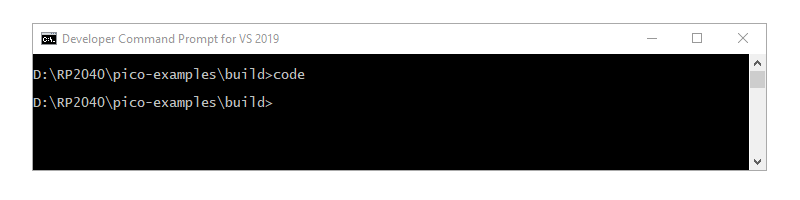
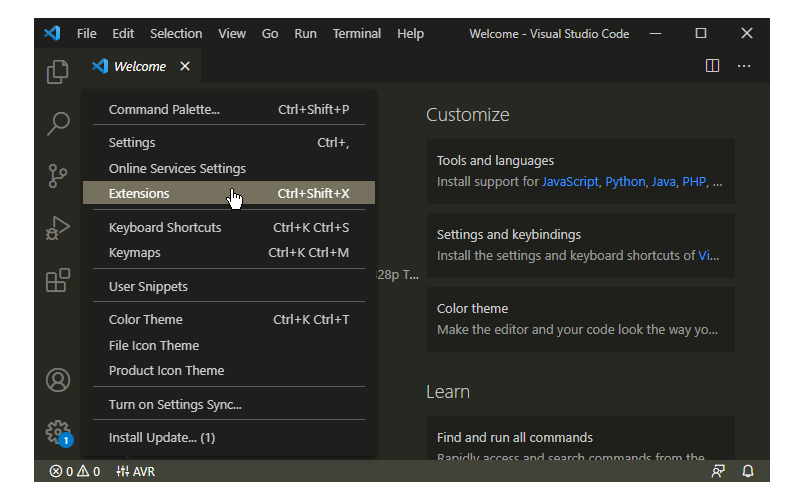
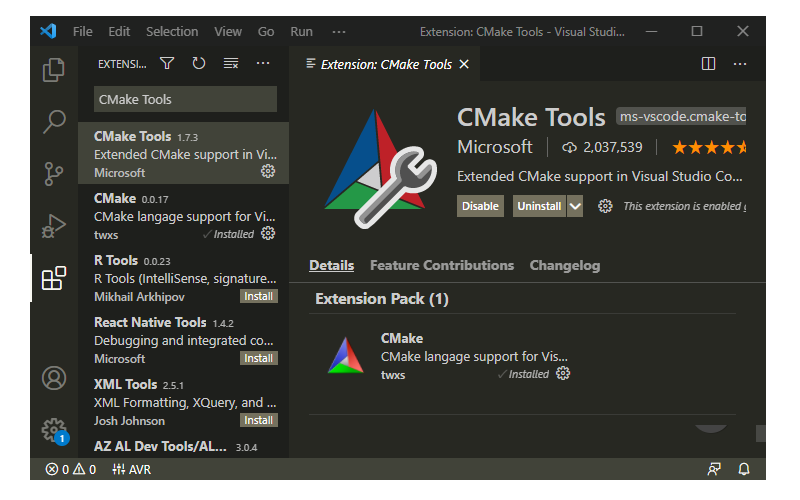
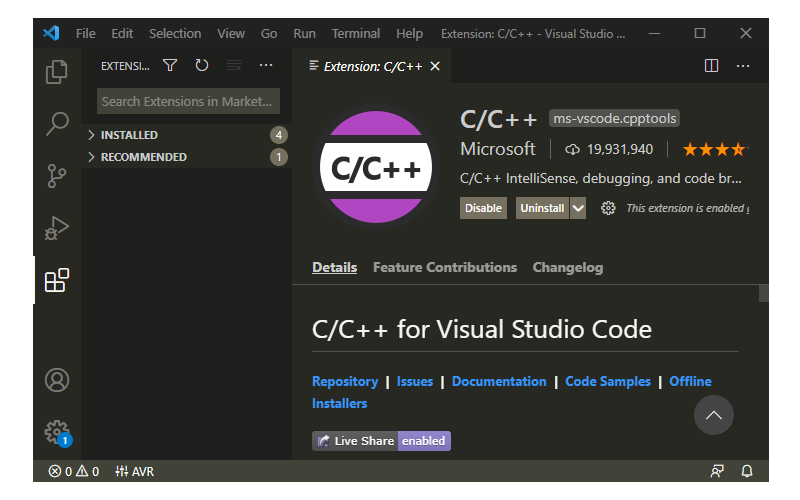
- Open Extensions
Ctrl+Shift+X - Install
CMake ToolsExtension by Microsoft - Install
C/C++Extension by Microsoft
Install Extension in Visual Studio Code Install CMake Tools Extension Install C/C++ Extension
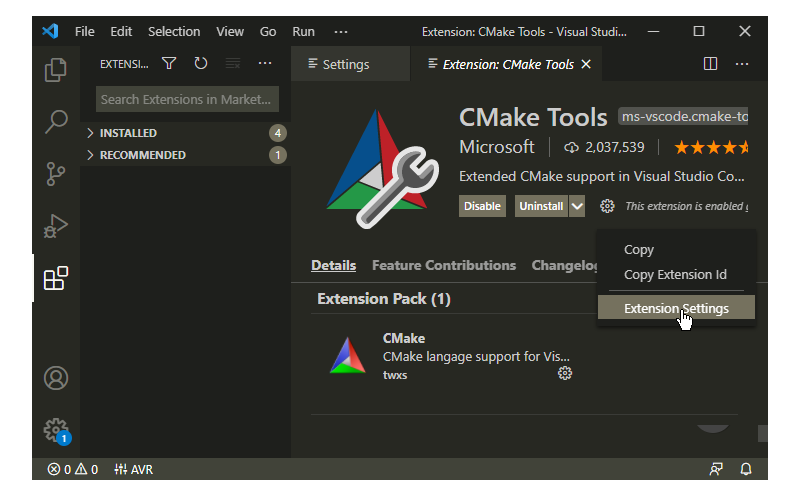
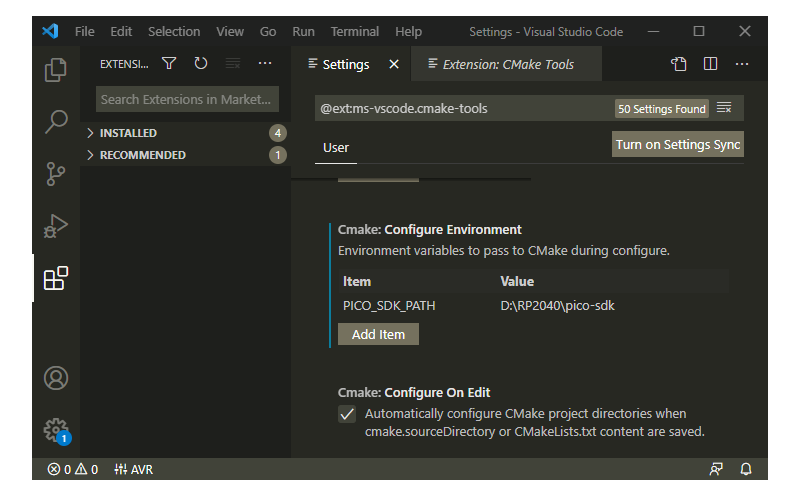
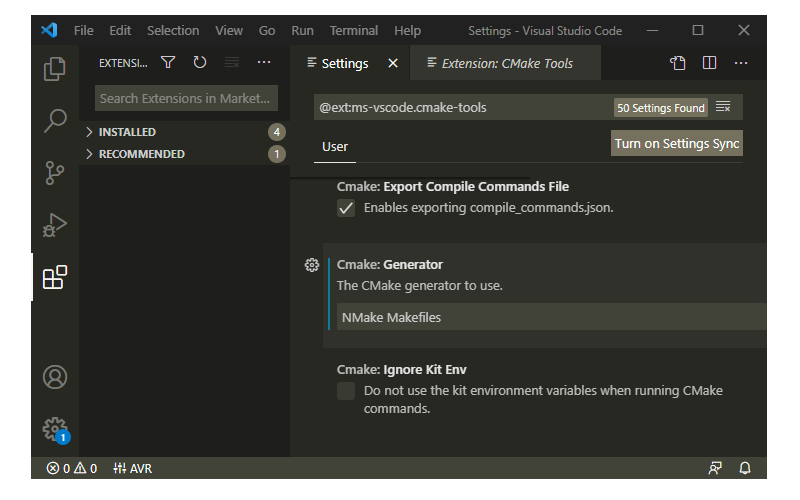
- Open CMake Tools Extension Settings
- Scroll Down
- Add Cmake: Configure Environment Item as
PICO_SDK_PATH - Add Cmake: Configure Environment Value as
D:\RP2040\pico-sdk - Scroll Down
- Add Cmake: Generator as
NMake Makefiles
CMake Tools Extension Settings in Visual Studio Code Add CMake Configure Environment Path Add CMake Generator Name
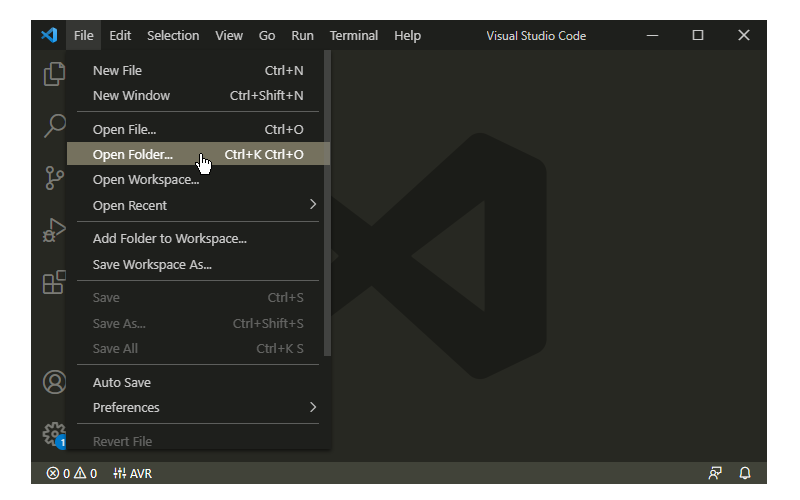
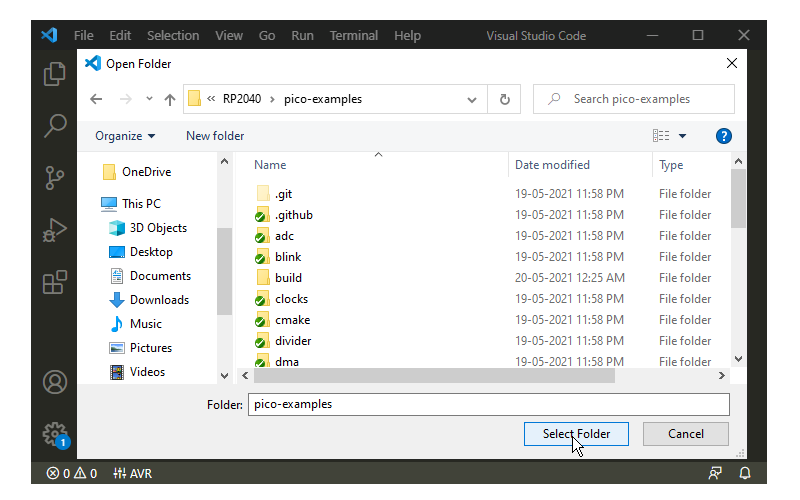
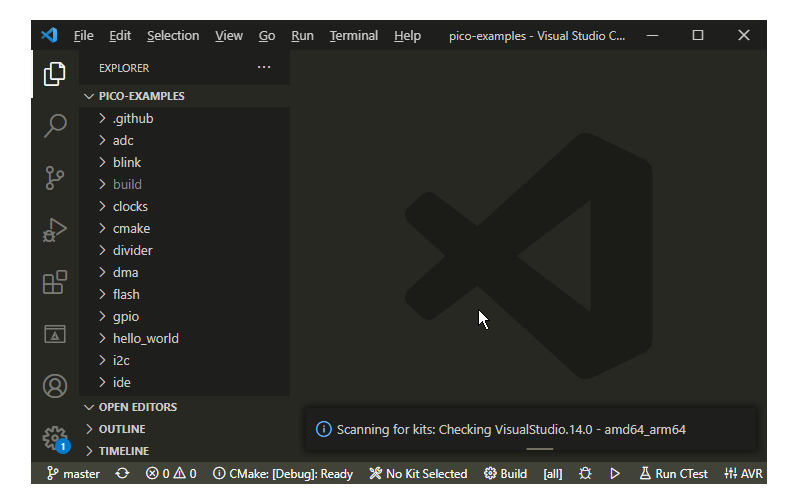
- Add Folder
pico-examplesto Visual Studio Code - Visual Studio Code will scan for Kits
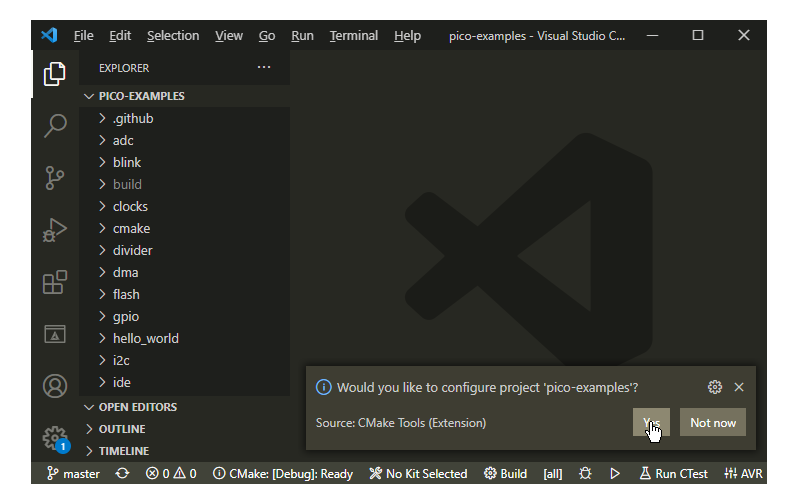
- Select ‘Yes’ when asked: Would you like to configure project
pico-examples? - Select ‘Yes’ if you like to configure the project upon opening
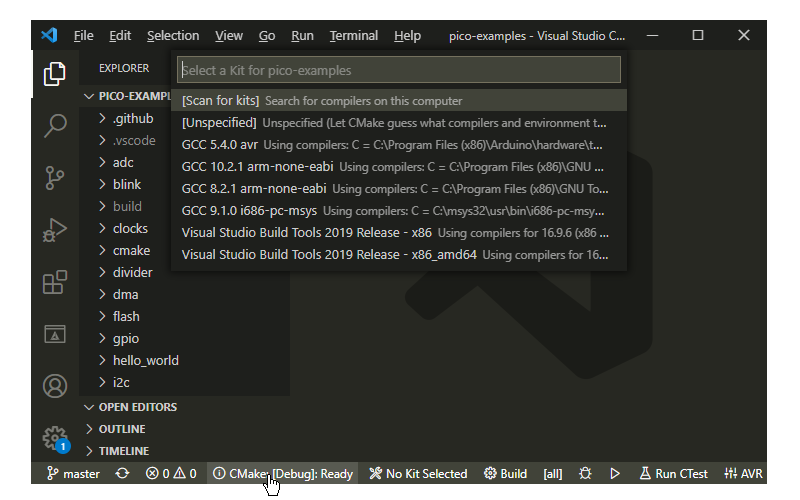
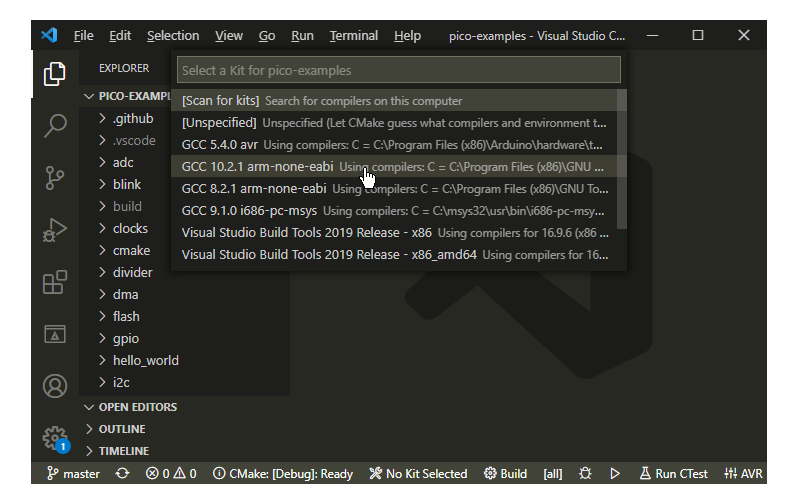
- Click CMake in the bottom bar to select the Kit for pico-examples
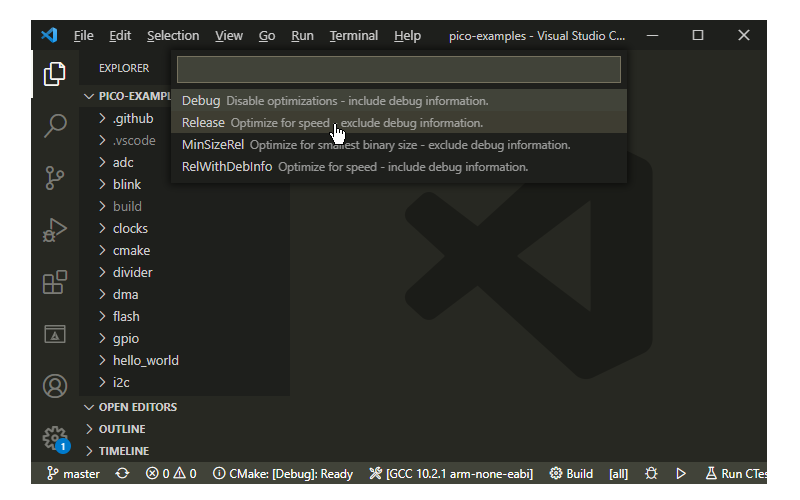
- Select Debug / Release based on your preference
- Visual Studio Code will save all file and configure the project
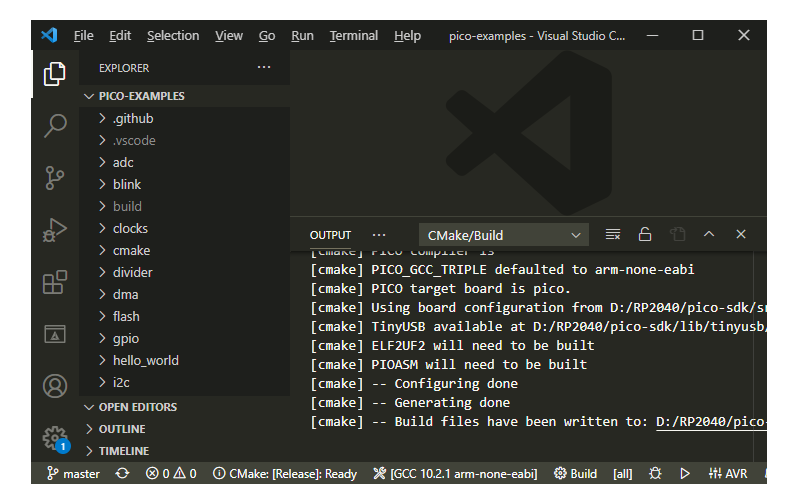
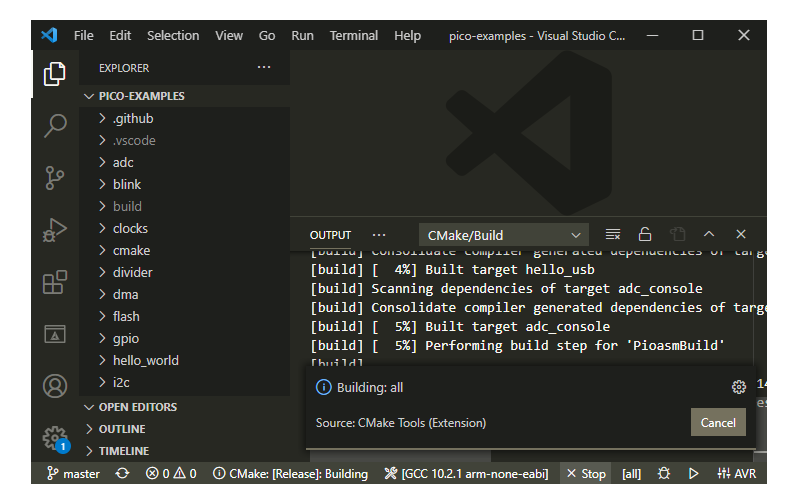
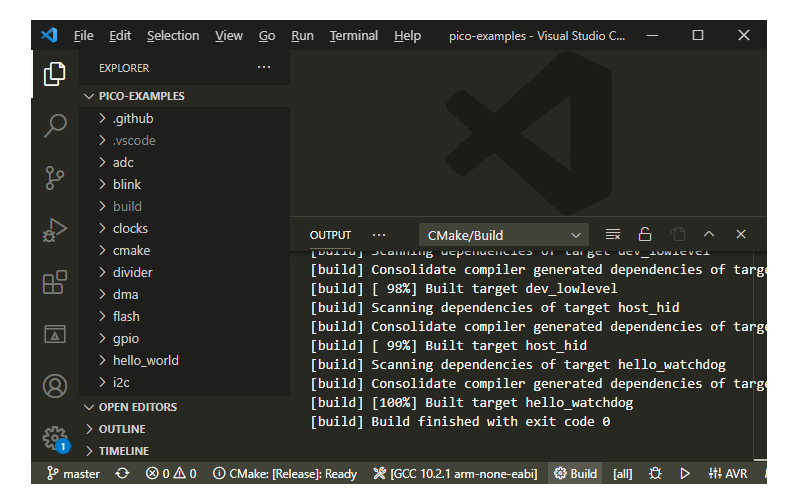
- Click on Build to build all examples
- If no error Build will finish with exit code 0
Open pico-examples Folder in Visual Studio Code Open pico-examples Folder in Visual Studio Code Folder Loading pico-examples in Visual Studio Code Configure Project Automatic Project Configuration in Visual Studio Code Click on CMake in Bottom Bar to Select Kit for pico-examples Select GCC 10.2.1 arm-non-eabi Select Release / Debug Build Type CMake Configuration Starts CMake Configuration Finished Click Build Build Starts Build Succeed


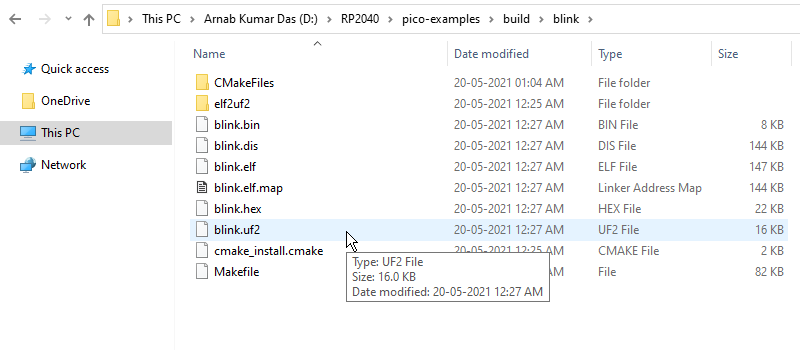
- Navigate to the folder
pico-examples\build\blink - Successful Build will generate the above artifacts
Flashing the Raspberry Pi Pico
- Push and hold the BOOTSEL button (white colour near USB port)
- Plug the Pico into the USB port of the Windows 10 Computer
- Raspberry Pi Pico will mount as a Mass Storage Device called RPI-RP2
- Drag and Drop or Copy and Paste the
blink.uf2UF2 Binary into the RPI-RP2 Drive - Pico will Reboot automatically, and the on-board Green LED should start Blinking
27 Comments
Marcus · May 22, 2021 at 10:57 pm
Thank you for your Toolchain Setup in Windows 10 instuktion. Best! It works 😁 very well.
Crazy Engineer · May 22, 2021 at 11:02 pm
Thank You for choosing this guide. Stay tuned for the whole series on Raspberry Pi Pico
Gopalakrishnan Narayanan · July 3, 2021 at 2:05 pm
2 errors in this
>>>>>>Cmake only 3.19.8 is working with the above tutorials.
>>>>>Open CMake Tools Extension Settings
Scroll Down
Add Cmake: Configure Environment Item as PICO_SDK_PATH
Add Cmake: Configure Environment Value as D:\RP2040\pico-sdk
Scroll Down
>>>>Add Cmake: Generator as NMake Makefile shoudl be Generator as NMake Makefiles
The image is showing the correct command
I would thank you for a well wriiten tutorial
Crazy Engineer · July 3, 2021 at 3:07 pm
The latest version of all software should work fine.
Gopalakrishnan Narayanan · July 3, 2021 at 2:06 pm
2 errors in this
>>>>>>Cmake only 3.19.8 is working with the above tutorials.
>>>>Add Cmake: Generator as NMake Makefile shoudl be Generator as NMake Makefiles
The image is showing the correct command
I would thank you for a well wriiten tutorial
Crazy Engineer · July 3, 2021 at 2:54 pm
Hi, There is no CMake version dependency as such, The tutorial is written and tested with the latest version of Windows 10 and all other supporting software including CMake. Please check your system dependencies.
Thanks, NMake Makefiles command is updated.
Steve D. · July 20, 2021 at 2:03 am
Hi,
Great tutorial on getting everything set up, but I’m having difficulty building the SDK examples… The examples up to and including blink compile and link correctly, but hello_serial doesn’t want to link: I get the following message;
AR10B2~1.EXE: error: ´╗┐CMakeFiles/hello_serial.dir/hello_serial.c.obj: No such file or directory
NMAKE : fatal error U1077: ‘C:\PROGRA~2\GNUARM~1\102020~1\bin\AR10B2~1.EXE’ : return code ‘0x1’
Stop.
It seems to be a path setting or some such thing – the file that is supposedly not found exists, but is in another directory (C:\SW_Projects\pico-examples\build\hello_world\serial\CMakeFiles\hello_serial.dir). The tool seems to be searching for it elsewhere…
Any idea where I should look?
Thanks,
Steve
Crazy Engineer · July 21, 2021 at 10:45 am
Hi, I am not sure what could be wrong. My guess is path related issues. Can you try configuring the sdk exactly like in the tutorial. Keep the path similar.
Hung · September 4, 2021 at 11:05 am
i have same your error, could u tell me how to fix it?
Crazy Engineer · September 4, 2021 at 4:06 pm
USE CMAKE VERSION 3.20.X
Steve D. · July 21, 2021 at 8:55 am
Hi,
I’ve been trying to install and compile the SDK but keep running into an error which seems to be related to a missing environment variable or something: The compilation seems to progress correctly, but the error occurs when linking – I get the following error message:
[ 84%] Linking CXX executable main.elf
AR10B2~1.EXE: error: ´╗┐CMakeFiles/main.dir/main.c.obj: No such file or directory
NMAKE : fatal error U1077: ‘C:\PROGRA~2\GNUARM~1\102020~1\bin\AR10B2~1.EXE’ : return code ‘0x1’
Stop.
The thing is, the file main.c.obj *does* exist. It is in the directory CMakeFiles contained within the build sub-directory (the directory from which the command “nmake” was executed).
Any ideas what is wrong? I’ve seen this error on several occasions, but not always – some programs compile, others not.
Thanks for your advice,
Steve
Steve D. · July 21, 2021 at 8:01 pm
Hi (again),
Sorry for the redundant posting – it looked like the original post disappeared, so I repeated the post (with a different project).
I’ve further isolated the issue to the following line in the build.make file (it’s a *very* long line …):
The build.make file is in the following location:
C:\SW_Projects\pico_LCD\build\CMakeFiles\main.dir
main.elf: CMakeFiles\main.dir\objects1.rsp
@$(CMAKE_COMMAND) -E cmake_echo_color –switch=$(COLOR) –green –bold –progress-dir=C:\SW_Projects\pico_LCD\build\CMakeFiles –progress-num=$(CMAKE_PROGRESS_72) “Linking CXX executable main.elf”
C:\PROGRA~2\GNUARM~1\102020~1\bin\AR10B2~1.EXE -mcpu=cortex-m0plus -mthumb -O3 -DNDEBUG -Wl,–build-id=none –specs=nosys.specs -Wl,–wrap=sprintf -Wl,–wrap=snprintf -Wl,–wrap=vsnprintf -Wl,–wrap=__clzsi2 -Wl,–wrap=__clzdi2 -Wl,–wrap=__ctzsi2 -Wl,–wrap=__ctzdi2 -Wl,–wrap=__popcountsi2 -Wl,–wrap=__popcountdi2 -Wl,–wrap=__clz -Wl,–wrap=__clzl -Wl,–wrap=__clzll -Wl,–wrap=__aeabi_idiv -Wl,–wrap=__aeabi_idivmod -Wl,–wrap=__aeabi_ldivmod -Wl,–wrap=__aeabi_uidiv -Wl,–wrap=__aeabi_uidivmod -Wl,–wrap=__aeabi_uldivmod -Wl,–wrap=__aeabi_dadd -Wl,–wrap=__aeabi_ddiv -Wl,–wrap=__aeabi_dmul -Wl,–wrap=__aeabi_drsub -Wl,–wrap=__aeabi_dsub -Wl,–wrap=__aeabi_cdcmpeq -Wl,–wrap=__aeabi_cdrcmple -Wl,–wrap=__aeabi_cdcmple -Wl,–wrap=__aeabi_dcmpeq -Wl,–wrap=__aeabi_dcmplt -Wl,–wrap=__aeabi_dcmple -Wl,–wrap=__aeabi_dcmpge -Wl,–wrap=__aeabi_dcmpgt -Wl,–wrap=__aeabi_dcmpun -Wl,–wrap=__aeabi_i2d -Wl,–wrap=__aeabi_l2d -Wl,–wrap=__aeabi_ui2d -Wl,–wrap=__aeabi_ul2d -Wl,–wrap=__aeabi_d2iz -Wl,–wrap=__aeabi_d2lz -Wl,–wrap=__aeabi_d2uiz -Wl,–wrap=__aeabi_d2ulz -Wl,–wrap=__aeabi_d2f -Wl,–wrap=sqrt -Wl,–wrap=cos -Wl,–wrap=sin -Wl,–wrap=tan -Wl,–wrap=atan2 -Wl,–wrap=exp -Wl,–wrap=log -Wl,–wrap=ldexp -Wl,–wrap=copysign -Wl,–wrap=trunc -Wl,–wrap=floor -Wl,–wrap=ceil -Wl,–wrap=round -Wl,–wrap=sincos -Wl,–wrap=asin -Wl,–wrap=acos -Wl,–wrap=atan -Wl,–wrap=sinh -Wl,–wrap=cosh -Wl,–wrap=tanh -Wl,–wrap=asinh -Wl,–wrap=acosh -Wl,–wrap=atanh -Wl,–wrap=exp2 -Wl,–wrap=log2 -Wl,–wrap=exp10 -Wl,–wrap=log10 -Wl,–wrap=pow -Wl,–wrap=powint -Wl,–wrap=hypot -Wl,–wrap=cbrt -Wl,–wrap=fmod -Wl,–wrap=drem -Wl,–wrap=remainder -Wl,–wrap=remquo -Wl,–wrap=expm1 -Wl,–wrap=log1p -Wl,–wrap=fma -Wl,–wrap=__aeabi_lmul -Wl,–wrap=__aeabi_fadd -Wl,–wrap=__aeabi_fdiv -Wl,–wrap=__aeabi_fmul -Wl,–wrap=__aeabi_frsub -Wl,–wrap=__aeabi_fsub -Wl,–wrap=__aeabi_cfcmpeq -Wl,–wrap=__aeabi_cfrcmple -Wl,–wrap=__aeabi_cfcmple -Wl,–wrap=__aeabi_fcmpeq -Wl,–wrap=__aeabi_fcmplt -Wl,–wrap=__aeabi_fcmple -Wl,–wrap=__aeabi_fcmpge -Wl,–wrap=__aeabi_fcmpgt -Wl,–wrap=__aeabi_fcmpun -Wl,–wrap=__aeabi_i2f -Wl,–wrap=__aeabi_l2f -Wl,–wrap=__aeabi_ui2f -Wl,–wrap=__aeabi_ul2f -Wl,–wrap=__aeabi_f2iz -Wl,–wrap=__aeabi_f2lz -Wl,–wrap=__aeabi_f2uiz -Wl,–wrap=__aeabi_f2ulz -Wl,–wrap=__aeabi_f2d -Wl,–wrap=sqrtf -Wl,–wrap=cosf -Wl,–wrap=sinf -Wl,–wrap=tanf -Wl,–wrap=atan2f -Wl,–wrap=expf -Wl,–wrap=logf -Wl,–wrap=ldexpf -Wl,–wrap=copysignf -Wl,–wrap=truncf -Wl,–wrap=floorf -Wl,–wrap=ceilf -Wl,–wrap=roundf -Wl,–wrap=sincosf -Wl,–wrap=asinf -Wl,–wrap=acosf -Wl,–wrap=atanf -Wl,–wrap=sinhf -Wl,–wrap=coshf -Wl,–wrap=tanhf -Wl,–wrap=asinhf -Wl,–wrap=acoshf -Wl,–wrap=atanhf -Wl,–wrap=exp2f -Wl,–wrap=log2f -Wl,–wrap=exp10f -Wl,–wrap=log10f -Wl,–wrap=powf -Wl,–wrap=powintf -Wl,–wrap=hypotf -Wl,–wrap=cbrtf -Wl,–wrap=fmodf -Wl,–wrap=dremf -Wl,–wrap=remainderf -Wl,–wrap=remquof -Wl,–wrap=expm1f -Wl,–wrap=log1pf -Wl,–wrap=fmaf -Wl,–wrap=malloc -Wl,–wrap=calloc -Wl,–wrap=free -Wl,–wrap=memcpy -Wl,–wrap=memset -Wl,–wrap=__aeabi_memcpy -Wl,–wrap=__aeabi_memset -Wl,–wrap=__aeabi_memcpy4 -Wl,–wrap=__aeabi_memset4 -Wl,–wrap=__aeabi_memcpy8 -Wl,–wrap=__aeabi_memset8 -Wl,-Map=main.elf.map -Wl,–script=C:/SW_Projects/pico-sdk/src/rp2_common/pico_standard_link/memmap_default.ld -Wl,–gc-sections -Wl,–wrap=printf -Wl,–wrap=vprintf -Wl,–wrap=puts -Wl,–wrap=putchar -Wl,–wrap=getchar @CMakeFiles\main.dir\objects1.rsp -o main.elf examples\libexamples.a lib\LCD\libLCD.a lib\OLED\libOLED.a lib\Infrared\libInfrared.a lib\Icm20948\libIcm20948.a lib\GUI\libGUI.a lib\Fonts\libFonts.a lib\Config\libConfig.a pico-sdk\src\rp2_common\boot_stage2\bs2_default_padded_checksummed.S
CMAKE_COMMAND is defined:
CMAKE_COMMAND = “C:\Program Files\CMake\bin\cmake.exe”
I’m trying to find additional resources to pinpoint the issue, but if you have any ideas it would be much appreciated.
Thanks,
Steve
Thomas · August 19, 2021 at 3:24 am
@Steve, did you get a solution for this?? I have the same problem, following the pico-examples tutorial and I am getting stuck basicalla with the same error
Crazy Engineer · August 20, 2021 at 10:23 am
I recommend you all to use the same path as in the tutorial and use the example file attached in the tutorial for creating new project.
Doug Gorgen · August 21, 2021 at 2:50 am
Hi Crazy,
Thanks for the great tutorial. The problem we are having is in the file objects1.rsp. Thanks @Steve for pointing us in the right direction. This file starts with 3 hex characters 0xEF, 0xBB 0xBF. These are the little squiggles shown in the error message before the word CMakefiles… I edited out these three hex characters from all of the objects1.rsp files and now the builds complete and I have uf2 files to try out.
Now the question is: Is this a bug in the generator “NMake Maefiles” or is there something in our environment that is causing the generator to prefix all the objects1.rsp files with these 3 characters? Any ideas?
I’m a total newbie to this environment and cmake, so your help would be greatly appreciated.
Doug
Crazy Engineer · August 21, 2021 at 4:36 pm
Hi Doug and Others,
I have checked my build files. I do not see the 3 hex characters 0xEF, 0xBB 0xBF in objects1.rsp files.
I assume the reason for the build failure is these hex codes. It could be a bug in the NMake Makefiles.
Can you try using another version?
Thanks and Regards,
Arnab
Doug Gorgen · August 22, 2021 at 12:21 pm
Hi Arnab,
Thanks for checking into this. After further investigation, I found out that those three hex characters are called a Byte Order Marker or BOM. It is there to support utf-8 encoding. There is a lot of discussion on github, Visual Studio, NMake, etc, about adding it, and removing it from files.
The editors I’ve tried will not show the 3 characters unless you put the editor into hex or binary mode. I use vim and vim –b objects1.rsp shows the BOM characters.
If you use Notepad to edit the file you won’t see the three leading characters, but there will be a little indicator in the lower right hand corner about how the file is encoded. If it has a BOM, it will show there. You can then save-as the file without the BOM by specifying utf-8 without BOM in the save-as menu.
Here is a simple powershell script to remove the BOMs. It would be better if we could do the git clone and download the files without the BOM, but I haven’t figured that out yet. I also don’t know why the objects1.rsp file is the only one that “NMake Makefiles” creates with a BOM. If anyone knows how to do the git without BOMs, or the “NMake Makefiles” without the BOMs, please post.
Thanks for your help and terrific guide.
Doug
#
# Put this powershell script into the pico-examples or build directory with some name like ccpo.ps1
# Usage: powershell .\ccpo.ps1
#
$dir = ‘.\’
get-childitem $dir -recurse -file -name | where{$_ -match ‘objects1.rsp’ } | out-file file.txt
$list=get-content file.txt
foreach ($filename in $list) {
$out = get-content $filename
$outtext = $out -join “`n”
$xfilename=$pwd.path+’\’+$filename
write-host xfilename $xfilename
$Utf8NoBomEncoding = New-Object System.Text.UTF8Encoding $False
[System.IO.File]::WriteAllLines($xfilename, $outtext, $Utf8NoBomEncoding)
}
Crazy Engineer · August 23, 2021 at 9:36 pm
Hi Doug,
I have viewed my files in vim and notepad++ in hex format and the objects1.rsp doesn’t contain any of the BOMs
I am not sure what is the main reason behind this.
Thanks,
Arnab
Doug Gorgen · August 24, 2021 at 12:49 pm
Hi Arnab,
Thanks for your continued support and further checking into this. I ran a lot more experiments and found that the previous version of cmake, 3.20.5, does not create BOMs. only the latest version of cmake, 3.21.1, creates the BOMs. The version of cmake in Visual Studio is 3.20.21032501, and it too does not create files with BOMs.
Please check the version of cmake that you are running. If it is 3.21.1, then the problem still lies elsewhere.
Meanwhile I have submitted a “Question” to the Arm community, and will file a bug report if there is no resolution to the question.
Thanks again for your support,
Doug
Laurence Arbin · August 22, 2021 at 9:16 pm
@Doug Gorgen – Thanks for the PowerShell. I was getting the same problem trying to follow this tutorial: https://www.youtube.com/watch?v=mUF9xjDtFfY&t=357s
You PowerShell solved the issue.
Laurence
Doug Gorgen · August 24, 2021 at 8:42 pm
Hi Laurence,
Thanks for the update. If you don’t need the features in the latest cmake, you might want to try downgrading cmake to the previous version 3.20.5. It worked for me and did not generate the files with BOMs.
Doug
Crazy Engineer · August 27, 2021 at 3:21 pm
Hi Doug,
YOU ARE ABSOLUTELY RIGHT
I CHECKED MY LOCAL SETUP.
Thanks
Gautom Bose · November 29, 2021 at 6:29 am
When I try to cmake by typing into (c:\rp2040\pico-examples\buid)> cmake -G “NMake Makefiles” I get the following error ..
PICO_SDK_PATH is c:/rp2040/pico-sdk
PICO platform is rp2040
CMake error at CMakeLists.txt:6(project)
‘nmake’ ‘-?’
failed with: The system cannot find the file s[pecified. Configuring i s incomplete. errors occured!
Todd · May 17, 2022 at 2:31 pm
Did you resolve this? I’m getting the same issue. Followed the tutorial and got it all to work ok. Came back to it a couple of days later and it’s no longer working, giving same error as you had.
Gautom Bose · November 29, 2021 at 6:37 am
CMakeLists.txt
cmake_minimum_required(VERSION 3.0 FATAL_ERROR)
add_library(unity STATIC “unity.c”)
install(TARGETS unity EXPORT unityConfig
ARCHIVE DESTINATION “${CMAKE_CURRENT_SOURCE_DIR}/${CMAKE_INSTALL_LIBDIR}”
LIBRARY DESTINATION “${CMAKE_CURRENT_SOURCE_DIR}/${CMAKE_INSTALL_LIBDIR}”
RUNTIME DESTINATION “${CMAKE_CURRENT_SOURCE_DIR}/${CMAKE_INSTALL_BINDIR}”
INCLUDES DESTINATION “${CMAKE_INSTALL_LIBDIR}”)
Jeffrey D Bloom · January 6, 2022 at 1:25 am
Is there any more recent update for this? I got stuck for the last 2 days and came to the same conclusion. There are 3 strange chars prepended to the start of the file names in objects.rsp file. If I use vim -b I can see the chars and remove them. As I manually fix each one, that elf file can then be generated. I am using CMake 3.22.1 and nmake 14.30.30706.0. I am very grateful for this thread ID’ing what those 3 chars mean. Without that I was lost. Is there any fix for this beyond using older version of CMake or the Powerscript?