Introduction
Raspberry Pi Pico is a tiny, fast, and versatile board built using RP2040, a brand new microcontroller chip designed by Raspberry Pi. RP2040 features a dual-core Arm Cortex-M0+ processor with 264KB internal RAM and support for up to 16MB of off-chip Flash. A wide range of flexible I/O options includes I2C, SPI, and uniquely Programmable I/O (PIO).
In this article, we will connect a Raspberry Pi Pico to a computer and learn how to build the SDK and flash an example program in it using C/C++. We will also see how to write the code in Visual Studio Code IDE.
What You Will Learn
- How to load the C/C++ firmware onto a Raspberry Pi Pico?
- How to program a Raspberry Pi Pico using C/C++?
- How to compile and build C/C++ SDK for Raspberry Pi Pico?
- How to compile and build C/C++ programs for Raspberry Pi Pico in Windows PC?
Prerequisite Hardware
- Raspberry Pi Pico
- Micro USB Cable
- Windows 10 Computer
Software Downloads
Download the Windows Executable Installer for each of the mentioned software in the list. The attached links will take you to the respective download pages.
- ARM GCC Compiler
Download the Windows 32-bit Installer (Signed for Windows 10 and later) - CMake
Download the Windows x64 Installer - Build Tools for Visual Studio 2019
Download the Online Installer - Python 3.9
Download Windows installer (64-bit) Stable Version - Git
Download 64-bit Git for Windows Setup - Visual Studio Code
Download Windows Installer (64-bit) - Doxygen (Optional)
Download the binary distribution for Windows
Software Installation
Follow the detailed installation guide in the following sequence and make sure not to miss any steps, especially match the checkboxes as shown in the below screenshots.
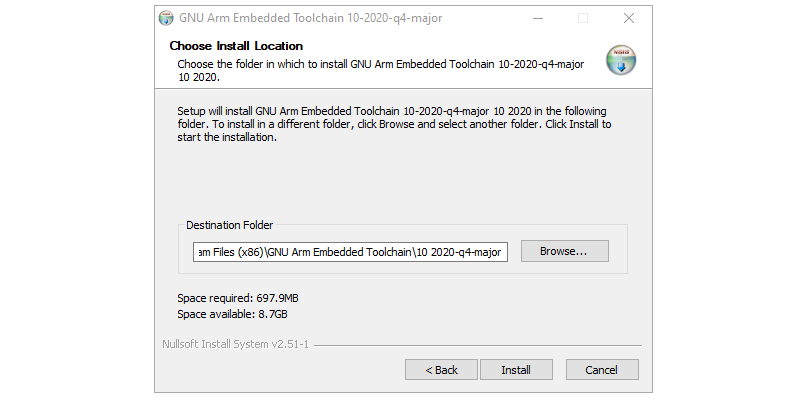
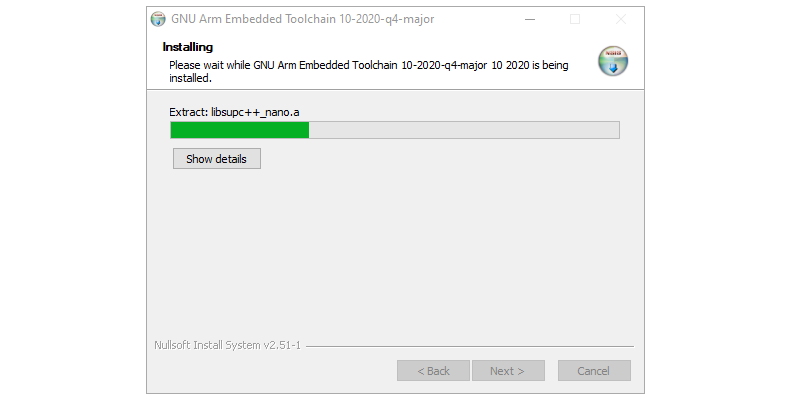
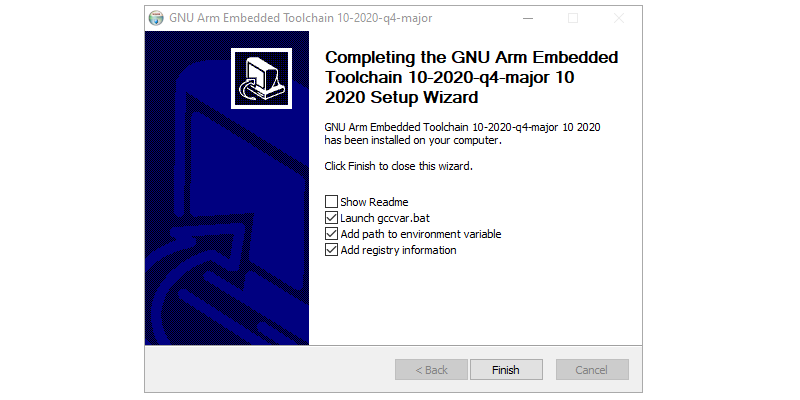
Installing ARM GCC Compiler
- Open the installer
- Use the default installation folder
- Add path to environment variable and add registry information

Step 1 : Installing ARM GCC Compiler Step 2 : Installing ARM GCC Compiler Step 3 : Installing ARM GCC Compiler Step 4 : Installing ARM GCC Compiler

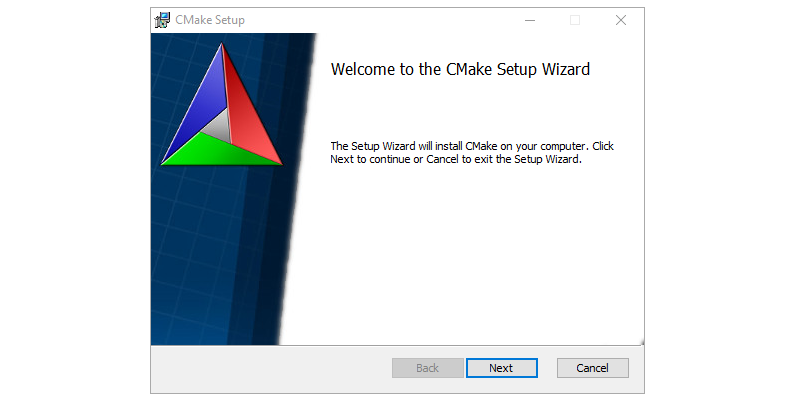
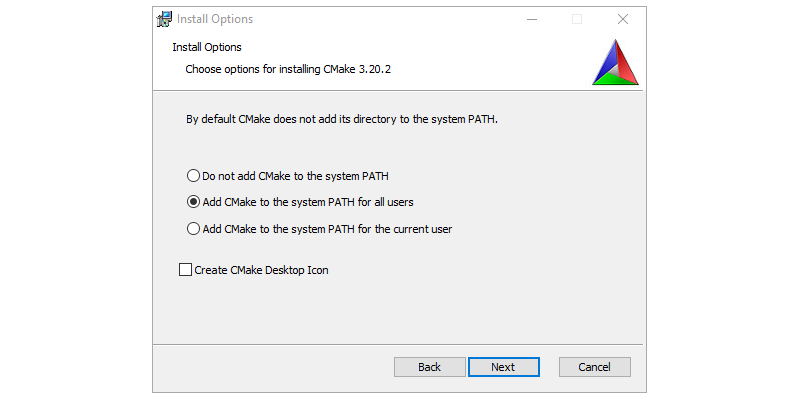
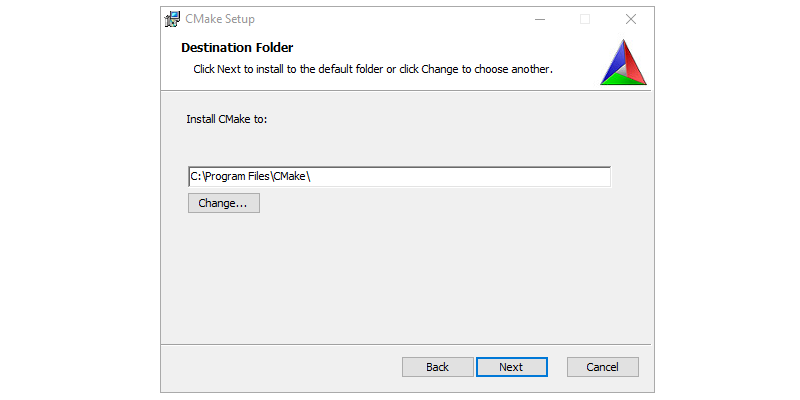
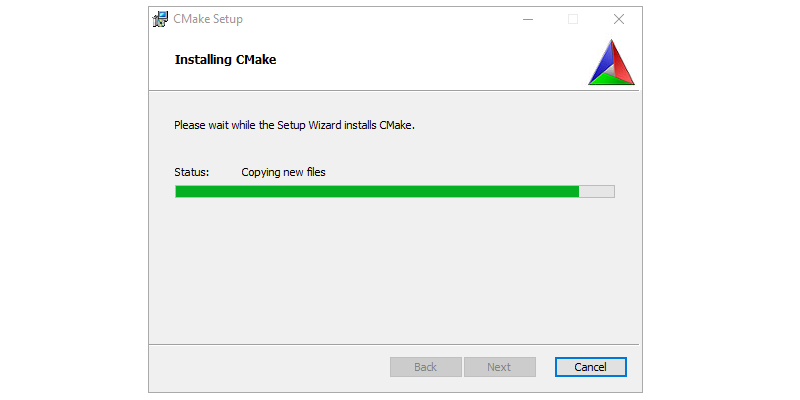
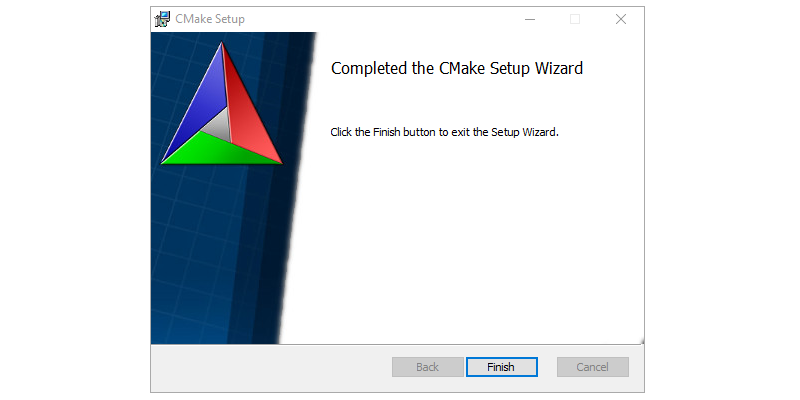
Installing CMAKE
- Open the installer
- Use the default installation folder
- Add CMake to the system PATH for all the users
Step 1 : Installing CMAKE Step 2 : Installing CMAKE Step 3 : Installing CMAKE Step 4 : Installing CMAKE Step 5 : Installing CMAKE
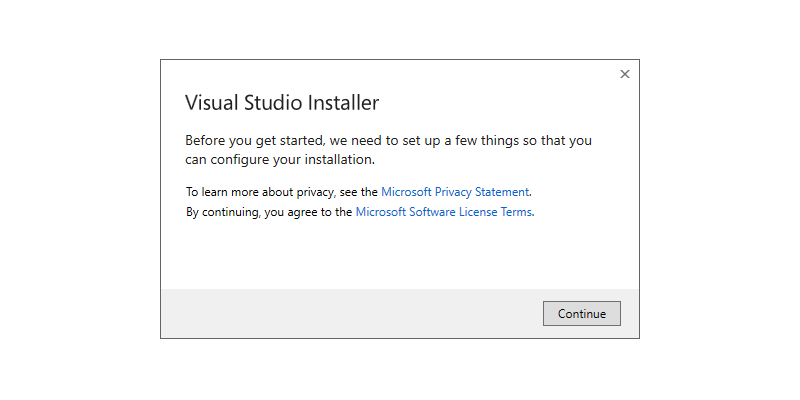
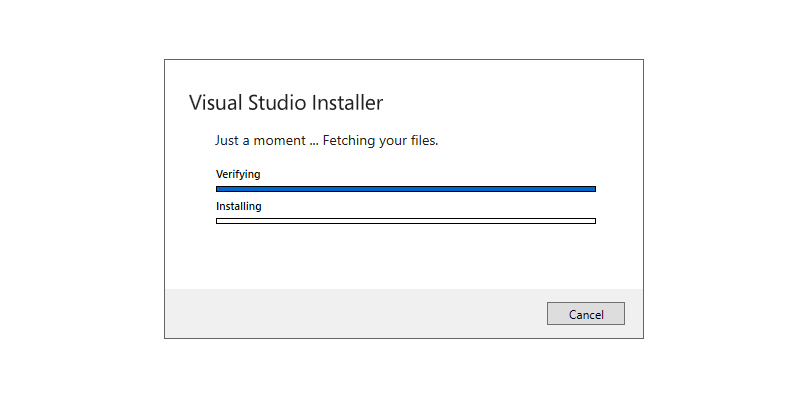
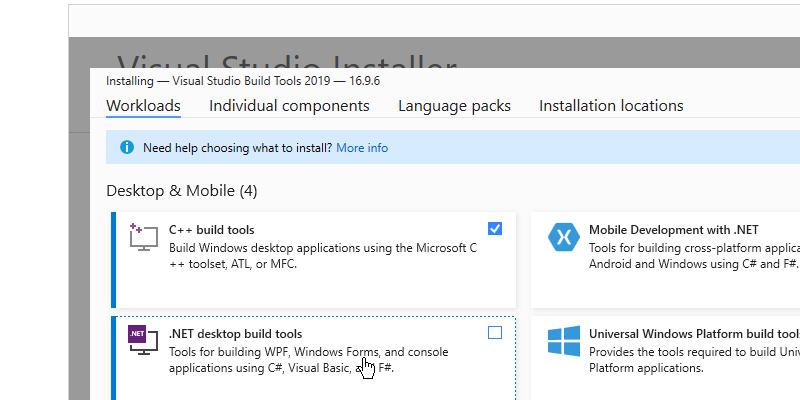
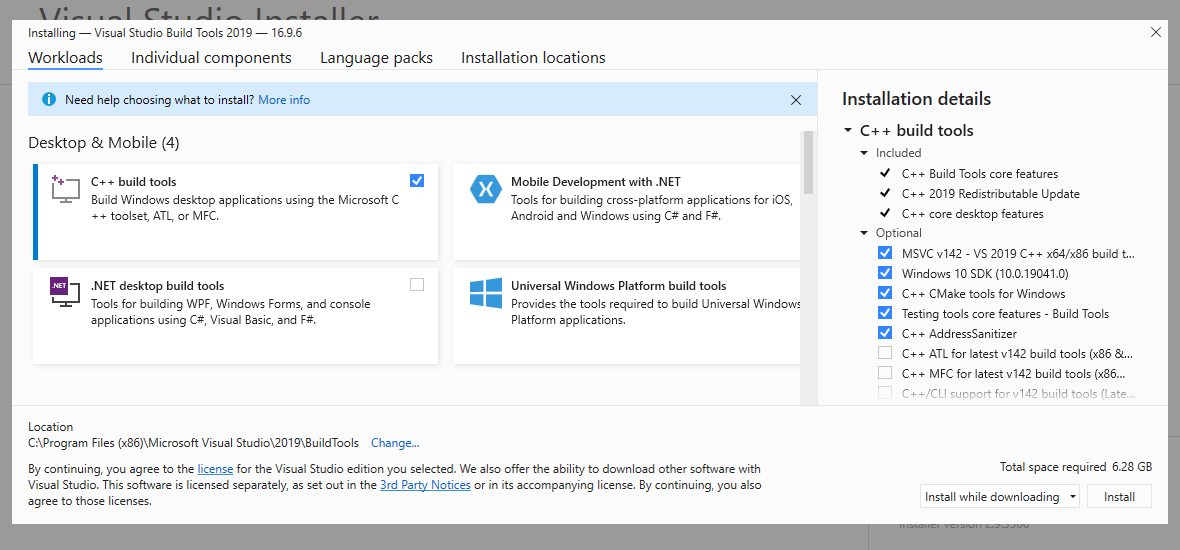
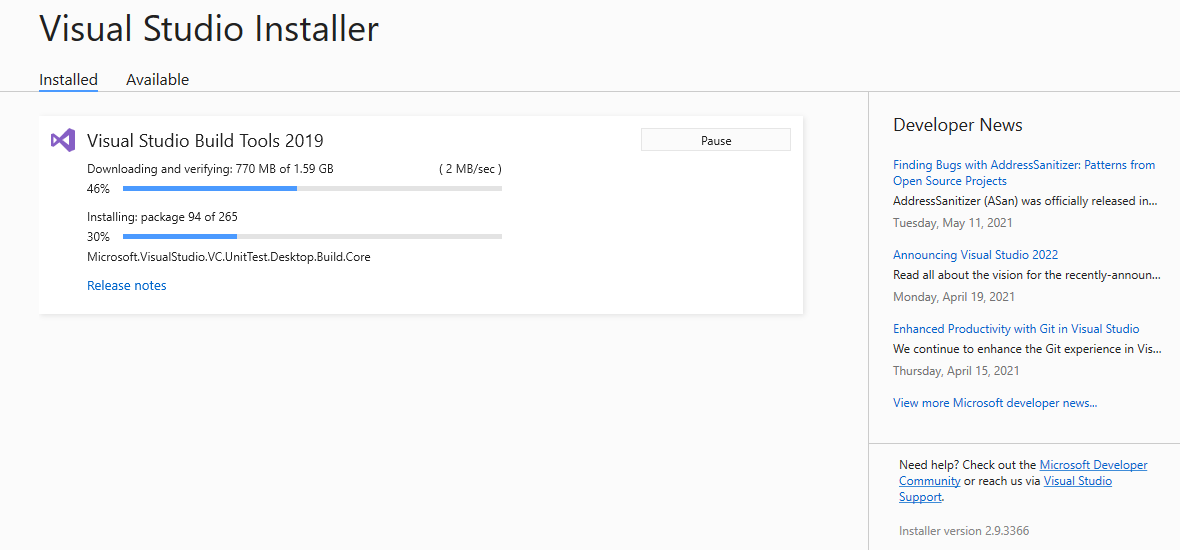
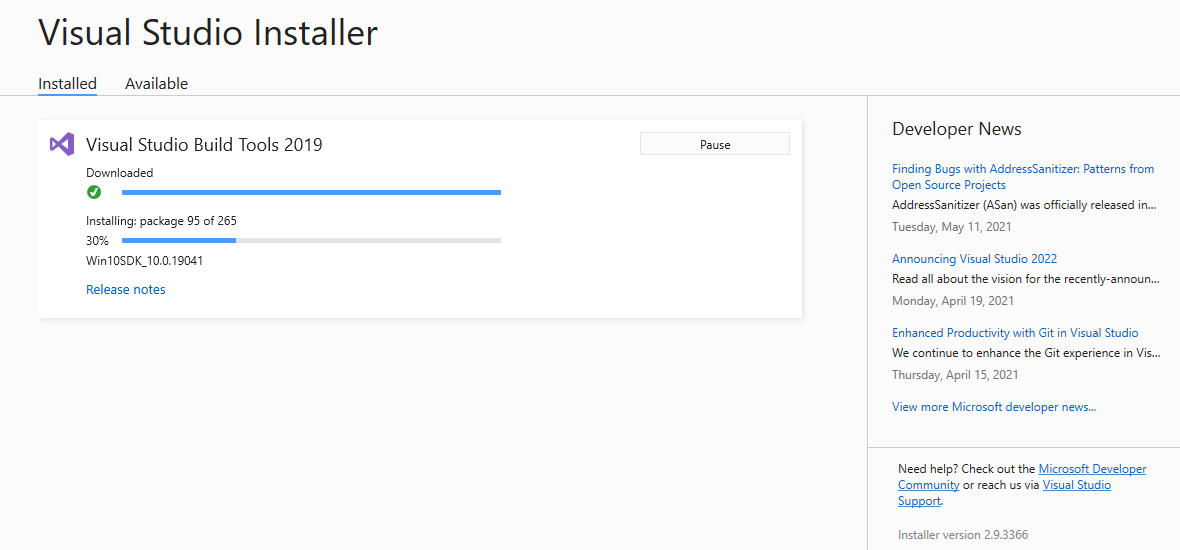
Installing Build Tools for Visual Studio 2019
- Open the installer
- Use the default installation folder
- Select the C++ Build Tools only
- Don’t change any other selection
Step 1 : Installing Build Tools for Visual Studio 2019 Step 2 : Installing Build Tools for Visual Studio 2019 Step 3 : Installing Build Tools for Visual Studio 2019 
Step 4 : Installing Build Tools for Visual Studio 2019 Step 5 : Installing Build Tools for Visual Studio 2019 Step 6 : Installing Build Tools for Visual Studio 2019
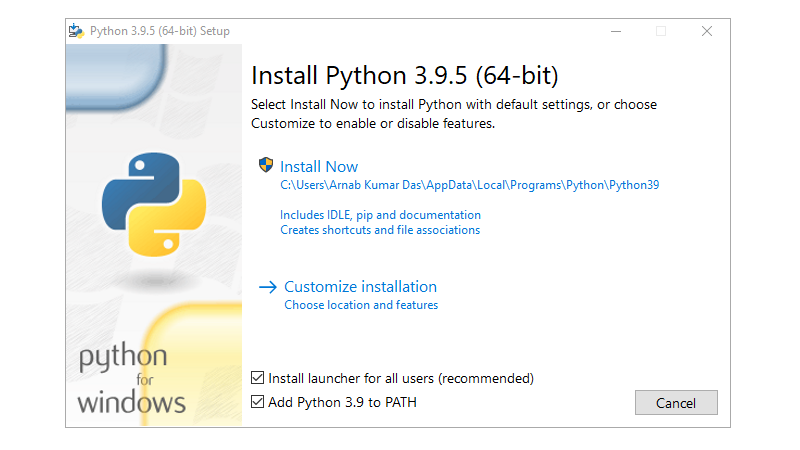
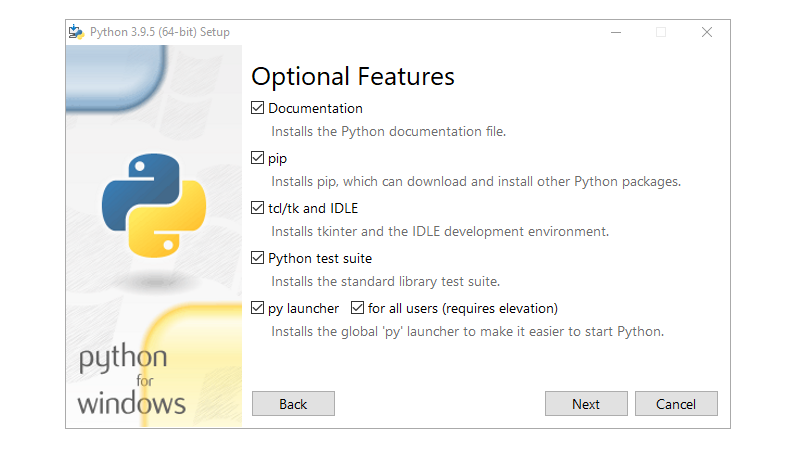
Installing Python
- Open the installer
- Use the default installation folder
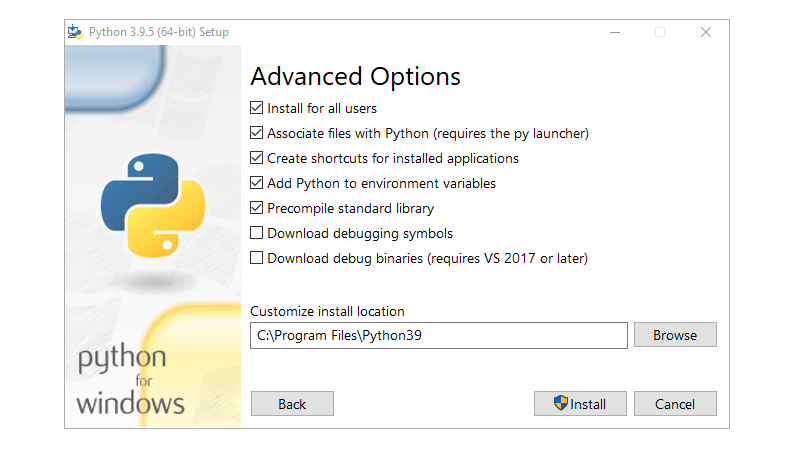
- Use Customize installation option
- Add Python 3.9 to PATH/environment variable
- Install launcher for all users
- Precompile standard library
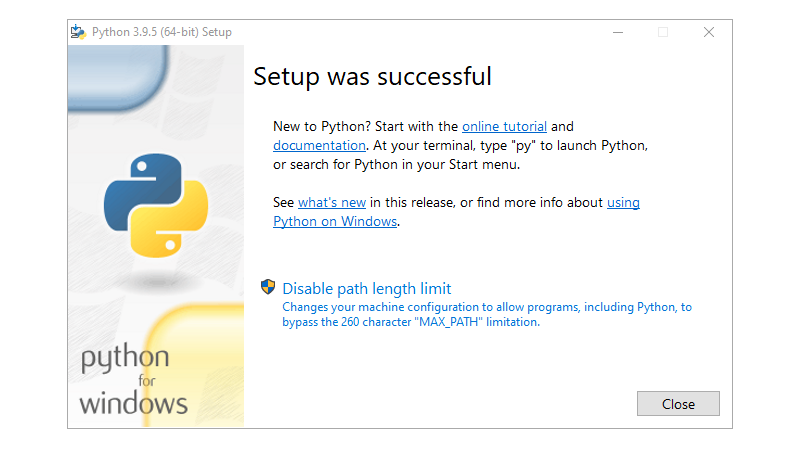
- Disable path length limit

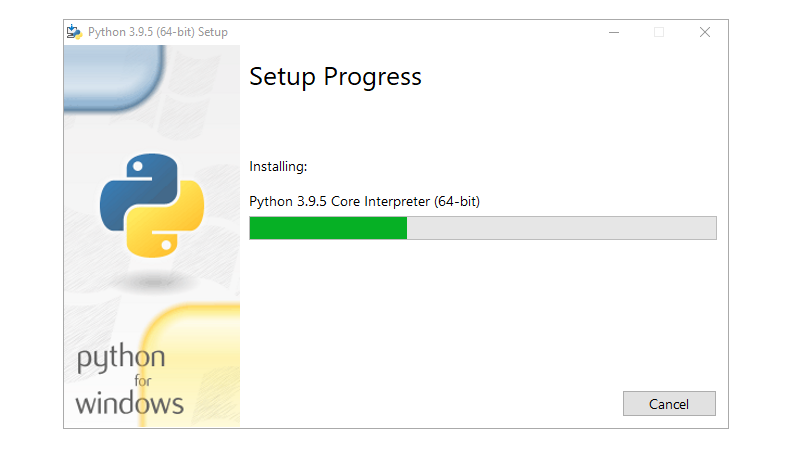
Step 1 : Installing Python Step 2 : Installing Python Step 3 : Installing Python Step 4 : Installing Python Step 5 : Installing Python Step 6 : Installing Python
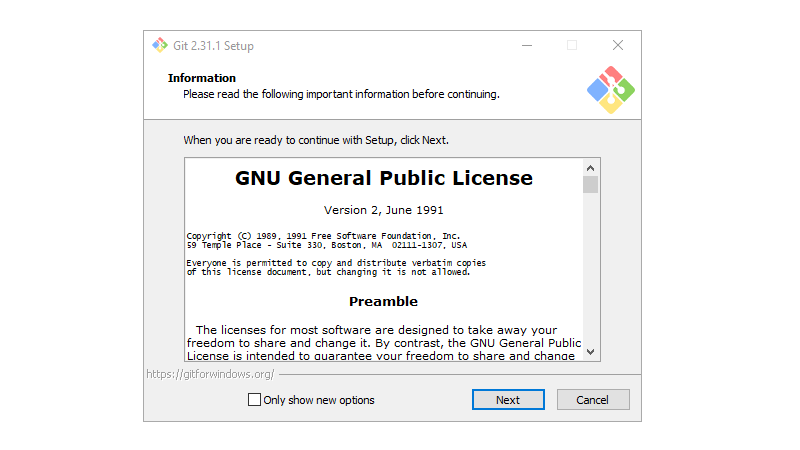
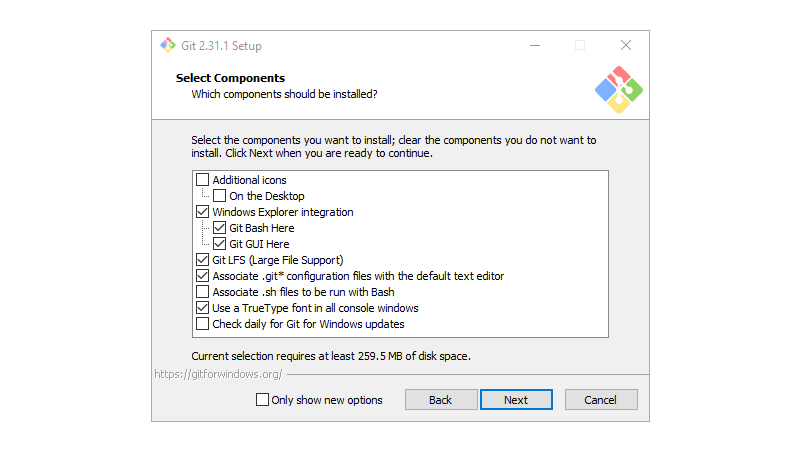
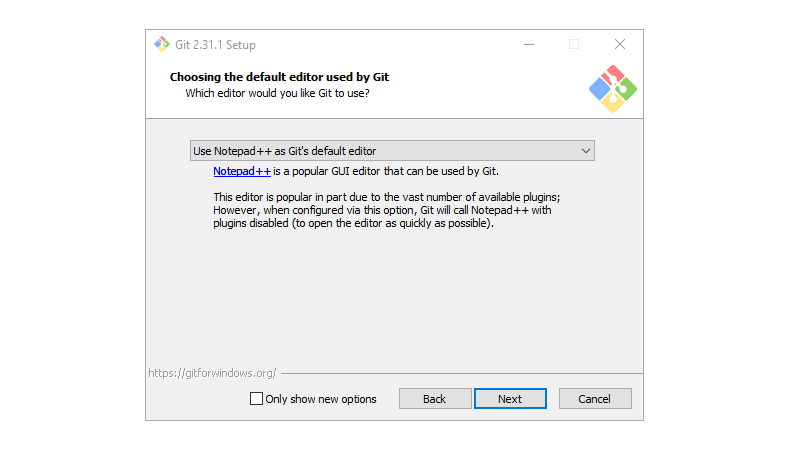
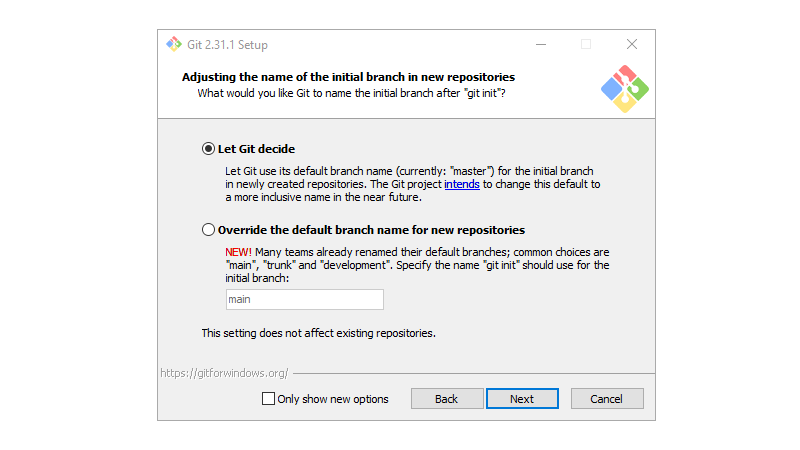
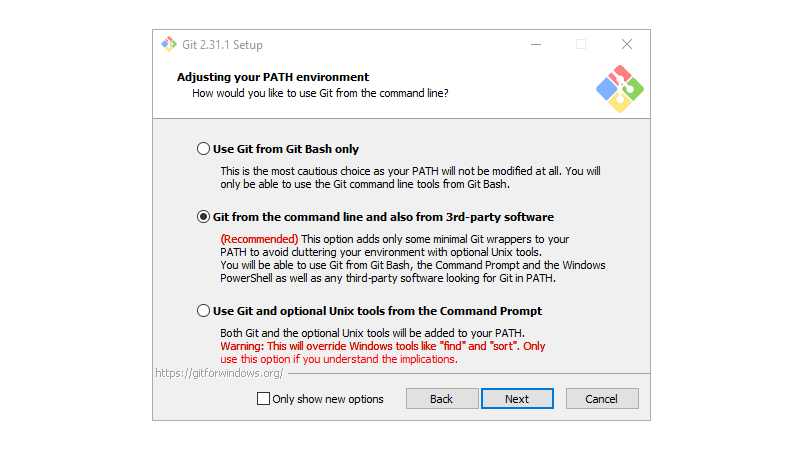
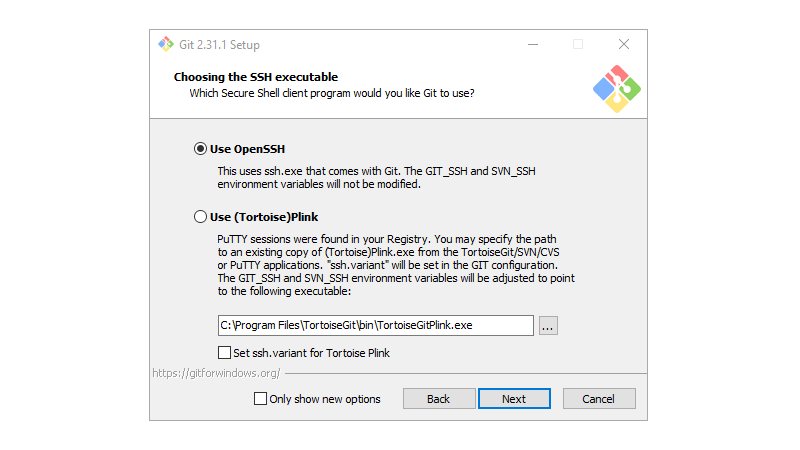
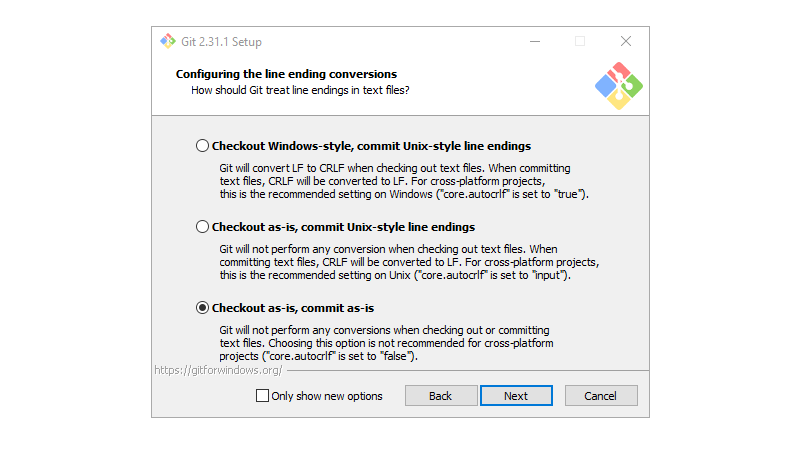
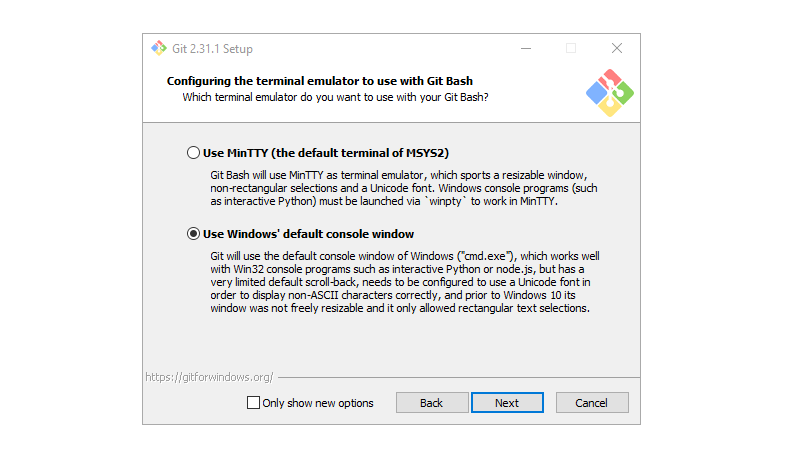
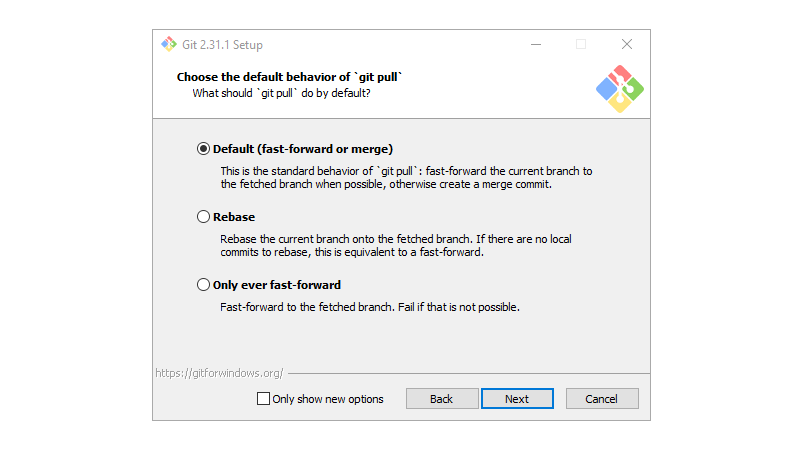
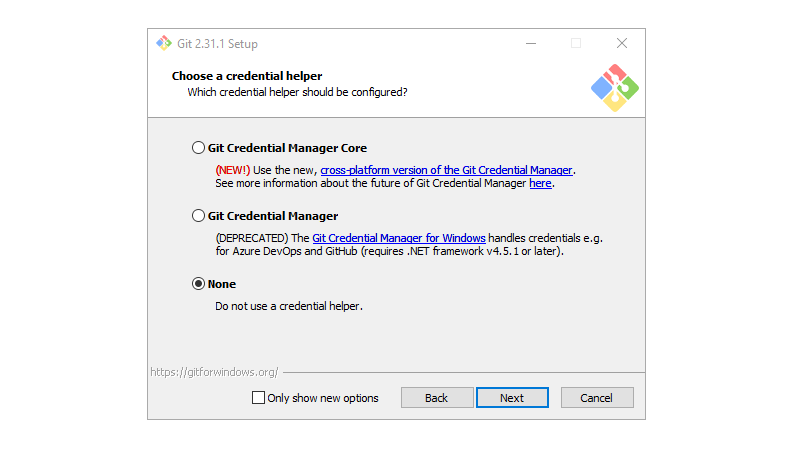
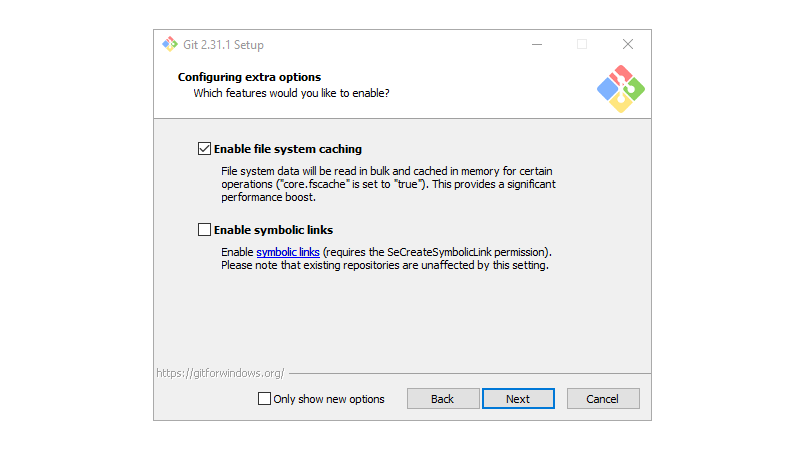
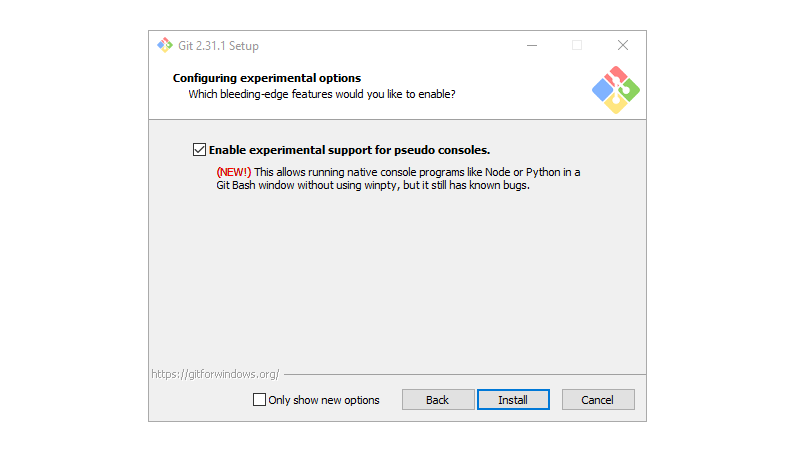
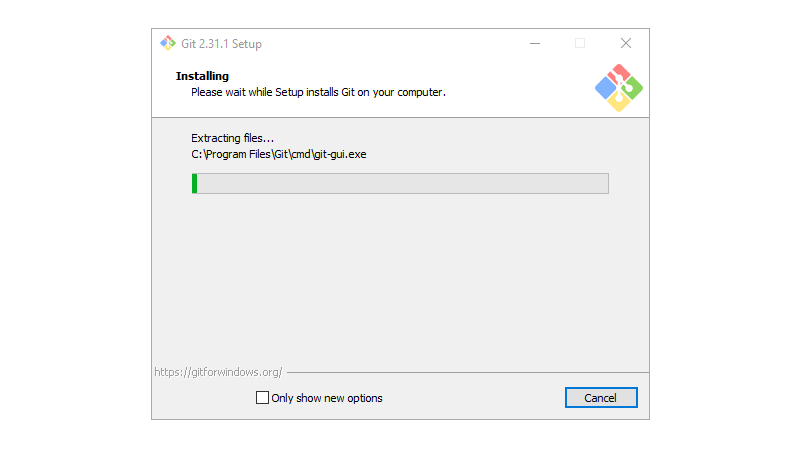
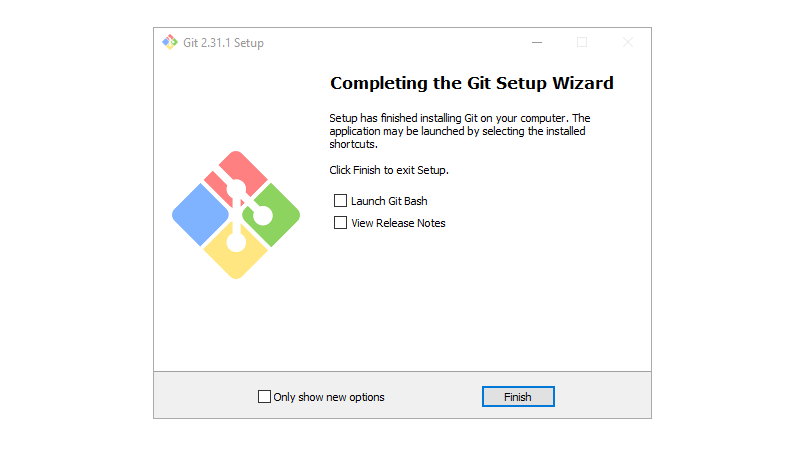
Installing Git
- Open the installer
- Use the default installation folder
- Select allow Git to be used from third-party tools
- Select checkout as-is, commit as-is
- Select use Windows’ default console window
- Select Enable experimental support for pseudo consoles

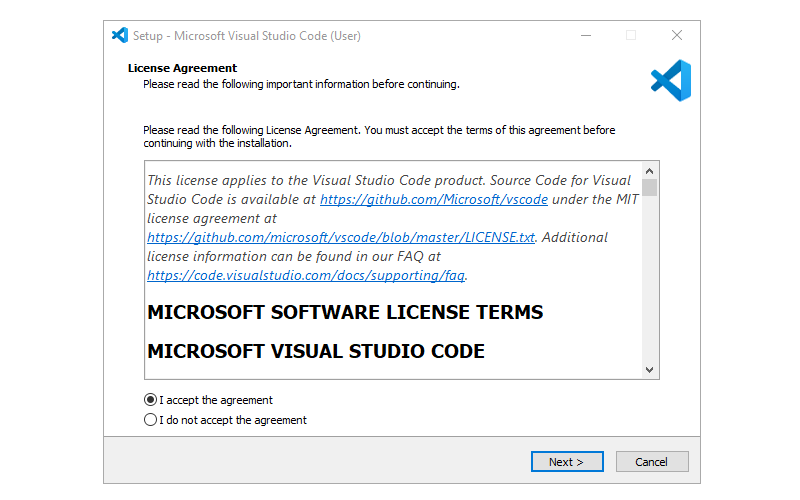
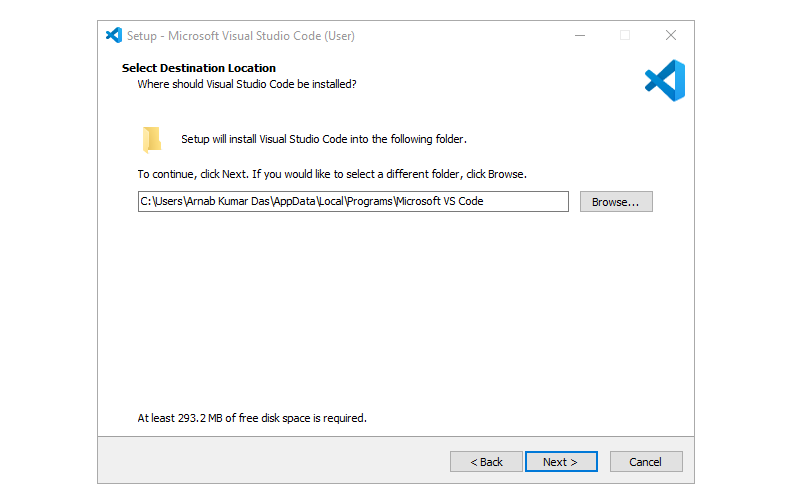
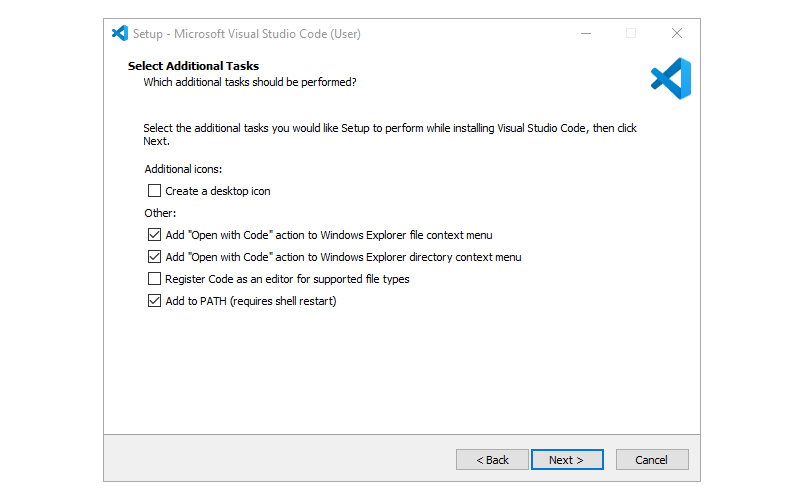
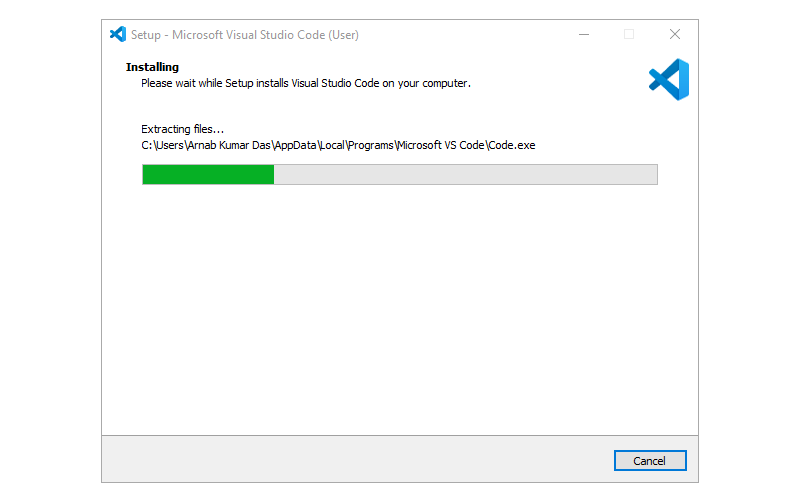
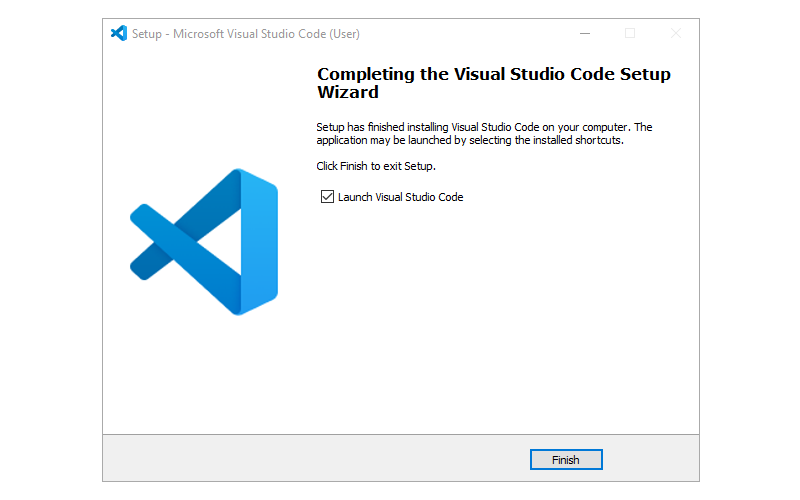
Installing Visual Studio Code
- Open the installer
- Use the default installation folder
- Add to
PATH

Step 1 : Installing Visual Studio Code Step 2 : Installing Visual Studio Code Step 3 : Installing Visual Studio Code Step 4 : Installing Visual Studio Code Step 5 : Installing Visual Studio Code
Raspberry Pi Pico SDK
The Raspberry Pi Pico SDK (Software Development Kit), provides the headers, libraries, and build system necessary to write programs for the RP2040 based devices such as the Raspberry Pi Pico in C, C++, or assembly language.
The SDK provides higher-level libraries for dealing with timers, USB, synchronization, and multi-core programming, along with additional high-level functionality built using PIO. The SDK also has examples to help get started with basic functionality and hardware interfacing.
The Build System
The Raspberry Pi Pico SDK uses CMake to manage the build. CMake is widely supported by IDEs (Integrated Development Environments) and allows a simple specification of the build (via CMakeLists.txt files), from which CMake can generate a build system ( make ) customized for the platform. CMakeList files used in Raspberry Pi Pico SDK and projects define how applications are configured and built.
The SDK builds an executable that is bare metal and runs independently on RP2040.
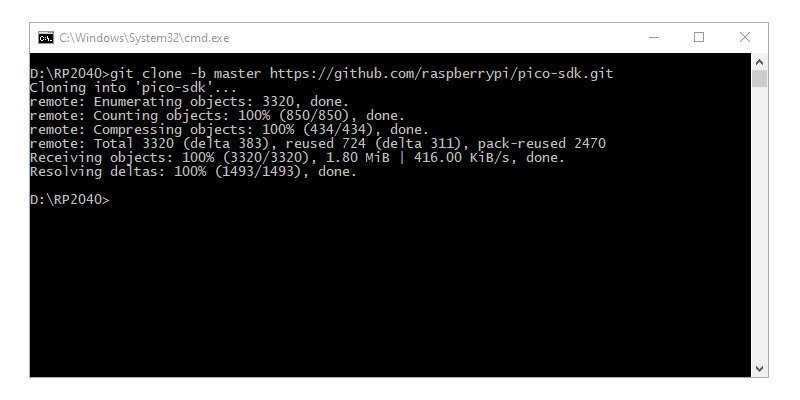
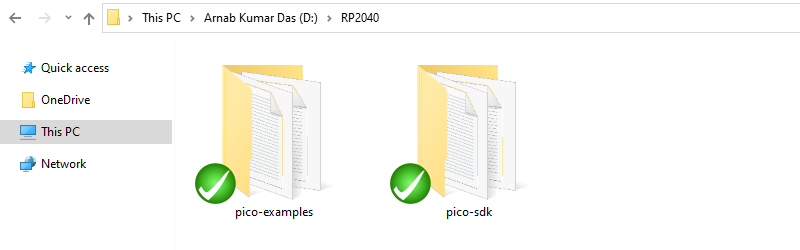
Download the Raspberry Pi Pico SDK and Examples
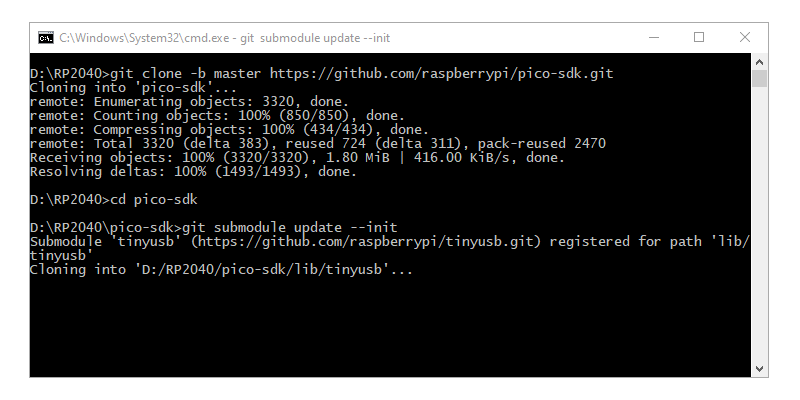
Create a new folder and open Command Prompt (cmd.exe) at that location. Run the below commands in a sequence.
D:\RP2040> git clone -b master https://github.com/raspberrypi/pico-sdk.git
D:\RP2040> cd pico-sdk
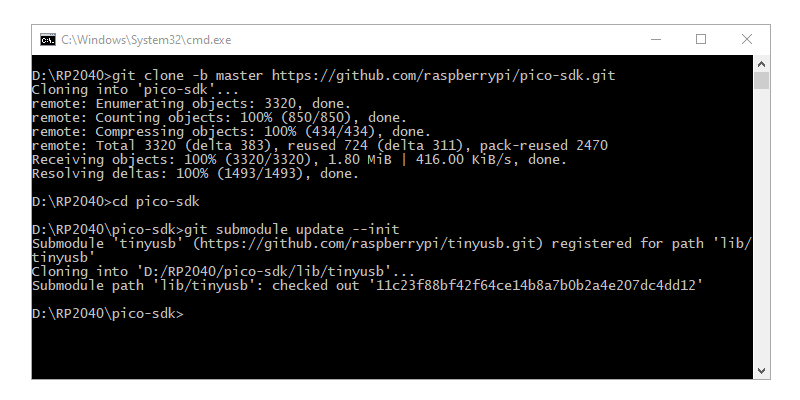
D:\RP2040\pico-sdk> git submodule update --init
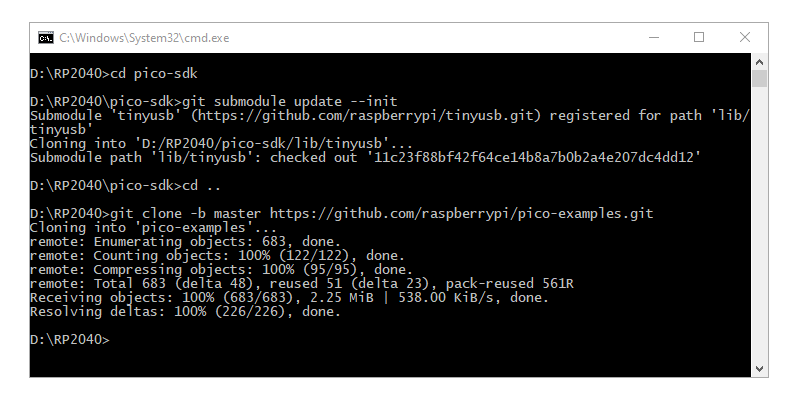
D:\RP2040\pico-sdk> cd ..
D:\RP2040> git clone -b master https://github.com/raspberrypi/pico-examples.gitStep 1 : Download the Raspberry Pi Pico SDK and Examples Step 2 : Download the Raspberry Pi Pico SDK and Examples Step 3 : Download the Raspberry Pi Pico SDK and Examples Step 4 : Download the Raspberry Pi Pico SDK and Examples
Building the Raspberry Pi Pico SDK and Examples
- Open the Visual Studio 2019 Developer Command Prompt
- Navigate to the SDK download location
- Add the environment variable with the path of the
pico-sdk - Close the Command Prompt
 ** Visual Studio 2019 Developer Command Prompt v16.9.6
 ** Copyright (c) 2021 Microsoft Corporation

 C:\Program Files (x86)\Microsoft Visual Studio\2019\BuildTools>cd /D D:RP2040
 D:\RP2040>setx PICO_SDK_PATH "D:\RP2040\pico-sdk"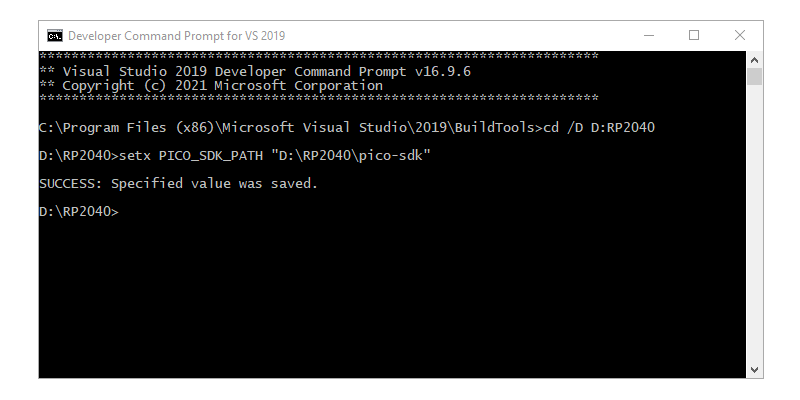
- Open a new Visual Studio 2019 Developer Command Prompt
- Navigate to the SDK download location
- Navigate to
pico-examples - Create a
buildfolder - Navigate to
build
 ** Visual Studio 2019 Developer Command Prompt v16.9.6
 ** Copyright (c) 2021 Microsoft Corporation

 C:\Program Files (x86)\Microsoft Visual Studio\2019\BuildTools>cd /D D:RP2040
 D:\RP2040>cd pico-examples
 D:\RP2040\pico-examples>mkdir build
 D:\RP2040\pico-examples>cd build
 D:\RP2040\pico-examples\build>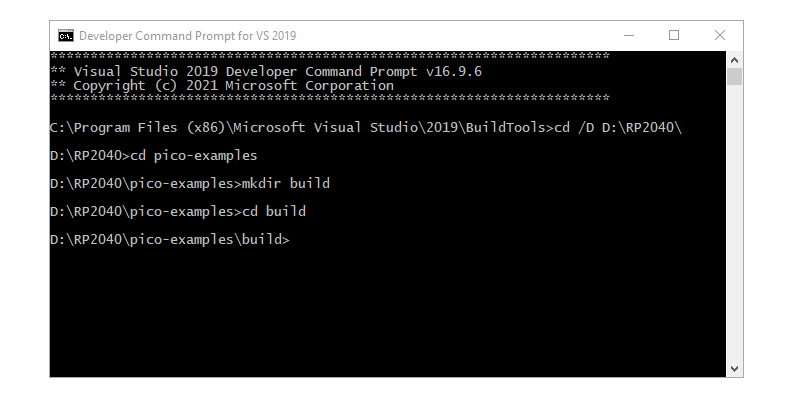
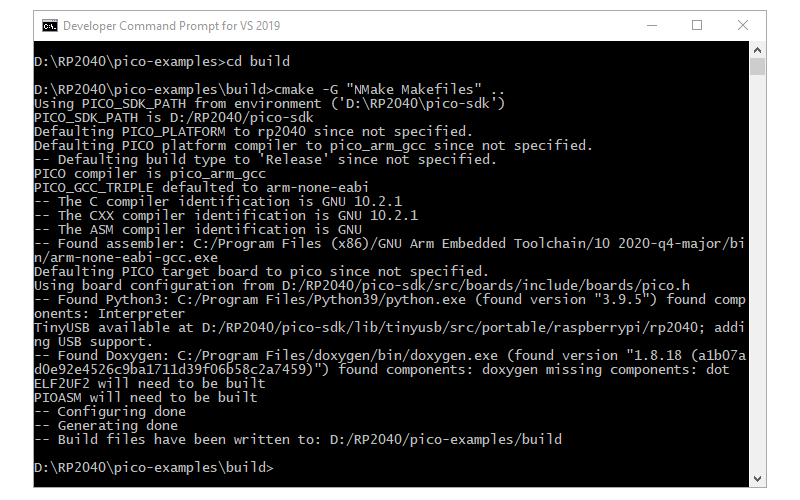
- Run
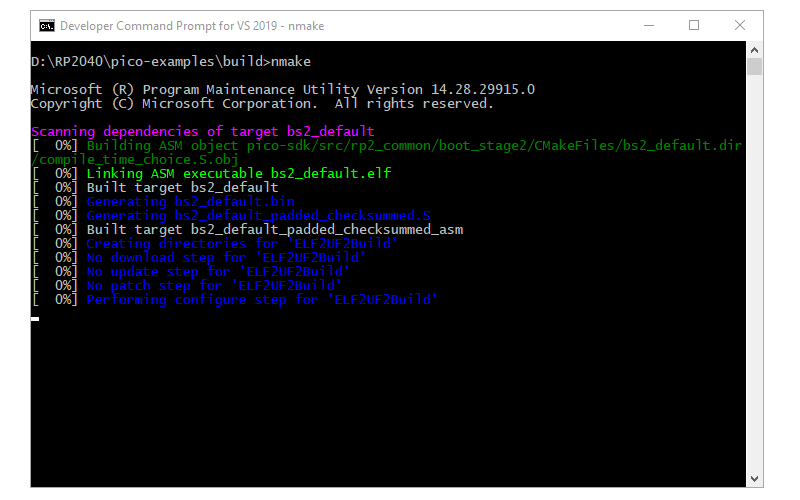
cmake -G "NMake Makefiles" .. - Run
nmake - This will produce ELF, bin, and uf2 file for each example project
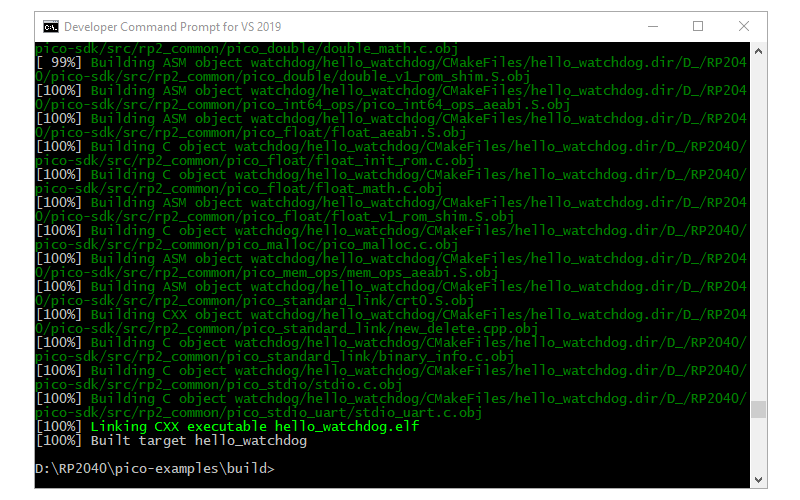
D:\RP2040\pico-examples\build>cmake -G "NMake Makefiles" ..
D:\RP2040\pico-examples\build>nmake
Running cmake for Raspberry Pi Pico SDK and Examples Running nmake for Raspberry Pi Pico SDK and Examples Successful Build Raspberry Pi Pico SDK and Examples
Setting Up Visual Studio Code IDE
- Open a new Visual Studio 2019 Developer Command Prompt
- Run the below command to open Visual Studio Code
D:\RP2040\pico-examples\build>code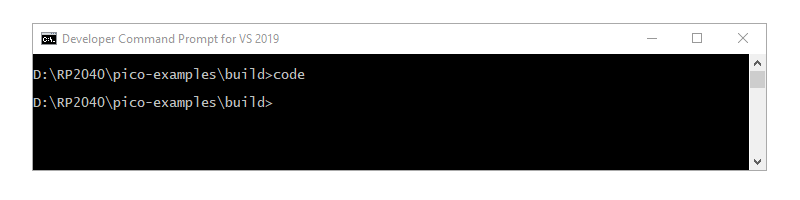
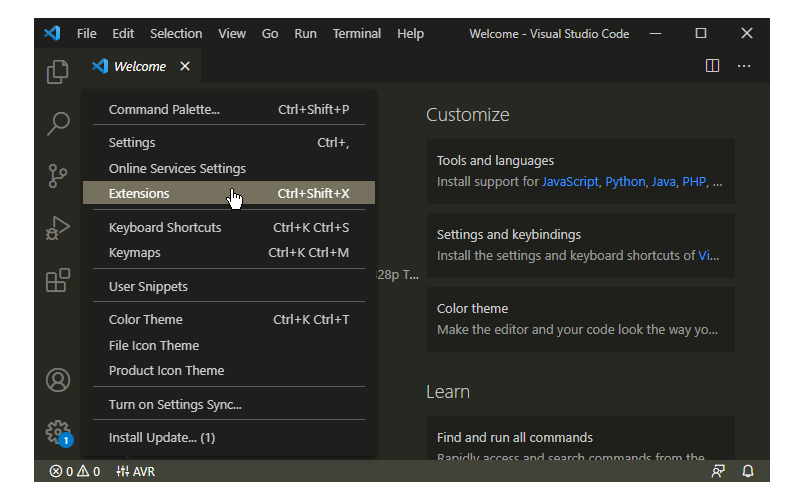
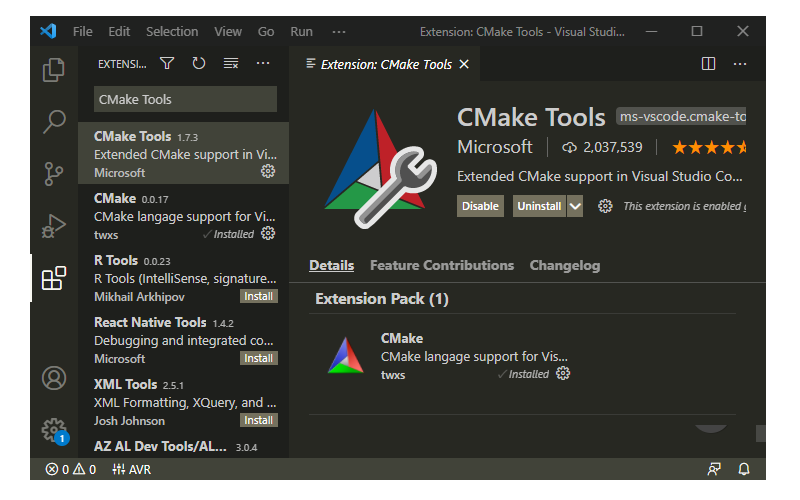
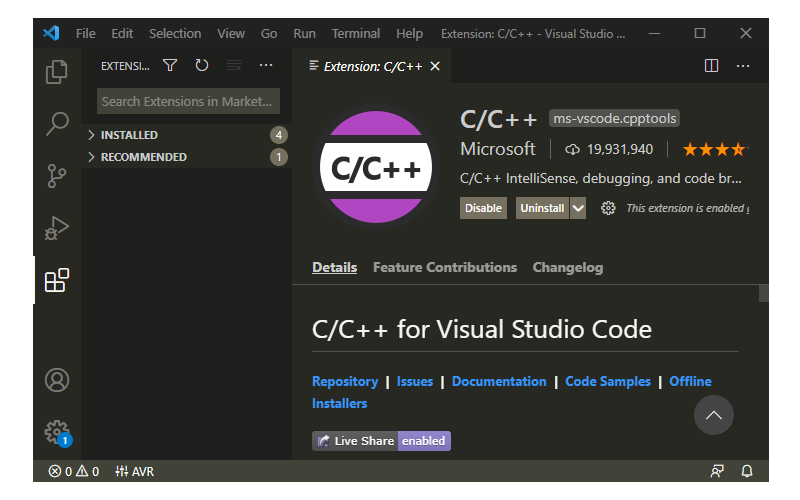
- Open Extensions
Ctrl+Shift+X - Install
CMake ToolsExtension by Microsoft - Install
C/C++Extension by Microsoft
Install Extension in Visual Studio Code Install CMake Tools Extension Install C/C++ Extension
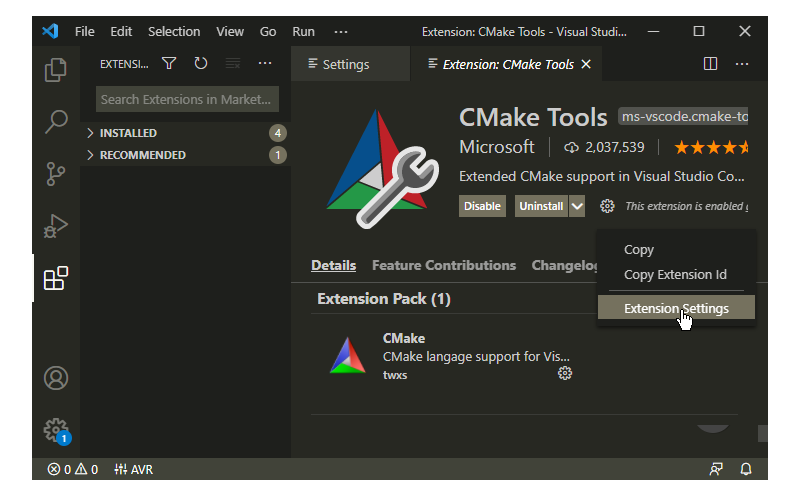
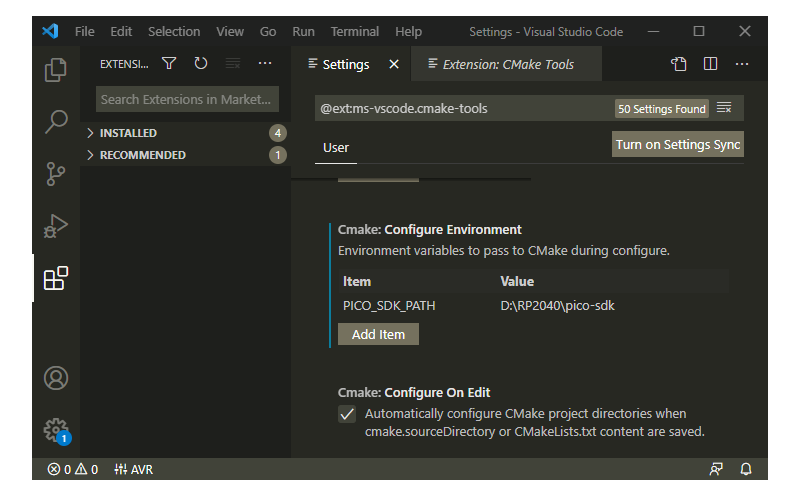
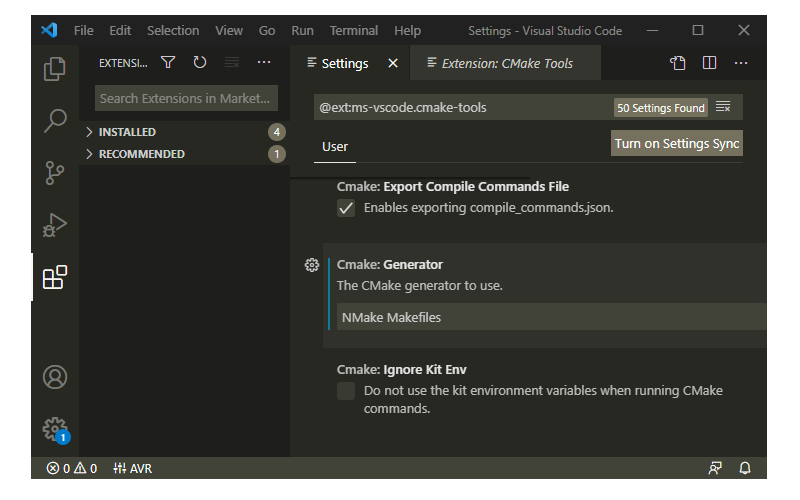
- Open CMake Tools Extension Settings
- Scroll Down
- Add Cmake: Configure Environment Item as
PICO_SDK_PATH - Add Cmake: Configure Environment Value as
D:\RP2040\pico-sdk - Scroll Down
- Add Cmake: Generator as
NMake Makefiles
CMake Tools Extension Settings in Visual Studio Code Add CMake Configure Environment Path Add CMake Generator Name
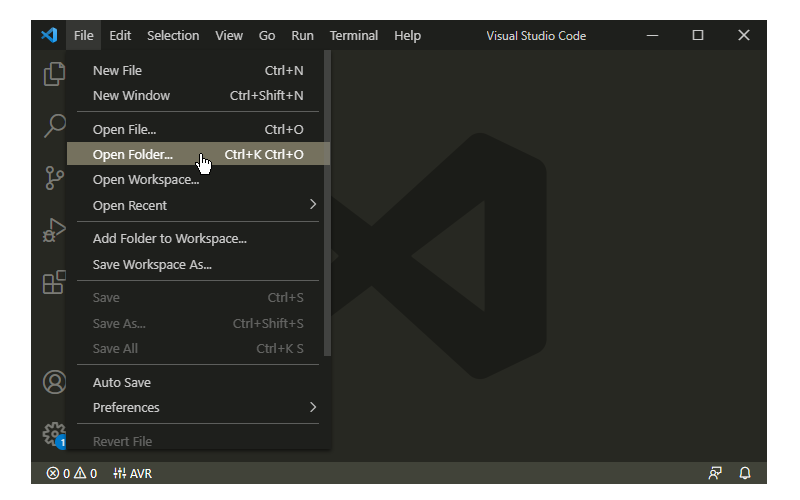
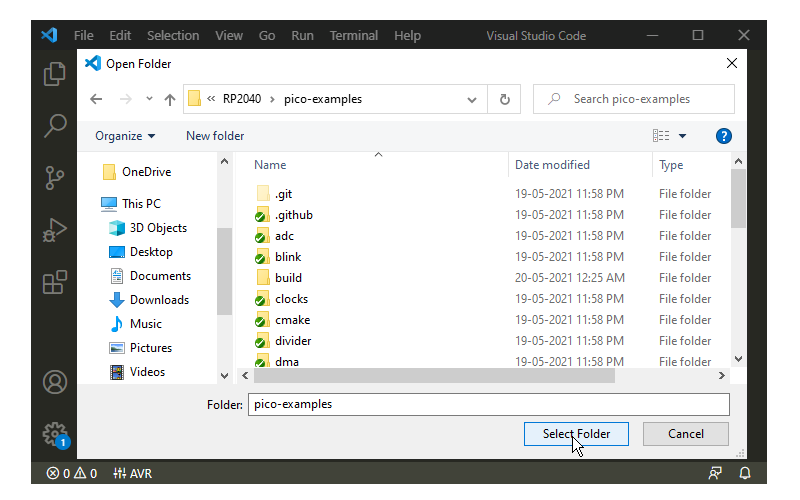
- Add Folder
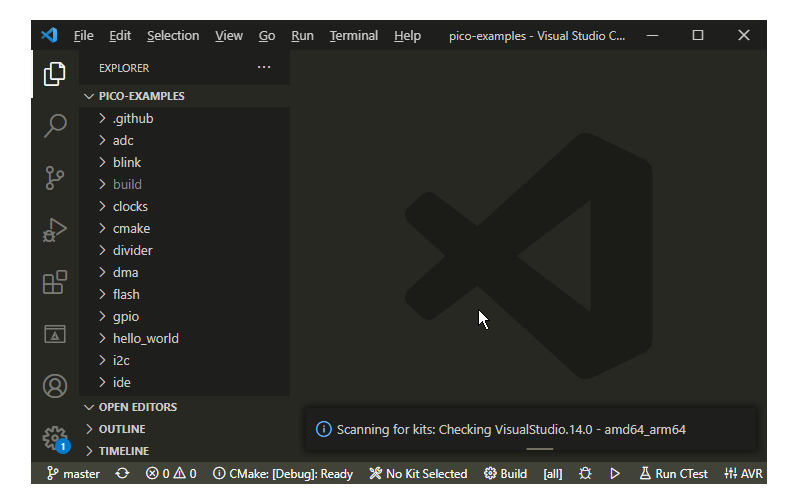
pico-examplesto Visual Studio Code - Visual Studio Code will scan for Kits
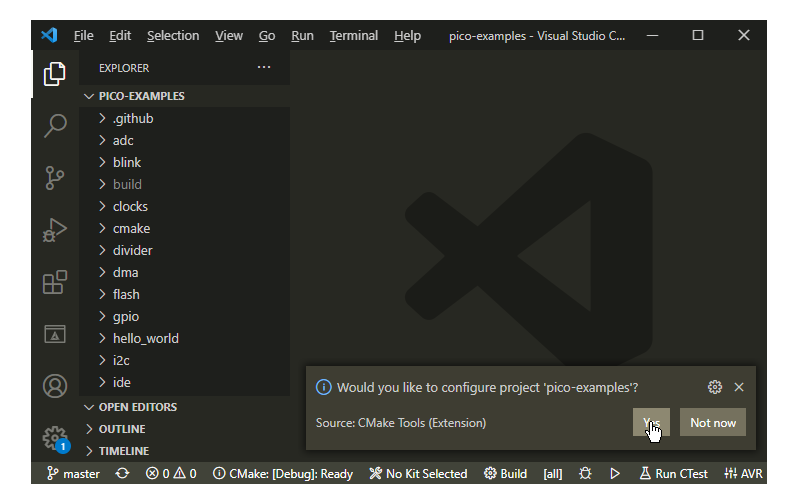
- Select ‘Yes’ when asked: Would you like to configure project
pico-examples? - Select ‘Yes’ if you like to configure the project upon opening
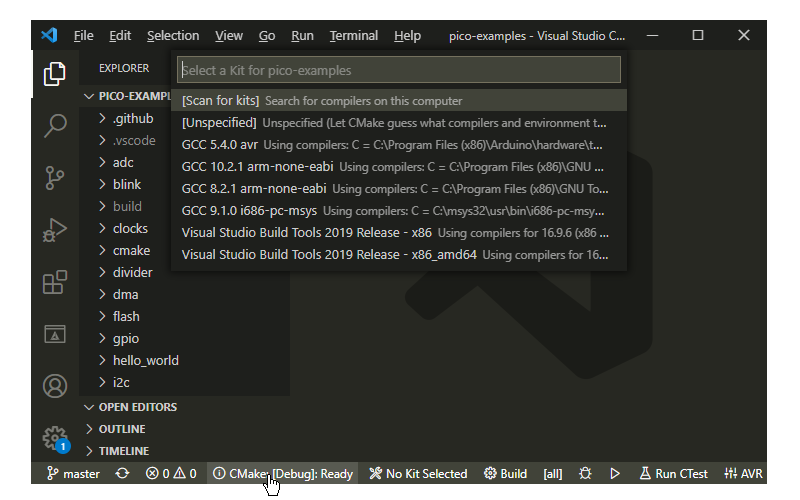
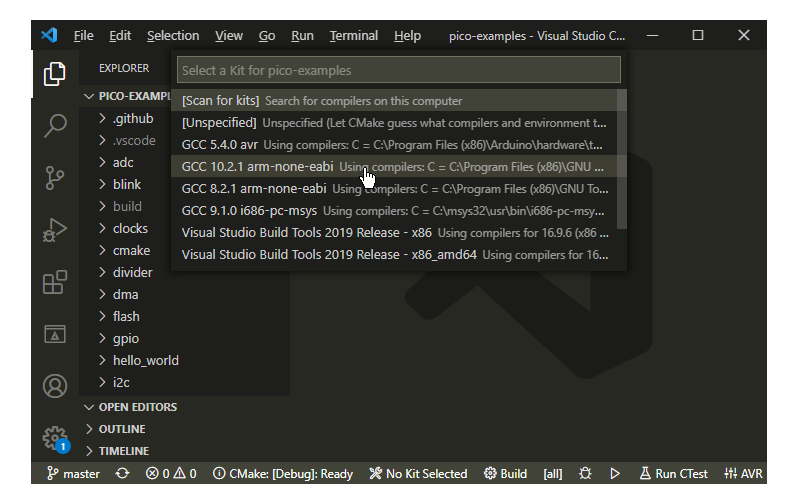
- Click CMake in the bottom bar to select the Kit for pico-examples
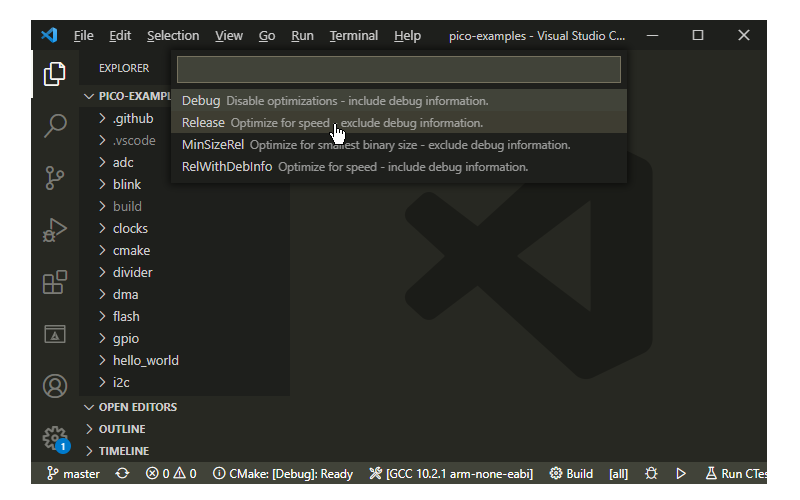
- Select Debug / Release based on your preference
- Visual Studio Code will save all file and configure the project
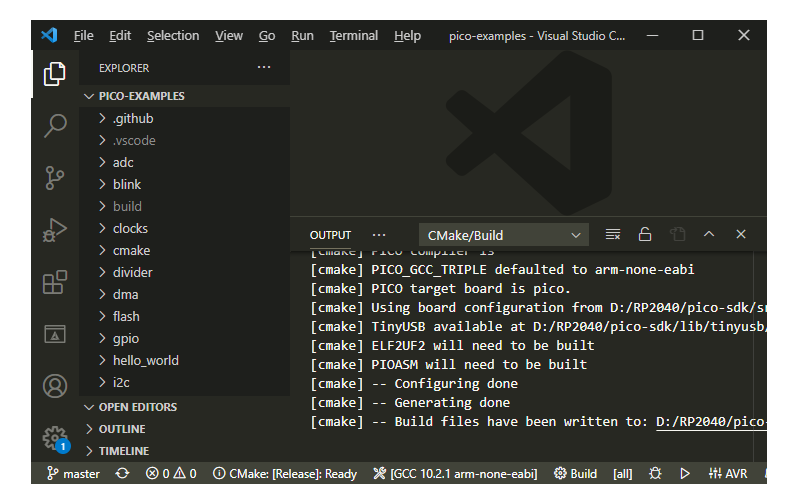
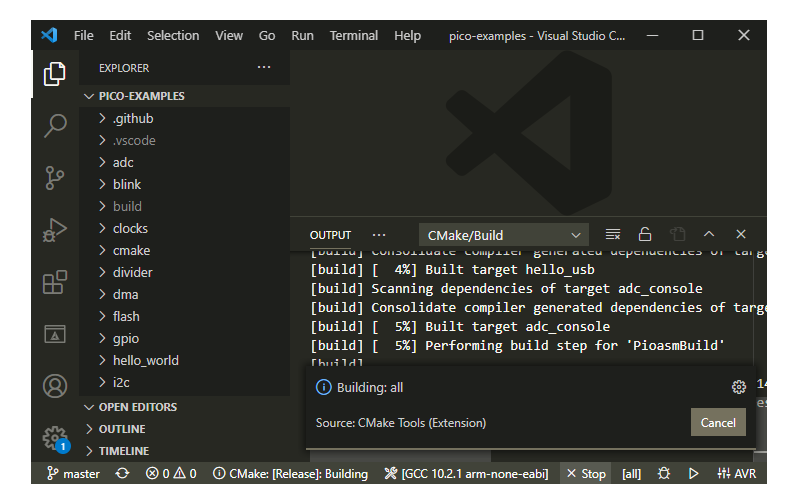
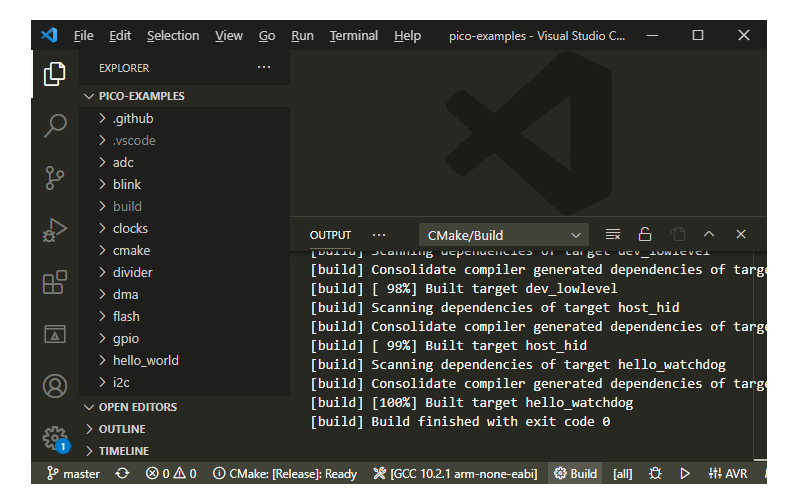
- Click on Build to build all examples
- If no error Build will finish with exit code 0
Open pico-examples Folder in Visual Studio Code Open pico-examples Folder in Visual Studio Code Folder Loading pico-examples in Visual Studio Code Configure Project Automatic Project Configuration in Visual Studio Code Click on CMake in Bottom Bar to Select Kit for pico-examples Select GCC 10.2.1 arm-non-eabi Select Release / Debug Build Type CMake Configuration Starts CMake Configuration Finished Click Build Build Starts Build Succeed


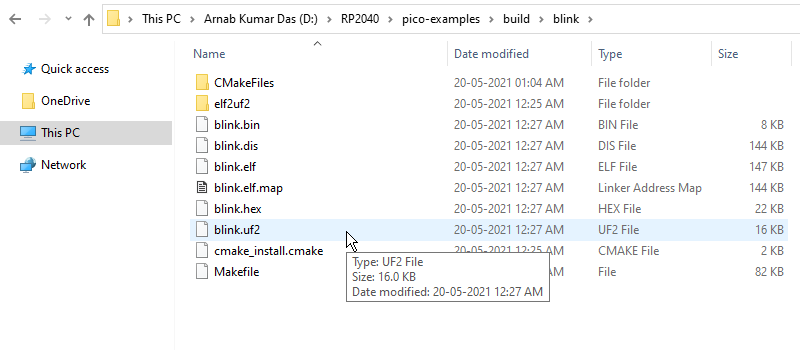
- Navigate to the folder
pico-examples\build\blink - Successful Build will generate the above artifacts
Flashing the Raspberry Pi Pico
- Push and hold the BOOTSEL button (white colour near USB port)
- Plug the Pico into the USB port of the Windows 10 Computer
- Raspberry Pi Pico will mount as a Mass Storage Device called RPI-RP2
- Drag and Drop or Copy and Paste the
blink.uf2UF2 Binary into the RPI-RP2 Drive - Pico will Reboot automatically, and the on-board Green LED should start Blinking
27 Comments
Islam Sameh · April 3, 2022 at 9:32 pm
Perfect guide. I hope in future to make guide to integrate tinyusb with MicroPaython or CircuitPython.